honeywell t4 pro installation manual

Honeywell T4 Pro Installation Manual: A Comprehensive Plan

Embark on a seamless setup experience! This detailed manual unlocks the full potential of your Honeywell T4 Pro, ensuring efficient and comfortable climate control.

Welcome to enhanced home comfort! The Honeywell T4 Pro is a smart thermostat designed to provide precise temperature control, energy savings, and convenient remote access. This advanced system learns your heating and cooling preferences, automatically adjusting settings to optimize comfort and reduce energy consumption.

This thermostat isn’t just about temperature; it’s about a new world of possibilities for managing your home’s climate. With features like geofencing and smart recovery, the T4 Pro adapts to your lifestyle, ensuring a comfortable environment when you’re home and saving energy when you’re away. This manual will guide you through every step, from installation to advanced configuration, unlocking the full potential of your new Honeywell T4 Pro.

Package Contents & Verification

Ensure a smooth installation process! Upon opening the Honeywell T4 Pro package, carefully verify all components are present. You should find the T4 Pro thermostat unit itself, a mounting backplate, screws and wall anchors for secure installation, and wire labels for easy identification during wiring.

Additionally, the package includes this comprehensive installation manual and potentially quick start guides. Inspect each item for any signs of damage during shipping. If anything is missing or appears damaged, immediately contact Honeywell Support for assistance. Accurate verification now prevents delays and ensures a successful setup of your new smart thermostat, setting the stage for a comfortable and efficient home climate.

Safety Precautions & Warnings

Prioritize your safety during installation! WARNING: Electrical shock hazard! Always disconnect power to your HVAC system at the breaker box before beginning any wiring. Failure to do so could result in serious injury or death. This installation should only be performed by individuals comfortable working with low-voltage electrical systems.

Exercise caution when handling wiring, and ensure all connections are secure. Do not install the thermostat in a location exposed to direct sunlight, extreme temperatures, or moisture. Keep small parts away from children. If you are unsure about any aspect of the installation, consult a qualified HVAC technician. Ignoring these precautions could damage the thermostat or your HVAC system.

Tools Required for Installation

Gather these essential tools for a smooth installation process! You will need a Phillips head screwdriver – both standard and stubby – for removing and securing the thermostat and backplate. A small flathead screwdriver may be useful for certain terminal connections. A wire stripper/cutter is crucial for preparing wires for connection.

A level ensures the thermostat is mounted straight for optimal display readability. A pencil is handy for marking screw holes. Consider a voltage tester to confirm power is off before wiring. Finally, a smartphone or tablet with Wi-Fi access is required for setup and app configuration. Having these tools readily available will streamline the installation.

System Compatibility Check

Verify your HVAC system’s compatibility before proceeding! The Honeywell T4 Pro supports most 24V heating and cooling systems, including furnaces, air conditioners, heat pumps, and boilers. However, it’s crucial to confirm compatibility with millivolt systems or proprietary communication protocols.

HVAC System Requirements are standard 24V wiring. Wiring Compatibility is key; ensure your existing wiring matches the T4 Pro’s terminal designations (R, C, W, Y, G). Incompatible systems may require a C-wire adapter (sold separately); Carefully review your existing thermostat’s wiring and consult a professional if unsure about compatibility to avoid damage.

HVAC System Requirements

Essential prerequisites for seamless integration! The Honeywell T4 Pro thermostat primarily requires a standard 24VAC (24 Volts Alternating Current) heating and cooling system. It’s designed to work with conventional forced-air systems, heat pumps, and most gas, oil, and electric furnaces.

Voltage is critical: Do not attempt installation with line voltage (120V/240V) systems, as this will cause severe damage. Systems utilizing proprietary communication protocols, like some high-efficiency systems, may require additional adapters. Confirm your system operates on 24VAC before proceeding; a multimeter can verify this.

Wiring Compatibility

Ensuring a secure and functional connection! The Honeywell T4 Pro supports standard wiring configurations, including C-wire (common wire) for consistent power. However, it’s adaptable to systems without a C-wire using a C-wire adapter kit (sold separately).

Compatibility check is key: Verify your existing wiring matches the supported terminals – R, C, W, Y, and G. Systems with more complex wiring, such as those with an auxiliary heat or emergency heat function, may require careful mapping to the T4 Pro’s terminals. Incorrect wiring can lead to system malfunction; consult a qualified HVAC technician if unsure.

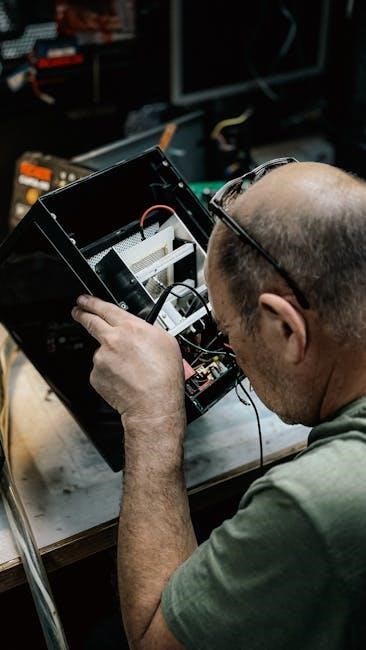
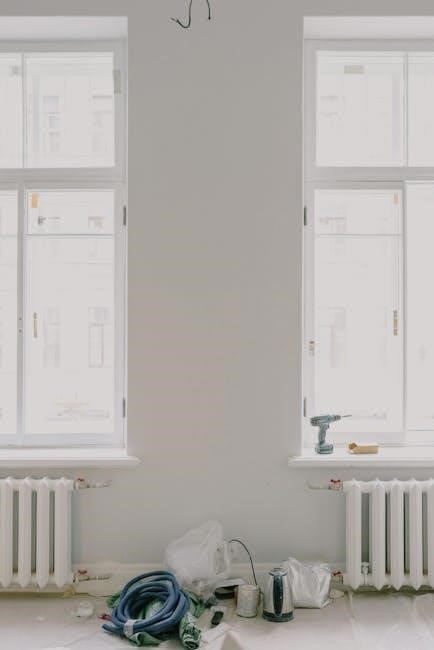
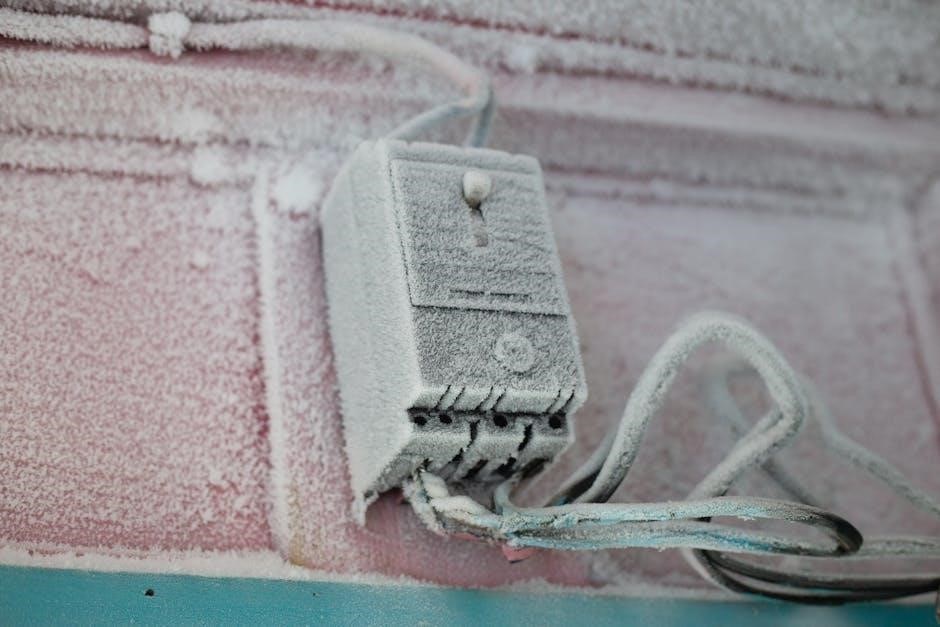
Mounting the T4 Pro Thermostat

Precise placement for optimal performance! Begin by carefully removing your old thermostat, noting the wire connections for later reference; Safety first: Turn off power to your HVAC system at the breaker before disconnecting any wires.

Secure the backplate: Using the provided screws, mount the T4 Pro backplate to the wall, ensuring it’s level. Utilize the included wall anchors if necessary for a stable installation. The backplate serves as the foundation for the thermostat, so a secure mount is crucial. Double-check alignment before proceeding to the wiring stage.

Removing the Old Thermostat

Preparation is key for a smooth transition! Before installing your Honeywell T4 Pro, carefully disconnect your existing thermostat. Crucially, switch off the power to your HVAC system at the circuit breaker to prevent electrical shock.

Gently remove the thermostat cover, exposing the wiring terminals. Important: Take a clear photograph of the existing wiring configuration – this will be an invaluable reference during the T4 Pro installation. Label each wire with the corresponding terminal designation (R, C, W, Y, G, etc.) for easy identification. Carefully disconnect the wires, ensuring they don’t slip back into the wall;

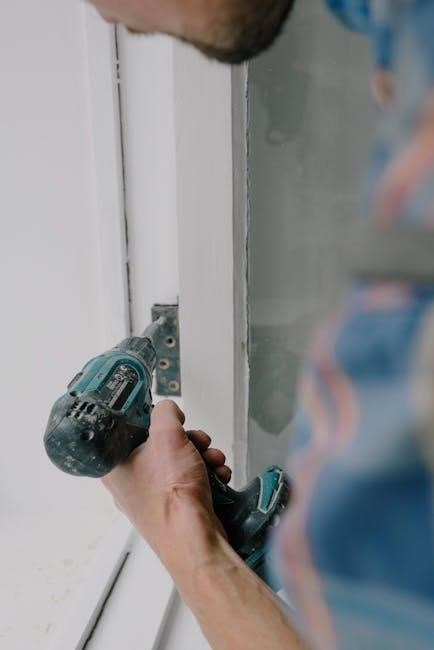
Backplate Installation

Secure the foundation for your smart thermostat! Once the old thermostat is removed, mount the Honeywell T4 Pro backplate to the wall using the provided screws. Ensure the backplate is level for optimal aesthetic appeal and accurate temperature sensing.

Use a drill if necessary, utilizing the wall anchors included in the package for secure mounting on drywall. Important: Verify the backplate is firmly attached and doesn’t wobble. Route the thermostat wires through the opening in the backplate, preparing them for connection to the T4 Pro. This step establishes a stable base for the subsequent wiring process.

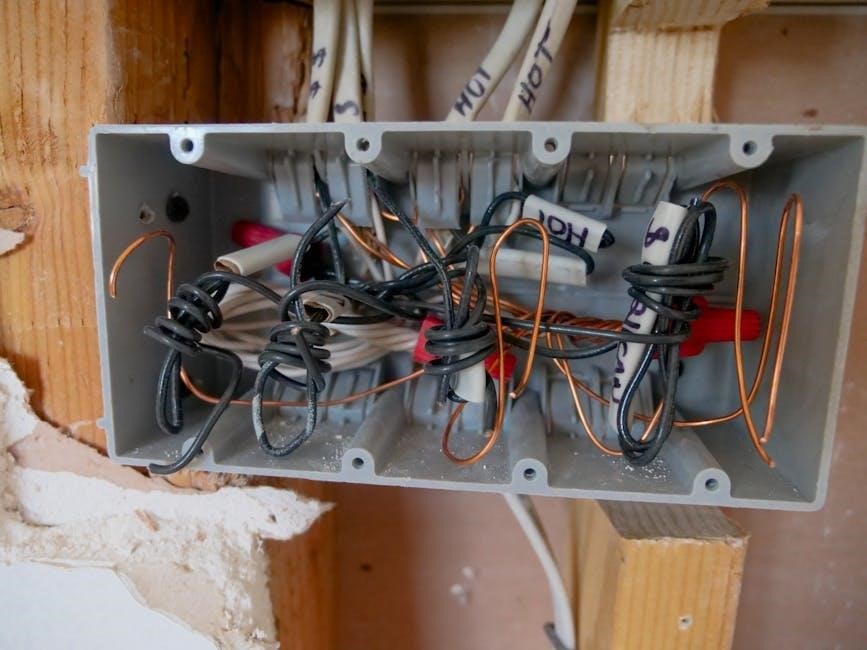
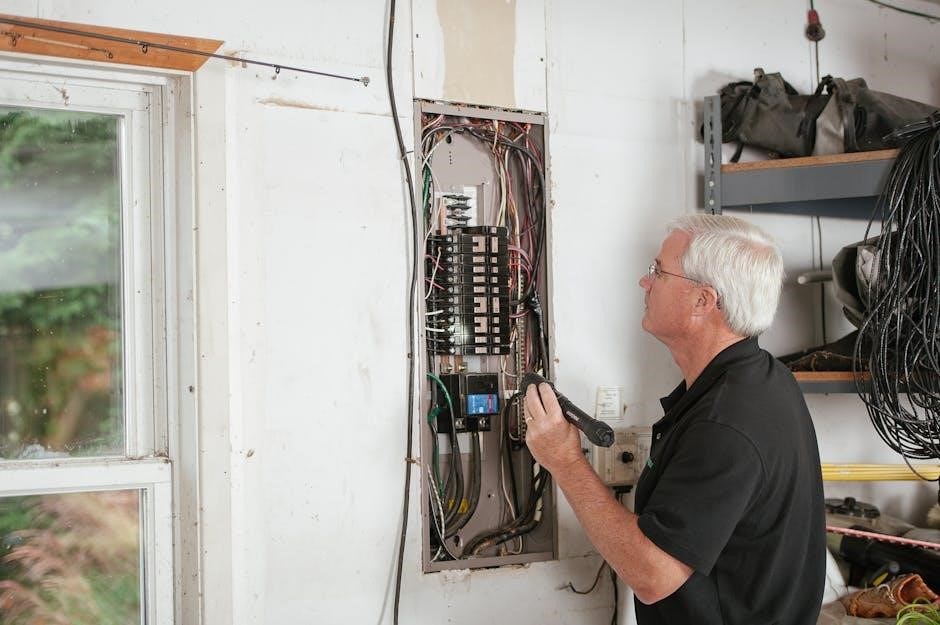
Wiring the Honeywell T4 Pro

Connect with confidence! Carefully connect the wires from your HVAC system to the corresponding terminals on the Honeywell T4 Pro backplate. Double-check each connection to ensure a secure fit, preventing loose wires and potential system malfunctions.

Refer to the detailed wiring diagrams provided in this manual, matching your specific HVAC system configuration. Caution: Always turn off power to your HVAC system at the breaker before handling any wiring; Incorrect wiring can damage your thermostat or HVAC equipment. Take your time and verify each connection before proceeding to the next step.

Identifying Terminal Connections (R, C, W, Y, G)

Understanding your connections is key! The Honeywell T4 Pro utilizes standard color-coded terminals for easy wiring. R typically signifies 24VAC power, while C is the common (neutral) wire – essential for consistent power. W controls heating, Y manages cooling, and G activates the fan.

Carefully label each wire before disconnecting it from your old thermostat. If you lack a ‘C’ wire, a ‘C’ wire adapter may be necessary. Important: Incorrectly identifying or connecting these wires can lead to system malfunction or damage. Consult a qualified HVAC technician if unsure about any connection.

Wiring Diagrams for Common HVAC Systems

Simplify installation with visual guidance! The Honeywell T4 Pro supports various HVAC configurations. Common systems include conventional (single-stage heating/cooling), heat pump, and multi-stage setups. Detailed wiring diagrams are crucial for correct installation;

Refer to the included diagrams – or the Honeywell Home app – for your specific system type. Pay close attention to wire placement on the T4 Pro’s backplate. Caution: Always de-energize your HVAC system at the breaker before wiring. Incorrect wiring can cause damage or safety hazards. If your system isn’t covered, consult a professional HVAC installer.

Powering On & Initial Setup

Bring your T4 Pro to life! After wiring is complete and verified, restore power to your HVAC system at the breaker. The Honeywell T4 Pro should power on automatically, displaying the welcome screen.

Follow the on-screen prompts to begin the initial setup. This includes selecting your language, setting the date and time, and configuring basic system parameters like heating and cooling types. Ensure accurate information entry for optimal performance. The thermostat will guide you through a brief system check to confirm proper wiring and operation.

Connecting to Wi-Fi

Unlock remote control and smart features! From the thermostat’s main screen, navigate to the settings menu and select “Wi-Fi.” The T4 Pro will scan for available networks. Choose your home network from the list and enter your password when prompted.

A successful connection will be indicated by a Wi-Fi symbol on the display. If the connection fails, double-check your password and ensure your router is functioning correctly. Once connected, the thermostat will automatically synchronize with the Honeywell Home cloud, enabling remote access and advanced features through the mobile app.

Honeywell Home App Configuration

Enhance control with the Honeywell Home app! Download the Honeywell Home app from your device’s app store (iOS or Android). Create an account or log in if you already have one. Within the app, select “Add a Device” and follow the on-screen instructions.

The app will guide you through pairing your T4 Pro thermostat, typically by scanning a QR code located on the thermostat itself or entering its serial number. Once paired, you can remotely adjust the temperature, create schedules, and access advanced features like geofencing and smart recovery, all from your smartphone or tablet.

Programming Basic Schedules

Customize your comfort with tailored schedules! Within the Honeywell Home app, navigate to the scheduling section for your T4 Pro. You can create different schedules for weekdays and weekends, or customize each day individually. Define specific time periods and corresponding temperature settings – for example, a cooler temperature while you’re asleep or away.

The app allows for easy adjustments; simply drag and drop time blocks or modify temperature values; Save your schedules to activate them, ensuring your home automatically adjusts to your preferred settings throughout the day, optimizing both comfort and energy savings.

Advanced Features & Settings

Unlock the full potential of your T4 Pro! Explore advanced settings within the Honeywell Home app to personalize your experience. Geofencing utilizes your smartphone’s location to automatically adjust the temperature when you arrive or depart, maximizing energy efficiency. Smart Recovery learns your heating/cooling patterns to pre-condition your home before scheduled events, ensuring optimal comfort upon arrival.

Further customization options include filter change reminders, equipment settings, and display preferences. Dive into these features to fine-tune your system and enjoy a truly smart and responsive home climate control solution;

Geofencing Setup

Automate comfort with location-based control! Geofencing uses your smartphone’s GPS to trigger temperature adjustments. Within the Honeywell Home app, define a virtual “fence” around your home. When your phone enters this zone (Home), the thermostat automatically switches to your preferred home temperature. Conversely, when you exit (Away), it adjusts to an energy-saving setting.

Ensure location services are enabled for the Honeywell Home app. You can customize the geofence radius and temperature settings for both Home and Away modes. Multiple users can be added, creating a truly personalized and efficient climate control experience.

Smart Recovery Configuration

Optimize comfort and energy savings! Smart Recovery learns your heating and cooling patterns to proactively prepare your home for scheduled temperature changes. Instead of simply turning on at the scheduled time, the thermostat begins adjusting beforehand, ensuring your desired temperature is reached precisely when you need it.

Configure Smart Recovery within the Honeywell Home app. You can adjust the learning period and temperature differential. This feature minimizes energy waste by only heating or cooling as needed, while maximizing your comfort. It intelligently anticipates your needs, providing a consistently pleasant indoor environment.

Troubleshooting Common Issues

Resolve typical setup and operational challenges! If your T4 Pro displays a “No Power” message, verify the C-wire connection and breaker status. For Wi-Fi connectivity problems, ensure your network is 2.4 GHz and the password is correct. If the thermostat isn’t controlling your HVAC system, double-check the wiring against the appropriate diagram for your system type.

App connectivity issues can often be resolved by force-closing and reopening the Honeywell Home app, or by restarting the thermostat. Consult the online Honeywell support resources for detailed troubleshooting guides and FAQs. A quick system reset can also address minor glitches;

Resetting the Honeywell T4 Pro

Restore factory settings for a fresh start! A soft reset, achieved through the thermostat’s menu, clears temporary data without losing Wi-Fi credentials. For a complete factory reset – erasing all settings and returning the T4 Pro to its original state – navigate to the “Reset” option within the settings menu, confirming your choice when prompted.

This is useful when transferring ownership or resolving persistent issues. Remember that a factory reset requires re-connecting to Wi-Fi and reconfiguring all your preferences. Consult the Honeywell Home app or online documentation for step-by-step instructions and visual aids.

Warranty Information

Your investment is protected! Honeywell offers a limited warranty covering defects in materials and workmanship for a period of one year from the date of purchase. This warranty doesn’t cover damage resulting from improper installation, misuse, abuse, or unauthorized modifications.

To make a warranty claim, retain your proof of purchase and contact Honeywell Customer Support. They will guide you through the process, which may involve returning the thermostat for inspection or replacement. Full warranty details, including exclusions and limitations, are available on the Honeywell Home website or within the product documentation.

FCC Compliance

Important Regulatory Notice: This Honeywell T4 Pro thermostat complies with Part 15 of the Federal Communications Commission (FCC) rules. Operation is subject to two conditions: first, this device must not cause harmful interference, and second, it must accept any interference received, including interference that may cause undesired operation.

Changes or modifications not expressly approved by Honeywell could void the user’s authority to operate the equipment. This equipment has been tested and found to comply with the limits for a Class B digital device, ensuring reasonable protection against harmful interference in a residential installation.

Contacting Honeywell Support

Need Assistance? We’re Here to Help! For dedicated support regarding your Honeywell T4 Pro thermostat installation or operation, several convenient options are available. Visit our comprehensive online support portal at home.honeywell.com/support for FAQs, troubleshooting guides, and downloadable resources.

Alternatively, you can connect with our expert support team directly via phone at 1-800-468-1513. Please have your model number and date of purchase readily available to expedite the process. We also offer live chat support through our website for immediate assistance. Honeywell is committed to ensuring your complete satisfaction.

tens machine manual

Understanding Your TENS Machine

TENS units deliver electrical impulses via electrodes, offering a non-invasive pain relief method; always consult your manual for specific details regarding your device’s operation and safety.

These devices are valuable for managing discomfort, and proper understanding, guided by the manual, ensures effective and safe utilization for post-workout recovery or general muscle tension.

What is a TENS Machine?

A Transcutaneous Electrical Nerve Stimulation (TENS) machine is a small, battery-operated device used for pain relief. It’s a non-invasive method, meaning it doesn’t require needles or surgery, and works by delivering small electrical impulses through electrodes placed on the skin. These impulses are designed to stimulate nerves, effectively blocking pain signals from reaching the brain.

Crucially, understanding your specific unit is paramount, and the TENS machine manual is your primary resource. Different units have varying features and settings. The manual will detail the device’s capabilities, including adjustable intensity levels, pulse width, and frequency options. It will also outline safe usage guidelines and contraindications – situations where using a TENS machine is not recommended.

Many units are readily available both in retail stores and online, but regardless of where you purchase it, always prioritize reading the manual thoroughly before first use. Proper operation, as described in the manual, ensures both effectiveness and safety, maximizing the benefits of this pain management tool.

How Does a TENS Machine Work?

A TENS machine functions by sending small electrical currents to the body via electrodes applied to the skin. These currents stimulate nerves, aiming to reduce pain perception. The manual for your specific unit will explain the underlying principles in detail, often referencing the ‘Gate Control Theory’ of pain.

Essentially, the electrical impulses “jam” pain signals traveling to the brain, providing temporary relief. The manual will guide you on adjusting parameters like intensity, pulse width, and frequency to tailor the stimulation to your specific needs. Finding the ‘right’ intensity, as detailed in the manual, is key – aiming for a comfortable tingling sensation, not pain or muscle spasms.

Your manual will also explain how different settings affect the type of pain relief achieved. Understanding these settings, and following the manual’s instructions, allows you to optimize the therapy for conditions like muscle tension or post-workout recovery. Always prioritize the safety guidelines outlined within the manual.

Components of a TENS Unit

TENS units comprise a device, electrodes with lead wires, and batteries; the manual details each component’s function, proper usage, and maintenance for optimal performance.

The TENS Unit (Device)

The core of the TENS system is the device itself, a small, battery-operated unit that generates the electrical impulses. Your TENS machine manual is crucial for understanding its specific features and functions. It’s important to protect the unit from damage – avoid dropping it on hard surfaces, exposing it to water, or subjecting it to extreme temperatures.

The manual will detail the controls for adjusting intensity, pulse width, and frequency, allowing you to customize the stimulation to your needs. Different units offer varying programs designed for specific pain types or muscle conditions. Always refer to the manual before attempting to modify these settings.

Furthermore, the manual will provide information on battery type and replacement procedures. Removing batteries during prolonged non-use is recommended to prevent leakage and potential damage to the device. Carefully following the guidelines in your manual will ensure the longevity and effective operation of your TENS unit.

Electrodes and Lead Wires

Electrodes, the adhesive pads, are essential for delivering the electrical impulses to your skin. Your TENS machine manual will detail proper electrode placement and care. These pads come in various sizes and shapes, and their adhesiveness diminishes with use. The manual will advise on how to maintain their stickiness or when replacement is necessary.

Lead wires connect the TENS unit to the electrodes. The manual stresses the importance of handling these wires with care; avoid tightly bending or coiling them, as this can cause damage and disrupt the electrical connection. Inspect the wires regularly for any signs of fraying or breakage, as outlined in your manual.

Proper connection of the lead wires to both the unit and the electrodes is vital for effective stimulation. Your manual will illustrate the correct connection method. Maintaining both components ensures optimal performance and prolongs the lifespan of your TENS system.

Batteries

Batteries power your TENS unit, and your manual provides crucial information regarding battery type, size, and proper installation. Always use the batteries specified in the manual to avoid damaging the device. The manual will also detail how to safely replace the batteries, often requiring a screwdriver for access.

A key recommendation in most manuals is to remove the batteries when the unit is not in use for extended periods. This prevents potential leakage from the batteries, which can corrode the internal components and render the device unusable. Battery leakage is a common issue, so preventative measures are vital.

Your manual may also offer guidance on battery care, such as storing them in a cool, dry place. Proper battery maintenance extends the life of both the batteries and your TENS unit, ensuring reliable performance when you need it most.

Setting Up Your TENS Machine

Refer to your manual for detailed setup instructions, including skin preparation and electrode placement, ensuring optimal conductivity and effective pain relief with your TENS unit.

Preparing the Skin

Before applying the TENS unit electrodes, proper skin preparation is crucial for optimal conductivity and effective pain relief; always consult your device’s manual for specific recommendations.

Generally, the skin should be clean, dry, and free from lotions, oils, or sweat, as these can interfere with the electrical current. Gently wash the area with mild soap and water, then thoroughly dry it with a clean towel.

If there is excessive hair at the electrode site, it may be necessary to trim it lightly to ensure good contact. Avoid shaving immediately before application, as this can cause irritation.

Inspect the skin for any cuts, abrasions, or irritation. Do not apply electrodes to damaged skin. If skin irritation occurs, discontinue use and consult your healthcare provider. Following these steps, as outlined in your manual, will maximize the benefits of your TENS therapy.

Electrode Placement

Proper electrode placement is vital for effective TENS therapy; your device’s manual will provide detailed diagrams and guidance specific to your unit and the area being treated.

Generally, electrodes are placed on or around the painful area, or at specific acupuncture points. Avoid placing electrodes over bony prominences, open wounds, or directly over the heart.

Electrodes should be spaced a few centimeters apart, and ensure they are firmly adhered to the skin. Experiment with different placements to find what works best for you, always referring to the manual for recommended configurations.

For localized pain, surround the painful area with electrodes. For radiating pain, place electrodes at the source of the pain and along the path of the radiating sensation. Remember, the manual is your primary resource for safe and effective electrode placement.

Connecting the Lead Wires

Carefully connect the lead wires to both the TENS unit and the electrodes, ensuring a secure connection for optimal signal transmission; your device’s manual provides specific instructions and diagrams for this process.

Most TENS units utilize a standardized connector, but always double-check compatibility. Avoid forcefully inserting the wires, as this can damage the connectors; Gently align and push until you hear or feel a click.

Inspect the lead wires regularly for any signs of damage, such as fraying or cracking. Damaged wires can reduce effectiveness and potentially cause skin irritation. Refer to your manual for replacement instructions.

Do not tightly coil or bend the lead wires, as this can also cause damage. Proper connection, as detailed in the manual, is crucial for delivering a consistent and therapeutic electrical stimulation.

Using Your TENS Machine

Power on the unit and gradually increase intensity to a comfortable tingling sensation, avoiding pain or muscle spasms, as detailed in your manual.

Relaxation during use is key; adjust settings per the manual, considering pulse width and frequency for optimal muscle tension relief.

Powering On and Intensity Adjustment

Initiating operation with your TENS unit is generally straightforward, but always refer to your specific device’s manual for precise instructions. Typically, a power button activates the unit, and a control knob or digital buttons manage the intensity. Begin with the lowest intensity setting before gradually increasing it.

Crucially, the goal isn’t to induce pain, but rather a comfortable tingling sensation. The manual will emphasize this point – you should be able to relax while the unit is operating. If you experience muscle spasms or discomfort, immediately reduce the intensity. Slow, incremental adjustments are vital for finding the optimal level.

Some units offer pre-programmed settings for different conditions, outlined in the manual. Experimenting with these, while carefully monitoring your body’s response, can help personalize your therapy. Remember, the manual is your primary resource for safe and effective operation;

Finding the Right Intensity Level

Determining the appropriate intensity is paramount for effective TENS therapy, and your device’s manual is the definitive guide. Start at the lowest setting and slowly increase it until you feel a noticeable, yet comfortable, tingling sensation. This sensation should not be painful or cause muscle contractions.

The manual will likely advise asking yourself if you can relax while the unit is running. If the sensation is uncomfortable, immediately decrease the intensity. It’s a process of fine-tuning, finding the sweet spot where you feel relief without adverse effects.

Individual tolerance varies significantly, so what works for one person may not work for another. The manual may suggest starting with shorter durations and lower intensities, gradually increasing both as you become accustomed to the sensation. Prioritize comfort and heed the manual’s recommendations.

Understanding Pulse Width and Frequency

Your TENS machine’s manual will detail the functions of pulse width and frequency, crucial settings for customizing your therapy. Pulse width, measured in microseconds, dictates the duration of each electrical pulse; longer pulses generally provide stronger stimulation. Frequency, measured in Hertz (Hz), determines the number of pulses delivered per second.

The manual often suggests specific settings for different conditions. For general muscle tension, a lower frequency (e.g., 2-10 Hz) with a moderate pulse width might be recommended. Higher frequencies (e.g., 50-100 Hz) with shorter pulse widths are sometimes used for acute pain.

Experimentation, guided by your manual, is key. Start with the recommended settings and adjust them incrementally to find what provides the most effective pain relief. Remember to document what works best for you, and always prioritize comfort and safety as outlined in the device’s instructions.

TENS Machine Safety and Maintenance

Always refer to your manual for crucial safety precautions, contraindications, and proper care instructions to ensure longevity and effective, safe operation of your TENS unit.

Precautions and Contraindications

Carefully review your TENS machine manual before use, as certain conditions necessitate avoiding or modifying treatment. Do not use a TENS unit on open wounds, broken skin, or areas with active infections. Individuals with pacemakers or other implanted electronic devices must consult their physician prior to use, as electrical interference is a potential risk.

Avoid applying electrodes over the carotid sinus (neck), eyes, or directly over the heart. Pregnant women should consult their healthcare provider before using a TENS unit. If you experience skin irritation, discontinue use and adjust electrode placement or type. Never use while driving or operating heavy machinery. The manual will detail specific warnings and guidelines tailored to your device, ensuring safe and effective pain management. Always prioritize safety and consult a medical professional if you have any concerns.

Battery Care and Storage

Consult your TENS machine manual for specific battery type recommendations and replacement instructions. To maximize battery life, power off the unit when not in use. Prolonged inactivity can lead to battery leakage, so the manual often advises removing batteries for extended storage periods. Store batteries in a cool, dry place, away from direct sunlight and extreme temperatures.

Avoid mixing old and new batteries, or different battery types. Dispose of used batteries responsibly, following local regulations. Regularly check the battery compartment for signs of corrosion. If corrosion is present, carefully clean it with a dry cloth before inserting new batteries. Proper battery care, as outlined in your manual, ensures optimal performance and longevity of your TENS unit, preventing potential damage and maintaining its effectiveness.

Cleaning and Care of the Unit and Electrodes

Refer to your TENS machine manual for specific cleaning guidelines. Generally, the unit itself should be wiped down with a slightly damp cloth; avoid immersing it in water. Never use harsh chemicals or abrasive cleaners, as these can damage the device. Regularly inspect the lead wires for any signs of damage, such as fraying or cracking, and replace them if necessary.

Electrodes require careful attention. Clean electrodes after each use with a damp cloth to remove skin oils and debris. Adhesion can be restored by lightly misting them with water. Store electrodes in a clean, dry place, ideally in their original packaging. Replace electrodes when they lose their stickiness or become damaged. Following the manual’s instructions ensures hygiene, prolongs the life of your TENS unit, and maintains optimal performance.

Troubleshooting Common Issues

Consult your TENS machine manual first for solutions to problems like no stimulation or skin irritation; proper usage is key for effective relief.

No Stimulation

If you experience no stimulation from your TENS unit, the first step is always to thoroughly review the device’s manual for troubleshooting guidance specific to your model. Begin by ensuring the unit is powered on and the intensity is gradually increased – remember, the goal is a comfortable tingling sensation, not pain or muscle spasms.

Next, carefully check the electrode placement, confirming they are securely adhered to clean, dry skin and correctly positioned according to the manual’s recommendations. Verify the lead wires are firmly connected to both the electrodes and the TENS unit itself. A loose connection is a common cause of this issue.

Also, inspect the batteries; low battery power can significantly reduce or eliminate stimulation. Replace them with fresh batteries as needed. If the problem persists, consult the manual for further diagnostic steps or contact the manufacturer’s customer support for assistance. Do not attempt to disassemble or repair the unit yourself.

Skin Irritation

Should you experience skin irritation while using your TENS unit, immediately discontinue use and consult the device’s manual for guidance. Skin reactions can occur due to several factors, including adhesive sensitivity, prolonged electrode contact, or improper skin preparation. Ensure your skin is clean and dry before applying the electrodes, as outlined in the manual.

Consider using hypoallergenic electrodes if you have sensitive skin. Avoid placing electrodes over broken or irritated skin, and rotate electrode placement with each use to prevent localized irritation. If irritation persists, try reducing the intensity level or shortening the duration of each treatment session, as detailed in your manual.

The manual may also recommend specific skin preparation techniques or barrier creams. If the irritation is severe or doesn’t subside, consult a healthcare professional for advice. Proper care and adherence to the manual’s instructions are crucial for minimizing skin reactions.

mini educator e collar manual

Mini Educator E-Collar Manual: A Comprehensive Guide

Welcome! This manual provides detailed guidance on utilizing the Mini Educator e-collar effectively and responsibly‚ ensuring a positive training experience for both you and your canine companion.

Understanding the Mini Educator E-Collar

The Mini Educator is a remote training collar designed for dogs of all breeds and sizes‚ offering a humane and effective method for communication during training sessions. Unlike some e-collars‚ the Mini Educator prioritizes precision and control‚ allowing trainers to deliver consistent and adjustable stimulation. Many professionals favor it for its discreet design and reliable performance‚ particularly the EZ model’s convenient dial operation‚ though accidental adjustments can occur.

It’s crucial to understand that the e-collar isn’t a quick fix; it’s a tool to enhance existing training. Proper use involves pairing stimulation with established cues‚ like leash pressure‚ and understanding individual dog sensitivity. The collar’s effectiveness hinges on correct contact point selection – 5/8” for most‚ 3/4” for thicker fur – and a snug‚ proper fit; Remember to experiment with distance and remote handling‚ as signal strength can be affected by touch.

What is an E-Collar and How Does it Work?

An e-collar‚ or electronic collar‚ is a training tool utilizing remote-controlled stimulation to communicate with your dog. It doesn’t aim to punish‚ but rather to offer a clear signal‚ interrupting unwanted behaviors and reinforcing desired ones. The Mini Educator delivers this signal through contact points that touch your dog’s skin‚ providing a sensation that varies in intensity based on the selected level.

The remote allows you to control the stimulation‚ offering both continuous and momentary options. Most dogs will react to stimulation levels between 8 and 25‚ depending on skin dryness. Some trainers even utilize the vibration function‚ though adjustable vibrate collars are preferred for dogs with hearing impairments. Understanding how the collar works – and responsibly applying it – is key to successful and humane training.

Key Features of the Mini Educator

The Mini Educator stands out with several key features designed for effective and discreet training. Notably‚ the Mini model floats‚ making it ideal for water work. A significant advantage is the easily adjustable dial‚ allowing for precise stimulation level control‚ even when operating the remote from inside a pocket. While the dial can sometimes shift slightly within a pocket‚ a level-locking feature is available for added security.

Furthermore‚ the remote’s sensitivity to antenna touch is a characteristic of most remote trainers‚ requiring careful handling. Experimenting with distance and remote positioning is crucial. The Mini Educator’s design prioritizes user-friendliness and reliable performance‚ making it a popular choice among professional dog trainers.

Safety Precautions and Responsible Use

Responsible e-collar use is paramount. Always begin with the lowest stimulation level and gradually increase only if necessary‚ observing your dog’s reaction closely. Most individuals feel stimulation between levels 8 and 25‚ depending on skin dryness – testing on yourself (briefly!) can help gauge appropriate levels. Avoid continuous stimulation for extended periods; momentary stimulation is often more effective and humane.

Proper collar fitting is crucial to ensure the contact points make consistent contact. Never leave the collar on a dog unattended for prolonged durations. If accidental stimulation occurs‚ immediately cease use and reassess your approach. For any concerns or questions‚ don’t hesitate to contact customer support at 1-855-326-5527.

Setting Up Your Mini Educator E-Collar

Before commencing training‚ familiarize yourself with the components: the remote transmitter and the receiver collar. Ensure both are fully charged – see the ‘Charging the Remote and Receiver’ section for instructions. Next‚ select the appropriate contact points; standard 5/8” points suit most dogs‚ while thicker-furred breeds benefit from the longer 3/4” options. Use the provided tool to securely install your chosen points.

Proper collar placement is vital. The receiver should fit snugly‚ allowing consistent contact between the points and your dog’s skin. Avoid placement directly on the trachea. Experiment with distance and remote handling‚ having an assistant confirm vibration sensation to understand signal strength and antenna sensitivity.

Charging the Remote and Receiver

Maintaining optimal battery levels is crucial for consistent performance. The Mini Educator utilizes a convenient charging system. Connect the provided cable to a USB power source and the charging port on both the remote transmitter and the receiver collar. A full charge typically takes approximately two to three hours‚ though charging times may vary.

During charging‚ an indicator light will illuminate‚ typically red or amber‚ and change to green when fully charged. It’s recommended to fully charge both units before each training session. Regularly charging ensures uninterrupted training and prevents unexpected power loss. Always disconnect the charger once the units are fully powered to prolong battery life.

Contact Point Selection and Installation

Proper contact with your dog’s skin is vital for effective and humane stimulation. The Mini Educator comes with two contact point lengths: 5/8 inch and 3/4 inch. The standard 5/8 inch points suit most breeds‚ while dogs with thicker fur benefit from the longer 3/4 inch points for better contact.

To replace the contact points‚ use the included contact point tool. Gently unscrew the existing points and securely screw in the desired length. Ensure they are firmly tightened but avoid over-tightening. Regularly inspect the points for wear and tear‚ replacing them when necessary to maintain optimal performance and your dog’s comfort. Proper installation is key to a safe training experience.

Choosing the Right Contact Point Length (5/8″ vs. 3/4″)

Selecting the correct contact point length is crucial for effective communication with your dog. The 5/8 inch contact points are generally suitable for dogs with short to medium length coats‚ ensuring adequate skin contact for stimulation. However‚ for breeds possessing dense or thick fur‚ the 3/4 inch contact points are recommended.

These longer points penetrate the fur more effectively‚ establishing reliable contact with the skin. A trainer can determine the best fit by observing how well the points make contact during a test. Remember‚ consistent contact is paramount for delivering clear signals and achieving optimal training results. Prioritize your dog’s comfort and responsiveness when making your selection.

Proper Collar Fitting and Placement

Achieving a secure and comfortable fit is paramount when using the Mini Educator. The collar should sit snugly against your dog’s neck‚ positioned directly behind the ears. It’s vital to ensure the receiver isn’t too loose‚ preventing consistent contact‚ or too tight‚ causing discomfort. You should be able to comfortably slide two fingers between the collar and your dog’s neck.

Proper placement is equally important. Avoid positioning the collar directly on the trachea. Regularly check the fit‚ especially during active training sessions‚ as movement can cause the collar to shift. A well-fitted collar maximizes effectiveness and minimizes any potential discomfort for your canine companion‚ fostering a positive training experience.

Operating the Mini Educator E-Collar

The Mini Educator boasts a user-friendly interface. Familiarize yourself with the remote’s buttons: power‚ stimulation level adjustment‚ and momentary/continuous stimulation selection. Begin by testing the collar on yourself – most people feel stimulation between levels 8 and 25‚ depending on skin dryness. This helps understand the intensity range.

Remember sensitivity to the antenna; avoid touching it during operation as it can affect signal strength. Utilize the vibration function for attention-getting or as a low-level cue. When using stimulation‚ start at the lowest setting and gradually increase until a noticeable response is observed. Always prioritize minimal effective stimulation for optimal results and a positive training experience.

Understanding the Stimulation Levels

The Mini Educator offers a wide range of stimulation levels‚ typically spanning from 1 to 100‚ allowing for precise adjustments tailored to your dog’s temperament and coat thickness. It’s crucial to remember that these levels aren’t standardized; what feels mild to one dog may be stronger to another.

Begin with the lowest possible setting and incrementally increase it until you observe a clear behavioral response – a slight ear twitch‚ head turn‚ or change in pace. Avoid levels that elicit fear or anxiety. Remember‚ the goal isn’t to punish‚ but to communicate effectively. Testing the collar on yourself (levels 8-25 are typically felt) provides a baseline understanding of the intensity.

Using Continuous and Momentary Stimulation

The Mini Educator provides two primary stimulation modes: continuous and momentary. Continuous stimulation delivers a consistent electrical impulse as long as the button is pressed‚ ideal for maintaining pressure during a command like “heel.” Use it sparingly and release immediately upon compliance.

Momentary stimulation‚ a quick pulse delivered with a brief button press‚ is excellent for marking desired behaviors or interrupting unwanted ones. Michael Ellis recommends pairing momentary stimulation precisely with leash pressure for optimal timing. Many professionals favor momentary stimulation over continuous‚ finding it more precise and less likely to cause confusion or anxiety in the dog.

Utilizing the Vibration Function

The Mini Educator features a vibration function‚ offering a non-electrical communication method. While some trainers find vibration useful‚ particularly for dogs with hearing impairments (especially with adjustable vibrate collars)‚ many professionals generally dislike it for most dogs. This is because many canines perceive vibration as more aversive than low-level stimulation.

Experiment with the vibration setting by having a helper raise their hand each time they feel it‚ allowing you to gauge the effective range. Use the vibrate button during training exercises to test the signal strength and familiarize yourself with the remote’s functionality. Remember‚ consistent and clear communication is key to successful e-collar training.

The Debate: Vibration vs. Stimulation

A common discussion among trainers centers around the effectiveness of vibration versus stimulation. While vibration seems gentler‚ many dogs actually find it more unpleasant than a low-level electrical stimulus. This is because vibration can feel unpredictable and buzzing‚ triggering a stronger aversive response in some canines.

Professionals often lean towards utilizing stimulation as a clearer‚ more defined cue. However‚ adjustable vibration collars are highly recommended for training deaf dogs‚ providing a vital communication channel. Ultimately‚ the best approach depends on the individual dog’s temperament and sensitivity. Careful observation and experimentation are crucial to determine what resonates best with your dog.

Training with the Mini Educator E-Collar

Effective training with the Mini Educator hinges on precise timing and association. A cornerstone technique involves pairing stimulation with leash pressure. As you apply gentle leash correction for a desired behavior (like a heel)‚ simultaneously deliver a low-level stimulation. This creates a clear connection between the e-collar and the physical correction‚ allowing the dog to understand the expectation.

Furthermore‚ consider using stimulation as a new cue‚ particularly for recall. Once the dog associates the stimulation with returning to you‚ you can phase out the leash pressure. Michael Ellis’s remote e-collar course on Leerburg offers excellent examples of this timing. Remember consistency and low-level corrections are key!

Pairing Stimulation with Leash Pressure

This foundational technique establishes a clear understanding for your dog. Begin by applying gentle‚ consistent leash pressure to guide your dog into the desired behavior – for example‚ a sit or a heel. Simultaneously‚ administer a very low-level stimulation on the Mini Educator. The goal isn’t to punish‚ but to create an association between the physical correction and the e-collar sensation.

As your dog responds to the leash‚ immediately cease both the pressure and the stimulation. This precise timing is crucial. Over time‚ the dog will learn to anticipate the desired behavior and respond to the stimulation alone‚ eventually phasing out the need for leash guidance. Remember to start low and gradually increase the stimulation only if necessary‚ as demonstrated in resources like Michael Ellis’s course.

Using Stimulation as a New Cue (e.g.‚ Recall)

Many professionals effectively utilize the Mini Educator’s stimulation as a novel cue‚ particularly for recall. Begin by associating a verbal cue – “Come!” – with a low-level stimulation delivered as your dog starts to move towards you. Avoid using the stimulation to call a dog that is already actively ignoring you; instead‚ proactively pair it with the beginning of the desired action.

As your dog consistently responds to the cue and stimulation combination‚ gradually reduce the stimulation level. Eventually‚ the stimulation should become a subtle reinforcement‚ barely perceptible to the dog‚ serving solely as a reminder of the command. Remember‚ the goal is not to rely on constant correction‚ but to establish a reliable‚ positive association between the cue and the desired behavior‚ fostering a quicker and more enthusiastic response.

Remote Sensitivity and Antenna Handling

The Mini Educator’s remote signal strength is notably sensitive to touch; even slight contact with the antenna can significantly impact range and effectiveness. It’s crucial to understand this characteristic‚ as it’s common to all remote training collars‚ not unique to the Mini Educator. To properly assess the effective range‚ have a helper wear the receiver collar and experiment with distance while you manipulate the remote.

Utilize the vibrate function during testing – ask your helper to raise their hand each time they feel the vibration. This allows you to pinpoint the distance at which the signal remains consistent. Practice maintaining proper remote handling‚ avoiding accidental antenna contact. Familiarizing yourself with these nuances ensures reliable communication and optimal training outcomes.

Troubleshooting Common Issues

A frequent concern is accidental stimulation level changes‚ often occurring when the remote is carried in a pocket. While some users report the dial turning unintentionally‚ a level-locking feature may be available to prevent this. If experiencing this‚ investigate the remote’s settings for a locking mechanism. Another common issue involves inconsistent signal strength due to antenna contact – remember‚ even slight touch impacts range.

Experiment with distance and remote handling to identify optimal conditions. If problems persist‚ don’t hesitate to contact customer support for assistance at 1-855-326-5527. They can provide tailored guidance and address specific concerns regarding your Mini Educator e-collar.

Addressing Accidental Stimulation Level Changes

Many users find the dial on the Mini Educator can inadvertently adjust stimulation levels when carried in a pocket. This is a common issue‚ but often manageable. First‚ thoroughly examine your remote for a level-locking feature; if present‚ engage it to prevent unintentional adjustments. If a lock isn’t available‚ consider alternative carrying methods – a secure pouch or clipped to your belt can minimize accidental contact.

Regularly check the stimulation level before each training session. Experienced trainers suggest having a helper wear the collar receiver while you adjust the dial to confirm the intended setting. Remember‚ even slight dial movement can significantly alter the stimulation. If issues continue‚ contact customer support at 1-855-326-5527.

Contacting Customer Support (1-855-326-5527)

If you encounter persistent issues with your Mini Educator e-collar‚ or require assistance beyond the scope of this manual‚ dedicated customer support is readily available. For prompt and knowledgeable help‚ please contact them directly at 1-855-326-5527. Be prepared to describe your specific problem in detail‚ including the model number of your device and any troubleshooting steps you’ve already taken.

Customer support can assist with pairing issues‚ remote functionality concerns‚ receiver malfunctions‚ and questions regarding contact point selection. They can also provide guidance on proper usage and training techniques. Don’t hesitate to reach out – their expertise can ensure you maximize the benefits of your Mini Educator and maintain a safe‚ effective training experience for your dog.

mike mentzer workout routine pdf

Mike Mentzer Workout Routine: A Comprehensive Guide

Delve into the revolutionary Heavy Duty training system pioneered by Mike Mentzer, exploring a minimalist approach focused on intensity and recovery, often found in PDF guides.

Mike Mentzer, a prominent figure in bodybuilding during the 1970s and 80s, championed a training philosophy known as Heavy Duty. This approach, often detailed in readily available PDF workout routines, fundamentally challenged conventional high-volume training. Mentzer believed in maximizing muscle fiber recruitment through brief, intense workouts, prioritizing quality over quantity.

He advocated for significantly reduced training frequency and volume, contrasting sharply with the multi-day, numerous-set routines prevalent at the time. Mentzer’s system, meticulously outlined in various PDF guides, centers around achieving positive and negative muscle failure with each set. This intensity-focused method aimed to stimulate muscle growth with minimal stress, promoting faster recovery and preventing overtraining – a concept thoroughly explained within the mike mentzer workout routine pdf resources.

Mentzer’s Bodybuilding Background and Philosophy

Mike Mentzer’s journey began at age eleven with a weight set gifted by his father, sparking a lifelong dedication to bodybuilding. He quickly progressed, earning titles like Mr. Universe in 1976 and 1978. However, Mentzer’s philosophy evolved beyond simply building muscle; he sought the most efficient path to growth, a concept thoroughly detailed in numerous PDF workout guides.

He became a staunch critic of traditional bodybuilding methods, believing they led to diminishing returns and overtraining. Mentzer’s core belief, often emphasized in mike mentzer workout routine pdf materials, was that muscles only needed enough stimulation to trigger growth, not exhaustive, prolonged workouts. This led to the development of Heavy Duty, a system prioritizing brief, intense sessions and ample recovery – a stark contrast to the prevailing norms of his era, all documented within accessible PDF resources.

The Core Principles of Heavy Duty Training

Heavy Duty training, extensively outlined in mike mentzer workout routine pdf documents, centers around achieving positive failure on each set – the point where you absolutely cannot complete another repetition with good form. This isn’t about ego lifting; it’s about truly exhausting the muscle fibers. Recovery is equally crucial, as Mentzer believed growth occurred outside the gym.

Frequency is drastically reduced compared to conventional routines, often involving just a few workouts per week. Intensity trumps volume; fewer sets, performed with maximum effort, are favored. Many PDF guides emphasize the importance of pre-exhaustion, isolating the target muscle before compound movements. These principles, readily available in mike mentzer workout routine pdf formats, challenge traditional bodybuilding dogma, promoting efficiency and minimizing wasted effort.

The Heavy Duty Workout Routine – Detailed Breakdown

Explore the specifics of Mentzer’s system, often detailed in mike mentzer workout routine pdf guides, focusing on low volume, high intensity, and strategic exercise selection.

Workout Frequency and Split

Mike Mentzer’s Heavy Duty approach dramatically contrasts traditional bodybuilding frequencies. Instead of the commonly practiced six days a week, Mentzer advocated for significantly less – typically 2-4 workouts per week, allowing for substantial recovery. This is a core tenet often emphasized in mike mentzer workout routine pdf resources.

Splits varied based on individual recovery capabilities, but common structures included full-body workouts, or a two-way split (e.g., upper/lower). Mentzer believed in training each muscle group intensely, but infrequently. He prioritized complete recovery between sessions, recognizing that muscle growth occurs during rest, not during the workout itself.

PDF guides detailing his routines often highlight the importance of listening to your body and adjusting frequency accordingly. Overtraining was a major concern for Mentzer, and his system was designed to minimize it.

The Importance of Pre-Exhaustion

Pre-exhaustion was a cornerstone of Mike Mentzer’s Heavy Duty system, a technique frequently detailed within a mike mentzer workout routine pdf. It involves performing an isolation exercise before a compound movement for the same muscle group. This strategically fatigues the target muscle, forcing it to work harder during the subsequent compound lift.

For example, performing leg extensions before squats pre-exhausts the quadriceps. This ensures they are the limiting factor during squats, maximizing their stimulation. Mentzer believed this method bypassed the nervous system’s ability to compensate with momentum or assistance from other muscle groups.

PDF resources emphasize that pre-exhaustion increases intensity and reduces the weight needed, minimizing joint stress while maximizing muscle fiber recruitment.

Positive Failure and Rest-Pause Technique

Central to Heavy Duty training, as outlined in many a mike mentzer workout routine pdf, is reaching positive failure – the point where you cannot complete another repetition with good form. However, Mentzer didn’t stop there; he advocated for the Rest-Pause technique.

Rest-Pause involves briefly resting (10-15 seconds) after reaching failure, then performing as many additional reps as possible. This is repeated 2-3 times per set. This extends the set beyond initial failure, dramatically increasing time under tension and metabolic stress.

PDF guides highlight that Rest-Pause maximizes muscle fiber recruitment and growth stimulus, aligning with Mentzer’s belief in brief, intense workouts.

Negative Failure and Forced Reps

Mike Mentzer’s mike mentzer workout routine pdf materials detail advanced techniques like Negative Failure and Forced Reps, pushing beyond positive failure for maximal muscle stimulation. Negative failure involves completing as many repetitions as possible with assistance, focusing on the eccentric (lowering) phase.

A training partner provides just enough help to control the weight during the negative portion of the lift, extending the set beyond what you could achieve alone. Forced reps, similarly, utilize partner assistance to complete a few extra repetitions after reaching positive failure.

These techniques, though demanding, are crucial for breaking plateaus and achieving significant gains, as emphasized in Mentzer’s philosophy.

Set and Rep Ranges in Mentzer’s System

Analyzing a mike mentzer workout routine pdf reveals a departure from traditional bodybuilding volume; Mentzer advocated for extremely low set and rep ranges, prioritizing intensity over quantity. Typically, workouts consisted of just 1-2 working sets per exercise, taken to absolute positive failure.

Rep ranges generally fell between 6-10, though some exercises, particularly multi-joint movements, might be performed for as few as 4-6 reps. The key wasn’t the number, but reaching complete muscular exhaustion with each set.

Mentzer believed this approach was sufficient to stimulate growth, minimizing recovery time and preventing overtraining, a cornerstone of his Heavy Duty principles.

Sample Mike Mentzer Workout Routines

Explore practical applications of Heavy Duty training, often detailed in mike mentzer workout routine pdf guides, with examples for beginners and advanced lifters alike.

Full Body Routine for Beginners

Embarking on a Mike Mentzer journey requires understanding his core principles, often outlined in a mike mentzer workout routine pdf. For novices, a full-body approach is ideal, focusing on compound movements to stimulate maximum muscle fiber recruitment with minimal volume.

A sample beginner routine might include: Incline Press (1 set to failure), Pull-ups (assisted if needed, 1 set to failure), Squats (1 set to failure), and Dumbbell Rows (1 set to failure). Rest adequately – 2-3 minutes between sets is crucial for recovery.

Prioritize proper form over weight. The goal isn’t to lift heavy initially, but to achieve positive failure with controlled movements. This routine, detailed in many PDF resources, emphasizes quality over quantity, laying the foundation for future intensity gains.

Upper/Lower Split Routine

As you progress, an Upper/Lower split, frequently detailed within a mike mentzer workout routine pdf, offers increased frequency without overtraining. This involves dedicating separate workouts to upper and lower body muscle groups, allowing for focused intensity.

A sample split could be: Monday – Upper Body (Incline Press, Pull-ups, Shoulder Press, 1 set each to failure); Thursday – Lower Body (Squats, Leg Press, Hamstring Curls, 1 set each to failure). Rest-pause techniques can be incorporated for enhanced stimulation.

Remember Mentzer’s emphasis on brief, intense sessions. This routine, often found in downloadable PDF guides, prioritizes hitting positive failure on each set, followed by sufficient recovery – typically 2-3 days between working the same muscle group.

Push/Pull/Legs Routine Adaptation

Adapting Mike Mentzer’s Heavy Duty principles to a Push/Pull/Legs (PPL) split, often outlined in a comprehensive mike mentzer workout routine pdf, allows for further specialization. This structure categorizes exercises based on movement patterns – pushing, pulling, and leg work.

A possible PPL schedule: Monday – Push (Chest, Shoulders, Triceps, 1 set per exercise); Wednesday – Pull (Back, Biceps, 1 set per exercise); Friday – Legs (Quads, Hamstrings, Calves, 1 set per exercise). Positive failure is crucial on each set.

This adaptation, detailed in many PDF resources, maintains Mentzer’s core tenet of high-intensity, low-volume training; Prioritize proper form and sufficient rest between workouts to maximize recovery and growth.

Advanced Techniques Employed by Mentzer

Explore Mentzer’s sophisticated methods like static contraction and surge training, often detailed within a mike mentzer workout routine pdf, for accelerated gains.

Static Contraction Training

Static contraction, a cornerstone of Mentzer’s Heavy Duty approach, involves holding a muscle contraction at its peak for an extended duration. This technique, frequently outlined in a mike mentzer workout routine pdf, focuses on maximizing muscle fiber recruitment without joint movement.

Mentzer believed this method provided an incredibly intense stimulus, leading to significant muscle growth with minimal sets. Typically, a lifter would find a point of maximal resistance during an exercise and hold it for six to ten seconds, pushing against an immovable object or a fixed point.

This isn’t about simply ‘holding’ the weight; it’s about continuously attempting to move it, creating maximal tension. Detailed PDF guides often emphasize proper form and mental focus during static holds to ensure effectiveness and prevent injury.

Surge Training for Accelerated Progress

Surge training, a more advanced technique detailed in many a mike mentzer workout routine pdf, involves brief, incredibly intense bursts of exercise followed by extended periods of rest. Mentzer proposed this method to shock the muscles into rapid adaptation and overcome plateaus.

Unlike traditional sets, surges are performed with maximal effort for only a few seconds – often just 4-6 repetitions – pushing beyond positive failure. The extended rest periods, sometimes lasting several minutes, allow for near-complete recovery between surges, ensuring each effort is performed with peak intensity.

PDF resources often highlight the importance of meticulous record-keeping with surge training, tracking each surge’s intensity and the recovery time needed. It’s a demanding protocol, best suited for experienced lifters.

Nutrition and Recovery in Mentzer’s Approach

Mentzer’s system, often detailed in a mike mentzer workout routine pdf, prioritized sufficient protein, strategic carbohydrate intake, and ample rest for optimal muscle growth.

Protein Intake and Muscle Recovery

Mike Mentzer heavily emphasized protein’s crucial role in muscle repair and growth, a cornerstone often highlighted within a mike mentzer workout routine pdf. He advocated for a substantial daily intake, generally around 1 gram of protein per pound of bodyweight, to facilitate recovery from his intense, albeit infrequent, workouts.

This wasn’t simply about quantity; Mentzer stressed the importance of protein quality, favoring complete protein sources like meat, poultry, fish, eggs, and dairy. He believed adequate protein consumption was non-negotiable, especially given the high-intensity nature of Heavy Duty training, which caused significant muscle fiber breakdown.

Proper protein intake, as detailed in many resources including a mike mentzer workout routine pdf, ensured the body had the necessary building blocks to rebuild and strengthen muscle tissue during the recovery phase, maximizing the benefits of each training session.

The Role of Carbohydrates and Fats

While protein took center stage in Mike Mentzer’s nutritional philosophy, carbohydrates and fats weren’t dismissed, often detailed within a comprehensive mike mentzer workout routine pdf. Mentzer viewed carbohydrates as a secondary nutrient, primarily for replenishing glycogen stores depleted during intense training sessions. He didn’t advocate for high-carb diets, preferring a moderate intake timed around workouts.

Fats, according to Mentzer, were essential for hormonal production and overall health. He favored healthy fat sources like avocados, nuts, and olive oil, recognizing their importance in supporting the body’s physiological functions.

A mike mentzer workout routine pdf would typically outline a balanced approach, prioritizing protein, strategically utilizing carbohydrates, and incorporating healthy fats to optimize recovery and muscle growth.

Importance of Adequate Rest and Sleep

Mike Mentzer’s Heavy Duty training wasn’t about hours in the gym; it was about maximizing the impact of each set, a principle thoroughly explained in any detailed mike mentzer workout routine pdf. Consequently, recovery became paramount. Mentzer stressed that muscle growth doesn’t occur during training, but afterward, during rest and sleep.

He advocated for significantly more rest days than traditional bodybuilders, believing the nervous system needed ample time to recover from the intense stimulus. A mike mentzer workout routine pdf would emphasize 7-9 hours of quality sleep nightly, alongside strategic rest days between workouts.

Without sufficient rest, Mentzer argued, the body couldn’t adapt and rebuild, leading to overtraining and stagnation.

Criticisms and Considerations of Heavy Duty Training

While effective for some, Heavy Duty isn’t universally ideal; a mike mentzer workout routine pdf should acknowledge potential overtraining risks and individual suitability.

Potential for Overtraining

A key concern with Heavy Duty, detailed in many a mike mentzer workout routine pdf, is the surprisingly high potential for overtraining. Despite the low volume – fewer sets and exercises – the extreme intensity demanded can profoundly stress the central nervous system and muscle fibers.

Beginners, or those accustomed to traditional high-volume training, are particularly vulnerable. The philosophy hinges on reaching absolute muscular failure, and consistently pushing to this limit without adequate recovery can quickly lead to diminished returns, fatigue, and even injury.

Therefore, meticulous attention to rest, nutrition, and listening to your body’s signals is paramount. A mike mentzer workout routine pdf should emphasize the importance of deload weeks and individualized adjustments based on recovery capacity.

Suitability for Different Body Types

Analyzing a mike mentzer workout routine pdf reveals that Heavy Duty isn’t universally ideal; its effectiveness varies based on individual somatotypes. Ectomorphs, naturally lean with difficulty gaining weight, may find the low volume beneficial, allowing for focused recovery and growth. However, they must prioritize caloric intake.

Mesomorphs, possessing a naturally muscular build, generally respond well to the intensity, quickly adapting and seeing results. Endomorphs, prone to storing fat, require careful monitoring of nutrition alongside the routine, as reduced volume doesn’t negate dietary impact.

A mike mentzer workout routine pdf should advise tailoring the program – adjusting rest periods or incorporating additional cardio – to align with individual metabolic rates and body composition goals.

Resources for Further Learning

Expanding your understanding beyond a basic mike mentzer workout routine pdf requires exploring diverse sources. Numerous online forums dedicated to Heavy Duty training offer valuable insights and personal experiences from practitioners. Books authored by Mentzer himself, such as “Heavy Duty,” provide a foundational understanding of his philosophy.

Websites specializing in bodybuilding history often feature articles and interviews related to Mentzer’s career and training methods. YouTube channels dedicated to fitness frequently analyze and demonstrate Heavy Duty techniques.

Remember to critically evaluate information, cross-referencing sources and considering individual responses. A comprehensive mike mentzer workout routine pdf is a starting point, not the definitive guide.

Posted in PDF