manual wheelchair rental

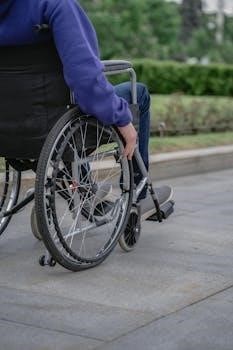
Manual Wheelchair Rental⁚ An Overview

Manual wheelchair rentals provide a convenient solution for temporary mobility needs․ These services are offered by various medical equipment companies and charities․ They often include delivery and pickup options․ Renting can be arranged online or by phone, with options for travel destinations․

Finding Rental Services Near You

Locating manual wheelchair rental services near you is now easier than ever, thanks to the internet and specialized providers․ Start by searching online using keywords such as “wheelchair rentals near me” or “manual wheelchair hire” followed by your city or region․ This will bring up local medical equipment rental companies, pharmacies, and even charitable organizations that offer wheelchair rentals․ Many of these services provide convenient pickup and delivery options, making the rental process hassle-free․ You can also narrow your search by specifying whether you need a standard manual wheelchair or if you are looking for a more specialized option․ Checking local directories and making direct inquiries with providers are additional methods to find the best fit for your needs․ Remember to check reviews and compare prices to ensure you are choosing a reputable service․ Some providers allow booking online or by phone, offering further convenience․

Online Booking Options for Manual Wheelchairs

The internet provides a convenient platform for booking manual wheelchair rentals․ Many companies now offer online booking systems, allowing you to browse available wheelchairs, view rental terms, and secure your booking from the comfort of your home․ These systems typically include user-friendly interfaces that guide you through the booking process․ You will often be able to select pickup and delivery options, specify the rental duration, and in some cases, choose a specific type of manual wheelchair․ Online platforms usually provide details about the wheelchairs, such as weight capacity and folding capabilities․ Additionally, you can often find customer reviews and ratings, helping you make an informed decision․ Most online booking platforms also offer secure payment gateways, ensuring your transaction is safe․ Some platforms may also provide the option to extend your rental period if needed․ Online booking streamlines the process, saving you time and effort․

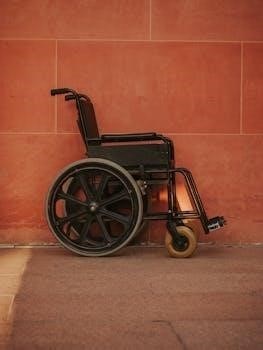
Types of Manual Wheelchairs Available for Rent

Rental services provide various manual wheelchairs․ Options include lightweight, foldable models for easy transport, and specialized versions such as bariatric or pediatric wheelchairs․ These cater to diverse needs and user requirements․

Lightweight and Foldable Manual Wheelchairs

Lightweight and foldable manual wheelchairs are a popular choice for rentals due to their portability and convenience․ These wheelchairs are designed to be easily transported and stored, making them ideal for travel and everyday use․ Many models are constructed from aluminum or other lightweight materials, reducing the overall weight without sacrificing durability․ The folding mechanism allows for quick collapsing, which is beneficial when fitting them into car trunks or storing them in small spaces․ These wheelchairs often come with features like adjustable footrests and armrests, enhancing user comfort; Their lightweight nature makes them easier for caregivers to push, improving the overall experience․ Lightweight and foldable options are perfect for individuals needing temporary mobility assistance who value ease of use and transport․ Their versatility ensures they can be used in a variety of settings, from navigating city streets to exploring vacation destinations․ These models are particularly suitable for those who require a mobility aid but do not need the more specialized features of other wheelchair types․ The availability of lightweight and foldable wheelchairs makes renting a very convenient option․

Specialized Manual Wheelchairs (Bariatric, Pediatric)

Specialized manual wheelchairs, such as bariatric and pediatric models, cater to unique user needs and require specific design considerations․ Bariatric wheelchairs are built to accommodate individuals with a higher weight capacity, typically featuring reinforced frames and wider seating areas․ These wheelchairs prioritize both user comfort and safety, ensuring stability and durability․ Pediatric wheelchairs are designed for children, focusing on appropriate sizing and features that support their growth and development․ They often include adjustable components to accommodate changes in size and may have vibrant colors or designs to make them more appealing to children․ These specialized rentals are essential for individuals who need specific support beyond standard wheelchairs․ The availability of these options ensures that a wider range of users can access the mobility assistance they require․ Rental services offering bariatric and pediatric wheelchairs provide a vital resource for families needing temporary solutions․ The specialized design of these wheelchairs ensures both safety and comfort, allowing for a more positive experience․ This category includes options like reclining and tilt-in-space wheelchairs as well, further accommodating specific medical needs․

Rental Costs and Pricing

Manual wheelchair rental costs can vary, with daily rates starting from around Rs 1000․ Prices may depend on wheelchair type, rental duration, and any additional services․ Factors like delivery and pickup will also influence the final cost․

Daily Rental Rates for Manual Wheelchairs

Daily rental rates for manual wheelchairs typically fluctuate depending on several factors․ Basic manual wheelchair models often have lower daily rates, making them an economical option for short-term use․ You might find rates starting from a nominal amount, such as Rs 1000, but this can vary significantly depending on location and the rental company․ More specialized wheelchairs, like those with lightweight frames or extra features, may command higher daily rates․ Duration of the rental also impacts the daily cost, with longer rentals potentially leading to reduced rates per day․ Remember that these daily prices can also be impacted by the level of demand and availability of the wheelchairs, particularly during peak travel seasons or events․ Before making a booking, it’s important to compare prices among multiple rental services to ensure you’re getting a fair deal․ Some companies also offer special deals or packages that may include additional services․

Factors Affecting Rental Price

Several factors can influence the final rental price of a manual wheelchair․ The type of wheelchair is a primary determinant; lightweight or specialized models often have higher rental costs compared to standard ones․ Rental duration also plays a crucial role, with longer rental periods potentially leading to reduced daily rates․ The location of the rental service is another factor, prices may vary depending on the area or city where you rent․ Furthermore, the demand for wheelchairs during peak seasons or events can cause prices to increase․ Additional features or services, such as delivery, pickup, or insurance, can add to the total cost․ Lastly, the rental company’s pricing policy and whether they offer any discounts can have an influence․ It is very important to ask about all the potential costs when making a booking to fully understand the overall price․

Additional Services and Information

Beyond basic rental, many providers offer delivery and pickup, making the process more convenient․ Medical equipment rental companies often provide a range of mobility aids, including wheelchairs, and related accessories․ Check local resources for more information․

Delivery and Pickup Options

Many manual wheelchair rental services offer convenient delivery and pickup options, catering to diverse customer needs․ These services are particularly beneficial for individuals with limited transportation or those traveling to a new location․ Some companies provide delivery directly to your home, hotel, or even a specific vacation destination, ensuring a hassle-free experience․ Pickup is equally convenient, with options for scheduled collections from the same location or a different address, depending on the rental agreement․ The flexibility of these services is designed to accommodate various schedules and circumstances․ When booking a rental, it is crucial to inquire about delivery and pickup fees, as well as any geographical limitations․ Furthermore, some companies may offer express or same-day delivery for urgent needs․ Be sure to confirm these details when making your reservation to ensure a smooth and efficient rental process․ Always clarify the exact time and place of delivery and pickup․ This helps avoid any misunderstandings and ensures timely service․ This added convenience greatly enhances the overall user experience of renting a manual wheelchair․

Medical Equipment Rental Companies

Medical equipment rental companies are the primary providers of manual wheelchair rentals, offering a wide selection of models to suit varying needs․ These companies specialize in providing mobility solutions, ensuring their equipment is well-maintained, safe, and reliable․ They typically have a range of manual wheelchairs, from standard to lightweight and foldable options․ Many also offer specialized models like bariatric or pediatric wheelchairs․ These companies often have knowledgeable staff who can assist in selecting the right wheelchair based on individual needs and preferences․ They usually provide detailed information about the wheelchairs’ features and weight capacity․ These rental companies also handle the maintenance and cleaning, ensuring hygiene and safety․ Booking through these companies can be done online or by phone, and they often offer delivery and pickup services․ Some also provide additional services such as repair and maintenance․ These companies are a vital resource for individuals seeking temporary mobility aids․ They make it easier to obtain necessary equipment without the cost of purchasing it outright․

groeneveld auto greaser manual

Groeneveld Auto Greaser Manual⁚ An Overview

This manual provides a comprehensive look at Groeneveld automatic greasing systems. It aims to offer insight into the systems’ operation, capabilities, and maintenance. It includes technical data on various system components and serves as a guide for users seeking information about Groeneveld greasing systems.

Groeneveld automatic greasing systems are designed to enhance operational efficiency, reduce downtime, and extend the lifespan of equipment through precise and timely lubrication. These systems are engineered to deliver the correct amount of grease to all connected lubrication points automatically, eliminating the need for manual greasing. This automated approach ensures consistent lubrication, even in the most demanding operating conditions. Groeneveld systems are rigorously tested to ensure reliable performance and longevity. They are designed with an emphasis on minimizing operational costs while maximizing productivity. The company offers both single-line and twin-line systems to accommodate different application needs. Groeneveld systems aim to streamline maintenance and improve overall equipment reliability. They provide a solution to prevent premature wear and tear, leading to reduced repair costs. These systems are applicable across various industries, including transportation, construction, mining, and agriculture. They are built to withstand diverse operating environments. Groeneveld systems represent a commitment to improving equipment uptime and efficiency through advanced lubrication technology.

Groeneveld Twin System⁚ Operation and Principles

The Groeneveld Twin system is a dual-line automatic greasing system specifically developed for use with NLGI class-2 grease, addressing the limitations of other systems when using this type of lubricant. It operates by utilizing two main lines that alternate in delivering grease to the lubrication points, ensuring efficient and consistent lubrication. This system’s design is crucial for handling class-2 grease effectively, ensuring the grease reaches all required points without blockage. The Twin system is engineered to overcome the challenges associated with using thicker greases, offering a reliable method for automatic lubrication. It ensures that the connected grease points of the vehicle or machine are automatically lubricated with the precise amount of grease at the right moment. The system is designed to provide long operational life and error-free operation. The Twin system’s operation is based on a progressive distribution of grease, where one line pressurizes while the other returns, ensuring a constant supply. This principle allows for a continuous and reliable greasing process. The system is designed to be robust and dependable under extreme operating conditions, providing a long-lasting solution;

Groeneveld SingleLine System⁚ Operation and Principles

The Groeneveld SingleLine system is an automatic greasing system designed to provide efficient lubrication using a single main line. Unlike the Twin system, the SingleLine system uses one line to deliver grease to all lubrication points sequentially. The system’s operation is based on a progressive method, where each point receives grease one after the other. This setup is effective for various applications, ensuring that grease is distributed to each point. It provides an effective method for automatic lubrication and is designed to be reliable and robust. The SingleLine system is constructed to provide a long operational life and minimize errors during operation. The principle behind the SingleLine system is to deliver the correct amount of grease to each point in a sequence, which is controlled by the system’s components. The system’s simplicity contributes to its reliability and ease of maintenance. It works by utilizing pressure from the pump to push the grease through the main line, then through the metering valves to each lubrication point. The system is designed to provide a consistent greasing cycle, ensuring that all connected points receive adequate lubrication.

System Components⁚ Pumps, Reservoirs, and Control Units

The Groeneveld automatic greasing system comprises several essential components, including the pump, reservoir, and control unit. The electric plunger pump is a vital part, responsible for delivering grease from the reservoir to the lubrication points. The pump often includes an integrated grease reservoir that stores the lubricant, ensuring a continuous supply. The reservoir is designed to hold enough grease for extended periods, reducing the need for frequent refills. The control unit, typically integrated with the pump, manages the greasing cycles. It includes a database that allows users to set parameters such as lubrication frequency and the amount of grease to be dispensed. The control unit often features a display for monitoring and adjustment. These components work together to ensure the automatic greasing system operates efficiently and effectively. The pump delivers the grease, the reservoir stores it, and the control unit manages the entire process, making sure that each lubrication point receives the right amount of grease at the right time. The components are designed to work together to provide reliable and consistent lubrication.

Greasing Cycles and System Functionality

Groeneveld automatic greasing systems operate through precisely controlled greasing cycles, ensuring that all connected points receive lubrication at optimal intervals. The system’s functionality is centered on the pump, which delivers a metered amount of grease based on predefined parameters set by the control unit. The greasing cycle begins with the control unit signaling the pump to initiate lubrication. The pump then draws grease from the reservoir and pushes it through the lines to the distribution blocks. These blocks ensure that each lubrication point receives its designated amount of grease. The cycle can be programmed to occur at specific time intervals or based on machine operation. The frequency and duration of the greasing cycle are adjustable to match the specific needs of the application. The system is designed to eliminate the need for manual greasing and ensures continuous and consistent lubrication which is vital for maintaining equipment performance and extending its lifespan. The system provides a precise and reliable method to prevent wear and tear from lack of adequate lubrication. This automated process significantly reduces the need for manual intervention, saving time and labor costs.

Technical Data of Groeneveld Greasing System Components

The technical data for Groeneveld greasing system components is crucial for understanding their performance and compatibility. The electric plunger pumps typically operate within a specific voltage range, and their flow rates are measured in cubic centimeters per minute, indicating the grease delivery capacity. The grease reservoirs come in various sizes, specifying the volume of grease they can hold. These reservoirs are designed to handle different types of grease, and their material composition ensures durability and resistance to chemical reactions. The control units have specific input/output specifications, including voltage requirements and communication protocols. The distribution blocks have precise metering parameters, ensuring each lubrication point receives the correct amount of grease. The grease lines are defined by their inner diameter and pressure ratings, crucial for the system’s ability to function efficiently. The quick couplers have specific connection types and pressure handling capabilities. The electrical wiring harness specifications include conductor sizes and insulation ratings. The signal lamps have designated voltage and current ratings. The specifications are essential for effective system maintenance and troubleshooting.

Maintenance Procedures for Groeneveld Systems

Maintaining Groeneveld greasing systems is vital for optimal performance and longevity. Regular inspection of the pump unit is crucial, checking for leaks or unusual noises. Verify the grease reservoir level and refill as needed, using the correct type of grease specified by Groeneveld. Inspect all grease lines and connections for wear, damage, or leaks, and tighten or replace them as necessary. Ensure the distribution blocks are free from blockages and are properly dispensing grease to each point. Check the control unit for any error codes or malfunctions, and consult the manual for troubleshooting steps. Verify the electrical wiring harness for any damage or loose connections. Test the system’s operation after any maintenance, making sure that each lubrication point receives the correct amount of grease. Clean all components regularly to prevent buildup of dirt or debris. Periodically check the signal lamp to ensure it functions correctly. Proper maintenance following these procedures extends the system’s lifespan and ensures reliable operation. Always refer to the specific manual for your system model.

Troubleshooting and Error Codes in Twin Systems

Groeneveld Twin systems, like any complex machinery, may encounter issues that require troubleshooting. Error codes are displayed by the control unit, and these codes provide crucial information about the problem. A common error is related to low grease levels, prompting a refill of the reservoir. Other issues may involve pump malfunctions, such as the pump not delivering grease, or the system being unable to maintain pressure. Blocked grease lines or distribution blocks can also result in error codes. Electrical faults, including damaged wiring or faulty connections, can disrupt the system’s operation. It is essential to consult the specific Twin system manual to accurately interpret error codes. The manual provides detailed troubleshooting steps, helping you to identify and fix the root cause of the issue. If you are unable to resolve the problem, you should always contact Groeneveld support. Regularly checking the system can prevent many issues, and addressing error codes promptly will ensure efficient operation.

Installation of the Twin-3 Automatic Greasing System

Installing the Groeneveld Twin-3 automatic greasing system requires careful planning and precise execution. The process begins with mounting the pump unit securely, ensuring it’s accessible for maintenance. The grease lines must be routed neatly, avoiding areas prone to damage. Distribution blocks should be placed strategically to efficiently supply grease to all lubrication points. Electrical wiring needs to be connected accurately, adhering to the system’s wiring diagram. Proper grounding is crucial for safety and system reliability. The control unit, which manages the greasing cycles, is typically mounted in a protected location. Once the system is installed, it’s essential to fill the reservoir with the correct type of grease, according to the manual’s recommendations. Thorough testing is needed to confirm that grease is reaching all intended locations. The installation manual provides step-by-step instructions, making the process straightforward when followed carefully. It’s always advisable to consult with a trained technician for complex installations, to ensure optimal performance and longevity of the system.

Groeneveld System Applications and Industries

Groeneveld automatic greasing systems find wide application across numerous industries, enhancing equipment reliability and reducing maintenance costs. In the transportation sector, these systems are invaluable for trucks, buses, and trailers, ensuring consistent lubrication of critical components. The logging industry benefits from the robust design of Groeneveld systems, which withstand harsh conditions and keep heavy machinery operational. Mining operations depend on these systems to lubricate excavators, loaders, and other equipment, minimizing downtime in demanding environments. The construction industry utilizes them on heavy machinery like cranes and bulldozers, maintaining smooth operation and extending equipment life. In waste management, Groeneveld systems are essential for refuse trucks and other vehicles, ensuring efficient and reliable operation. Furthermore, these systems are also used in transit, coach, emergency and automotive industries, providing essential lubrication and increasing productivity. Groeneveld’s versatility makes them a key asset for industries requiring continuous operation and reduced maintenance. Their ability to provide precise lubrication in extreme conditions further expands their application.

car wash equipment list pdf

Car wash equipment list pdf provides information on various equipment

Overview of Car Wash Industry

The car wash industry has experienced significant growth over the years, with many car wash owners investing in new equipment to improve efficiency and customer satisfaction.

According to industry reports, the car wash industry is expected to continue growing, driven by increasing demand for convenient and environmentally friendly car wash services.

Many car wash owners are turning to professional car wash equipment manufacturers and suppliers to provide them with high-quality equipment and expert advice on how to set up and maintain their car wash facilities.

The industry is also seeing a shift towards more sustainable and eco-friendly car wash practices, with many car wash owners investing in equipment that uses less water and energy.

Overall, the car wash industry is a dynamic and growing market, with many opportunities for car wash owners to invest in new equipment and technologies to improve their businesses.

By understanding the overview of the car wash industry, car wash owners can make informed decisions about their businesses and stay ahead of the competition.

Types of Car Wash Equipment

Various equipment types are available including tunnel and in-bay car wash systems and accessories

Automatic Car Wash Systems and Optional Accessories

Automatic car wash systems are a crucial part of the car wash industry, providing a efficient and effective way to clean vehicles. These systems typically include a series of brushes, sprayers, and dryers that work together to remove dirt and grime from the vehicle. Optional accessories such as wheel cleaners, tire scrubbers, and polishers can be added to enhance the cleaning process. The car wash equipment list pdf provides a comprehensive overview of the different types of automatic car wash systems and accessories available, including their features, benefits, and pricing. This information can be useful for car wash owners and operators looking to upgrade or expand their existing equipment. By understanding the different options available, they can make informed decisions about which systems and accessories to invest in, in order to provide the best possible service to their customers and stay competitive in the market, with various options.

Importance of Choosing the Right Equipment

Choosing right equipment is crucial for car wash business success and profitability always matters

Tips for Finding and Installing Car Wash Equipment

To find and install the right car wash equipment, consider several factors, including the size of the car wash, the type of vehicles being washed, and the budget for equipment. Researching different manufacturers and suppliers can help car wash owners make informed decisions. It is also essential to read reviews and ask for referrals from other car wash owners. Additionally, car wash owners should consider the maintenance and repair costs of the equipment, as well as the energy efficiency and environmental impact. Proper installation of the equipment is also crucial to ensure it functions correctly and safely. Car wash owners can hire professional installers or follow the manufacturer’s instructions to ensure a successful installation. By following these tips, car wash owners can find and install the right equipment for their business, leading to increased efficiency, productivity, and customer satisfaction. Regular maintenance and upkeep can also help extend the life of the equipment.

Car Wash Equipment Manufacturers and Suppliers

Motor City Wash Works and Hanna Car are notable manufacturers

Professional Wash Systems and MacNeil Wash Systems

Professional Wash Systems is a complete solution for car wash businesses, providing assistance in selecting the best location and overseeing the entire project. They work with all contractors involved in building the car wash complex. MacNeil Wash Systems, on the other hand, offers a range of car wash equipment and solutions. Their equipment is designed to provide efficient and effective cleaning of vehicles. MacNeil Wash Systems also emphasizes the importance of car wash safety, noting that the equipment used in washing a vehicle and the support equipment in the backroom can cause serious injury if not handled properly. As such, they stress the need for all car wash employees to understand the potential hazards and take necessary precautions. By choosing the right equipment and following proper safety protocols, car wash businesses can ensure a safe and successful operation. This is crucial for building a loyal customer base and maintaining a good reputation.

Car Wash Safety and Maintenance

Regular maintenance ensures equipment longevity and prevents accidents daily

Employee Training and Equipment Handling

Proper employee training is essential for efficient car wash operations, ensuring equipment is handled correctly and safely. A well-trained staff can prevent accidents and maintain equipment longevity.

Regular training sessions should be conducted to educate employees on equipment handling, safety procedures, and emergency protocols.

This includes understanding the functions of various car wash equipment, such as conveyors, pumps, and spray nozzles, as well as knowing how to perform routine maintenance tasks.

Effective employee training also enhances customer satisfaction, as a well-informed staff can provide better service and address customer concerns promptly.

Moreover, trained employees can identify potential equipment issues early on, allowing for prompt repairs and minimizing downtime.

By investing in employee training, car wash owners can ensure a safe, efficient, and profitable operation.

Additionally, a trained staff can adapt to new equipment and technologies, staying up-to-date with the latest advancements in the car wash industry.

Posted in PDF

bug out bag checklist pdf

Creating a bug out bag checklist is crucial for emergency preparedness, and a downloadable pdf is a great starting point for a comprehensive survival plan always available online․

Importance of Preparation

Having a well-prepared bug out bag can make all the difference in an unexpected situation, providing a sense of security and comfort․ Preparation is key to ensuring survival and safety in emergency situations․ A comprehensive bug out bag checklist pdf can help individuals prepare for any situation, whether it’s a natural disaster or power outage․ The importance of preparation cannot be overstated, as it can help save lives and reduce stress․ By taking the time to prepare a bug out bag, individuals can ensure they have the necessary items to survive for an extended period․ This includes food, water, first aid supplies, and communication devices․ A bug out bag checklist pdf can provide a detailed list of essential items to include, making it easier to prepare and stay safe․ Proper preparation is essential for emergency situations․

Comprehensive Bug Out Bag List

A comprehensive bug out bag list should include essential items such as food, water, and first aid supplies․ The list should be tailored to meet individual needs, taking into account factors such as climate and geography․ A bug out bag checklist pdf can provide a detailed and organized list of items to include, making it easier to prepare and stay safe․ The list should be regularly reviewed and updated to ensure it remains relevant and effective․ By including a wide range of essential items, a comprehensive bug out bag list can help individuals prepare for any situation, from natural disasters to power outages․ A well-organized list can also help reduce stress and anxiety, providing a sense of security and comfort in emergency situations․ This can be achieved with a downloadable bug out bag checklist pdf․

Creating a Bug Out Bag Checklist

Utilize online resources to create a personalized bug out bag checklist with essential items for emergency preparedness always․

Downloadable PDF Checklist

A downloadable PDF checklist is a convenient way to get started on creating a bug out bag, providing a comprehensive list of essential items to include․ The PDF can be easily accessed and printed, allowing individuals to review and update their checklist as needed․ Many online resources offer free downloadable PDF checklists, making it simple to find and utilize one that suits specific needs․ By using a downloadable PDF checklist, individuals can ensure they have a well-organized and thorough bug out bag, helping to provide peace of mind in emergency situations․ The checklist can be customized to fit individual needs, and the PDF format makes it easy to share with family members or friends․ Overall, a downloadable PDF checklist is a valuable tool for creating a effective bug out bag․

Editable Excel or Google Sheets Version

An editable Excel or Google Sheets version of the bug out bag checklist offers a highly customizable and interactive way to manage emergency preparations․ This format allows individuals to easily add, remove, or modify items to suit their specific needs and circumstances․ The spreadsheet can be shared with family members or friends, enabling collaborative planning and updating․ With formulas and sorting capabilities, the Excel or Google Sheets version helps to organize and prioritize items, ensuring a comprehensive and tailored bug out bag․ By utilizing this format, individuals can create a personalized and dynamic checklist that can be regularly reviewed and updated, providing a proactive approach to emergency preparedness and helping to ensure a well-stocked and effective bug out bag․ This version is ideal for those who want a high degree of control over their checklist․

Ultimate Bug Out Bag Checklist

Comprehensive bug out bag checklist includes essential items for survival and emergency situations always available online in pdf format for easy access and planning purposes․

104 Item Checklist

A comprehensive 104 item checklist is a valuable resource for creating a bug out bag, providing a detailed list of essential items for survival and emergency situations․ This checklist can be downloaded as a pdf, allowing for easy access and printing․ The items included in the checklist are carefully selected to ensure that all basic needs are met, from food and water to first aid and self-defense․ The checklist is organized into categories, making it easy to prioritize and pack the most important items․ With this checklist, individuals can create a personalized bug out bag that meets their specific needs and ensures their safety in emergency situations․ The pdf format makes it easy to share and update the checklist, and it can be accessed from anywhere, making it a convenient and reliable resource for emergency preparedness․

Key Considerations for a Quality Bug Out Bag

When selecting a bug out bag, several key considerations must be taken into account to ensure the bag is of high quality and meets individual needs․ The bag should be durable, water-resistant, and have multiple compartments to organize gear․ It is also important to consider the size and weight of the bag, as well as the material it is made of․ A good bug out bag should be comfortable to carry and have sturdy straps and zippers․ Additionally, the bag should be easy to access and have a clear layout, making it simple to find essential items quickly․ By considering these factors, individuals can choose a high-quality bug out bag that will serve them well in emergency situations and provide peace of mind․ The right bag can make all the difference in a crisis situation, and careful selection is crucial․

Essential Bug Out Bag Items

Emergency supplies and equipment are vital components of a bug out bag checklist always․

Full List of Essential Items

A comprehensive bug out bag checklist pdf should include a full list of essential items such as food, water, first aid supplies, and shelter materials․
These items are crucial for survival in emergency situations and should be carefully selected and packed․
The list should also consider personal and hygiene items, as well as tools and equipment for self-defense and navigation․
It is also important to include communication devices and important documents in the bug out bag․
The full list of essential items should be regularly reviewed and updated to ensure that it remains relevant and effective․
A well-planned bug out bag checklist pdf can help individuals and families to be better prepared for emergency situations and to stay safe․
The key is to be prepared and to have a plan in place, and a comprehensive bug out bag checklist pdf is an essential part of that plan․

Prioritizing Essential Items

Prioritizing essential items is crucial when creating a bug out bag checklist pdf, as it ensures that the most critical items are included and easily accessible․
A thorough review of the list should be conducted to determine which items are most important for survival․
The priority items should be packed in an easily accessible location, such as the top or front pocket of the bag․
This allows for quick access to critical items, such as first aid supplies, food, and water․
The prioritization process should also consider the specific needs of each individual, such as medications or special dietary requirements․
By prioritizing essential items, individuals can ensure that they are well-prepared for emergency situations and can respond effectively․
A well-prioritized bug out bag checklist pdf can help to save lives and reduce the risk of injury or illness in emergency situations․

and Download

Finalize your emergency plan with a downloadable bug out bag checklist pdf for free online always․

Download Your Free PDF

To get started with your emergency preparedness plan, download your free bug out bag checklist pdf online․ This comprehensive guide covers all the essential items you need to include in your bag․ With a downloadable pdf, you can easily access and print out your checklist, making it simple to stay organized and prepared․ The pdf is available for free and can be downloaded directly to your device, allowing you to start planning your emergency kit right away․ By downloading your free pdf, you can take the first step towards creating a comprehensive bug out bag that will help keep you safe in any situation․ The downloadable pdf is a valuable resource that can help you stay prepared and ensure your safety in emergency situations, and it is easily accessible online․

Final Thoughts on Bug Out Bag Preparation

Preparing a bug out bag requires careful consideration and planning, and having a comprehensive checklist is essential․ A well-prepared bug out bag can provide peace of mind and help ensure safety in emergency situations․ It is important to review and update your bug out bag regularly to ensure it remains relevant and effective․ By taking the time to prepare a bug out bag and staying informed, individuals can help protect themselves and their loved ones․ A bug out bag checklist pdf can serve as a useful resource in this process, providing a handy guide to follow․ Overall, preparing a bug out bag is an important step in emergency preparedness, and with the right resources and planning, individuals can help stay safe in uncertain situations and be better equipped to handle emergencies․ Proper planning is key to a successful bug out bag․

Posted in PDF

manual sliding wooden gates

Manual sliding wooden gates are a popular choice for homeowners seeking a blend of functionality and aesthetic appeal. These gates offer a space-saving alternative to traditional swinging gates, operating smoothly on a track. They are often chosen for their convenience and ease of installation.

Benefits of Choosing Sliding Wooden Gates

Sliding wooden gates provide numerous advantages, making them a popular choice for many homeowners. Firstly, they are excellent space-savers, requiring no swing area, which is especially beneficial for driveways with limited space. Secondly, they can enhance security, as they are generally more difficult to force open compared to traditional swing gates. Additionally, wooden gates offer a natural aesthetic, complementing various architectural styles and landscaping designs. The use of wood allows for customization in terms of style, finish, and overall look, adding a touch of elegance and warmth to the property. Moreover, these gates are cost-effective, with simple wooden designs being relatively inexpensive to build. Furthermore, they provide privacy, acting as a solid barrier to keep your property secluded. Lastly, wooden gates are generally easy to operate, making them convenient for daily use.

Space-Saving Advantages of Sliding Gates

One of the primary benefits of choosing sliding gates, particularly manual wooden ones, is their remarkable space-saving capabilities. Unlike traditional swing gates that require a large arc of clearance to open and close, sliding gates operate linearly along a track, making them ideal for areas with limited space, such as narrow driveways or entrances. This functionality is particularly useful in situations where space is constrained, preventing any disruption to surrounding areas. The sliding design ensures that no additional room is needed for the gate to move, maximizing the usable space within the property. This feature makes sliding gates a practical choice for homeowners who value efficient use of space and seek to avoid spatial conflicts with landscaping or other structures. Furthermore, they can be installed close to fences, further optimizing the available area.

Aesthetic Appeal of Wooden Gates

Wooden gates offer a unique aesthetic appeal that can significantly enhance the look of a property. The natural beauty of wood provides a warm and inviting feel, blending seamlessly with various architectural styles and landscapes. Whether it’s a rustic, traditional design or a more contemporary look, wooden gates can be customized to fit specific aesthetic preferences. The versatility of wood allows for a range of finishes, from natural stains that highlight the grain to painted options that match exterior color schemes. Furthermore, wooden gates can be crafted with intricate designs or kept simple and clean, depending on the desired style. This adaptability makes them an excellent choice for homeowners who are keen on creating a beautiful and personalized entrance. The timeless appeal of wood ensures that these gates remain stylish and attractive for years to come, contributing to the overall curb appeal of the property.

Planning and Preparation

Before starting construction, careful planning is crucial. This includes accurately measuring the gate opening and determining the desired slide direction. Gathering all necessary materials and tools is also essential for a smooth build.

Measuring the Gate Opening Accurately

Accurate measurement is the first and most critical step in constructing a sliding gate. Begin by carefully measuring the entire opening where the gate will be installed. It’s vital to determine the exact width between the posts or structures where the gate will sit. Do not assume the opening is perfectly square; measure at the top, middle, and bottom to account for any variations. These measurements are not for a flush fit, as you need to factor in space for hardware and ground clearance. Remember to consider that wood might expand or shrink slightly with the weather. Leave a few inches of ground clearance to prevent dragging and ensure smooth operation. These precise measurements will dictate the dimensions of the gate frame and ensure the gate will operate efficiently within the designated space. Failing to measure accurately will impact the entire project.

Determining Slide Direction⁚ Inside or Outside

Deciding whether your sliding gate will slide inside or outside of your fence line is a crucial early decision. The chosen direction will impact the hardware placement and the available space for gate operation. An inside slide means the gate will move along the inner side of the fence, requiring sufficient space within your property. This choice might be preferred for aesthetic reasons or to maximize space outside. Conversely, an outside slide means the gate will move along the exterior of your fence. Consider the landscape and any obstructions, like trees or other structures, that might interfere with the gate’s movement. Consider the terrain to ensure that the sliding path is clear and level. This decision impacts the gate’s functionality, ease of use, and overall appearance. Carefully assess both options before proceeding.

Materials and Tools Checklist

Before commencing construction of your manual sliding wooden gate, ensure you have all necessary materials and tools. You’ll need lumber for the gate frame and planks, along with diagonal bracing for added stability. Gather the sliding gate hardware kit, which typically includes the track, rollers, and any necessary brackets. You may require posts for mounting the track, depending on your setup. Don’t forget fasteners like screws and bolts, as well as wood glue. Essential tools include a measuring tape, level, saw, drill, and possibly a router for detailed work. A circular saw will be helpful for making straight cuts. Having a square is important to ensure the frame is square. Safety gear like gloves and glasses are also essential. This preparation ensures a smooth and efficient building process.

Construction of the Wooden Gate

Building a sturdy wooden gate involves creating a robust frame, adding diagonal bracing for stability, and then installing vertical planks or tubing. Careful measuring and precise cutting are essential for a successful build.

Building the Gate Frame

The initial step in constructing your sliding wooden gate involves building a strong and square frame. This frame serves as the foundation for the entire gate. Carefully measure and cut the wood pieces according to your planned dimensions, ensuring they are accurate. Assemble the frame using robust joints, whether you choose mortise-and-tenon, dovetail, or simpler methods like screws and corner brackets. During assembly, regularly check the frame with a level to ensure it’s perfectly square and plumb. Diagonal measurements should be equal to confirm squareness. This foundational step is crucial for the structural integrity and smooth operation of your sliding wooden gate, so precision is key.

Adding Diagonal Bracing for Stability

To significantly enhance the structural stability of your wooden gate frame, adding diagonal bracing is essential. These braces prevent the gate from sagging or warping over time, ensuring smooth operation. Install the diagonal supports across the back of the gate frame, connecting opposite corners. Use screws or bolts to firmly secure the bracing in place. The diagonal pieces should be properly measured and cut to fit snugly within the frame, providing maximum support. This crucial step will greatly improve the longevity and functionality of your sliding wooden gate, preventing common issues like sagging and ensuring consistent performance. It’s a simple addition that makes a significant difference;

Installing Vertical Tubing or Planks

Once the gate frame is constructed and diagonal bracing is added, the next step involves installing either vertical tubing or planks to create the gate’s surface. If using tubing, pre-drill holes in the frame before welding for quicker installation, ensuring they are evenly spaced for a consistent look. For planks, attach them securely to the frame using screws, ensuring proper alignment and spacing. Whether you choose tubing or planks, ensure they are firmly connected to the frame for maximum stability. Carefully measure and cut each piece to fit perfectly within the frame to achieve a professional and polished finish. This process is vital for the gates overall strength and aesthetic appearance.

Installation Process

The installation process involves several key steps, including mounting the sliding mechanism, ensuring the top rail is correctly aligned, and securing the gate to the track and posts for smooth operation.

Installing the Sliding Mechanism

Installing the sliding mechanism is a crucial step in the process of setting up a manual sliding wooden gate. This typically involves attaching the necessary hardware to both the gate itself and the supporting posts. The track, which the gate will slide along, needs to be securely fixed to the ground or the fence line, ensuring it’s level and straight. The wheels or rollers that will allow the gate to move should be carefully attached to the gate frame, making sure they align perfectly with the track. Proper alignment and secure fastening of these components are vital for the smooth and reliable operation of the sliding gate. This stage requires precision and attention to detail for optimal functionality.

Ensuring Proper Alignment of the Top Rail

Ensuring the proper alignment of the top rail is absolutely critical for the smooth operation of a manual sliding wooden gate. The top rail serves as a guide, and if it’s not perfectly aligned, the gate may bind, stick, or even come off the track. This process typically involves careful measurement and precise installation of any supporting hardware attached to the fence posts, ensuring they are level and parallel to the track below. It is essential to use a level to confirm the top rail is perfectly straight, as any deviation can cause problems. This alignment also ensures that the gate moves smoothly and without excessive force, preventing premature wear and tear on the gate and its components. This step is vital to a successful installation.

Securing the Gate to the Track and Posts

Securing the gate to the track and posts is a crucial step in ensuring the stability and functionality of your manual sliding wooden gate. After the gate is correctly positioned on the track, it must be firmly attached to the guide posts and the track itself. This usually involves using bolts or other appropriate fasteners to secure the gate to the sliding mechanism. The aim is to achieve a secure fit that allows the gate to glide smoothly without any wobble or play. Additionally, this process also may include installing end stops to prevent the gate from sliding off the track at either end. Ensuring proper attachment prevents unwanted movement. Finally, inspect all fixings to make sure they are tight and secure.

Troubleshooting Common Issues

Even with careful installation, issues like sagging, sticking, or misalignment can occur with manual sliding wooden gates. Addressing these problems promptly ensures the gate’s longevity and smooth operation.

Addressing Gate Sagging

Gate sagging is a common issue with wooden sliding gates, often caused by the weight of the wood or improper construction. This can lead to the gate not sliding smoothly and potentially scraping the ground. To address this, first inspect the gate frame for any signs of weakness or loose joints. Adding diagonal bracing can significantly increase the gate’s structural stability and prevent further sagging. Ensure that the gate’s wheels or rollers are properly aligned and functioning smoothly within the track. If the gate is still sagging, consider adjusting the support posts or track to ensure they are level and properly supporting the gate’s weight. Reassembly might be necessary after troubleshooting.

Dealing with Sticking Gates

A sticking sliding gate can be frustrating, often stemming from a few key issues. Firstly, check the track for any obstructions such as debris, dirt, or rust, which can impede the smooth movement of the rollers. Regularly cleaning and lubricating the track can help prevent sticking. If the track is clear, examine the gate’s rollers or wheels for wear and tear, ensuring they are rotating freely. Misalignment can be another cause, indicating that the gate may need to be disassembled and reinstalled. Verify that the gate is square and that the top rail is properly aligned, as even slight deviations can lead to sticking. Pay close attention to any hardware that is loose or damaged.

Adjusting for Uneven Ground

Uneven ground presents a significant challenge when installing a sliding gate, potentially causing it to drag, scrape, or bind. It is crucial to ensure the ground beneath the gate is reasonably level before installation. If the ground isn’t level, consider options like adding shims or adjusting the gate’s height to maintain adequate clearance. Always ensure the gate’s casters or wheels are correctly aligned and can move smoothly along the track. For more significant slopes, professional consultation may be necessary to assess the need for landscaping or additional structural supports. Remember that even a small deviation in ground level can drastically affect a sliding gate’s functionality. Therefore, careful planning and measurement are crucial for smooth operation.

select medical employee handbook pdf

Medical employee handbooks are vital resources for staff, outlining policies and procedures. These handbooks clarify employment terms, benefits, and standards of conduct. They serve as a guide for daily operations within a healthcare setting. This ensures consistent practices across all medical staff.

Purpose of a Medical Employee Handbook

The primary purpose of a medical employee handbook is to clearly communicate the organization’s expectations and policies to all staff members. This document serves as a comprehensive guide, ensuring that every employee understands their rights, responsibilities, and the procedures they must follow. It aims to foster a consistent, professional, and compliant work environment. The handbook also serves as a reference tool for employees to quickly access information regarding their employment, such as benefits, leave policies, and standards of conduct. By providing clear guidelines, the handbook minimizes potential misunderstandings and conflicts. This handbook establishes a foundation for a harmonious and productive workplace. Moreover, it ensures that employees are well-informed about their roles and the organization’s commitment to providing high-quality healthcare services. Ultimately, this promotes transparency, fairness, and a shared understanding among all personnel, contributing to a positive workplace culture.

Key Components of a Medical Employee Handbook

A comprehensive medical employee handbook includes key components like employment terms, compensation details, benefits overviews, essential policies, and procedures. These elements ensure clarity and compliance for all staff members.

Employment Terms and Conditions

The medical employee handbook clearly outlines the terms and conditions of employment, establishing a formal agreement between the healthcare facility and its staff. This section will detail the type of employment, whether full-time, part-time, or contract-based, specifying the duration of the employment period. It covers the probationary period, if applicable, and explains the procedures for permanent employment status; Furthermore, this segment defines the employee’s job title, responsibilities, and reporting structure within the organization, ensuring clarity in roles and expectations. It will include information about the work schedule, detailing the standard hours of operation, and any potential requirements for overtime or on-call duties. The handbook will specify the policies regarding employee conduct, performance expectations, and the process for addressing performance issues or disciplinary actions. This section also includes the terms related to termination of employment, both voluntary and involuntary, outlining the required notice periods and any post-employment obligations. This section ensures that all employees are aware of the general framework governing their relationship with the medical practice or healthcare facility.

Compensation and Benefits Overview

This section provides a detailed overview of the compensation and benefits package offered to medical employees. It clearly states the method of payment, whether hourly, salaried, or commission-based, along with the pay frequency. The handbook will outline the compensation structure, including the base pay rate or salary range for each position, and any potential opportunities for salary increases or bonuses. Information about overtime pay, if applicable, will be provided, along with the conditions under which it is earned. Furthermore, this section covers the various benefits offered to employees, such as health insurance, dental and vision plans, retirement savings plans (e.g., 401k), and life insurance. It will explain the eligibility criteria for each benefit, the enrollment process, and the contribution rates for both the employer and employee. The handbook will also outline any other benefits, such as employee assistance programs, tuition reimbursement, or professional development opportunities. This section ensures that all employees are well informed about the total compensation package provided by the medical practice or healthcare facility.

Paid Time Off (PTO) and Leave Policies

This part of the employee handbook describes the policies regarding paid time off (PTO) and various leave options available to medical staff. It details how PTO is accrued, whether it is based on hours worked or a fixed annual amount, and explains any waiting periods before employees can use their accrued time. The section will clarify what constitutes permissible usage of PTO, such as vacation, personal days, and sick leave, providing specific guidelines for each purpose. The policy on requesting time off, including the required notice period and the approval process, will be outlined. Furthermore, the handbook will cover other leave policies, such as family and medical leave (FMLA), maternity and paternity leave, and any state-specific leave requirements, including eligibility criteria and duration of leave. It will explain the process for requesting leave, including necessary documentation and the impact of leave on benefits and job security. This section will ensure employees understand their rights and responsibilities regarding time off and leave.

Health Insurance and Other Benefits

This section of the medical employee handbook details the health insurance options and other benefits available to employees. It explains the different health insurance plans offered, including coverage levels, premiums, deductibles, and co-pays. The handbook outlines the enrollment process, eligibility requirements, and deadlines for enrolling in health insurance. Information about other benefits, such as dental and vision insurance, will be provided, including similar details on coverage, costs, and enrollment. The handbook will also explain employer-sponsored retirement plans, such as 401(k) or pension plans, including contribution matching, vesting schedules, and investment options. Other benefits, such as life insurance, disability insurance, and employee assistance programs (EAP), may also be included in this section. Eligibility criteria for each benefit will be clearly defined, as well as how to access them. Contact information for benefits administrators or human resources will be provided to address any questions employees may have, ensuring that employees fully understand their benefits package.

Essential Policies and Procedures

This section outlines critical policies and procedures. It covers standards of conduct, non-discrimination, health and safety, and conflict of interest. These guidelines ensure a safe, respectful, and compliant work environment for all medical staff.

Standards of Conduct and Professionalism

Maintaining high standards of conduct and professionalism is paramount in a medical setting. Employees are expected to adhere to ethical guidelines, demonstrating integrity and respect in all interactions. This includes maintaining patient confidentiality and privacy, as well as treating all colleagues and patients with courtesy and dignity. Professional behavior also encompasses punctuality, reliability, and a commitment to quality care. Employees should familiarize themselves with the specific standards of conduct outlined in this handbook, which include but are not limited to appropriate attire, proper use of technology, and adherence to ethical codes of conduct. Any violations of these standards may lead to disciplinary actions. A commitment to professionalism ensures a positive and productive work environment, fostering trust and confidence among patients and colleagues alike. These standards are integral to the reputation of the medical practice and the overall quality of patient care provided.

Non-Discrimination and Equal Opportunity Policy

Our medical practice is firmly committed to a policy of non-discrimination and equal opportunity for all employees and applicants. We strive to create a workplace free from discrimination based on race, color, religion, sex, national origin, age, disability, or any other protected characteristic. This commitment extends to all aspects of employment, including hiring, promotion, training, and compensation. We believe that a diverse workforce enhances our ability to provide the best possible care to our patients. All employees are expected to treat each other with respect and understanding, and any form of harassment or discrimination will not be tolerated. We are dedicated to fostering an inclusive environment where everyone has an equal opportunity to succeed and contribute to the mission of our medical practice. This policy is integral to our values and our commitment to providing ethical and equitable healthcare services.

Health and Safety Regulations

Maintaining a safe and healthy work environment is a top priority for our medical practice. All employees must adhere to the established health and safety regulations to ensure the well-being of themselves, their colleagues, and our patients. These regulations include protocols for infection control, handling hazardous materials, and responding to emergencies. We provide regular training sessions to keep our staff updated on the latest safety procedures and best practices. Employees are responsible for reporting any unsafe conditions or incidents immediately. Our commitment to health and safety is not just a policy; it is a core value that guides our daily operations; We continuously strive to improve our safety measures and foster a culture of awareness and prevention. Compliance with these regulations is essential for a secure and productive workplace.

Conflict of Interest Guidelines

Maintaining the integrity and impartiality of our medical practice is crucial. Therefore, all employees must adhere to strict conflict of interest guidelines. These guidelines are designed to prevent situations where personal interests could potentially compromise professional judgment or patient care. Employees are required to disclose any relationships or financial interests that could be perceived as a conflict. This includes relationships with patients, vendors, or other healthcare providers. We emphasize transparency and require full disclosure. If a potential conflict arises, it must be reported to management immediately. Failure to disclose conflicts or engaging in activities that create conflicts of interest may result in disciplinary action. We are committed to upholding the highest ethical standards in all our professional interactions and decisions.

Access and Availability

The employee handbook is readily available to all staff members. It can be accessed on our company website and is downloadable as a PDF file. Employees are encouraged to review it regularly for updates.

Where to Find the Employee Handbook

The employee handbook is a crucial document for every member of our team, and ensuring easy access is a priority. You can locate the most current version of the handbook on our company website, which is accessible 24/7. This digital format allows you to conveniently review the policies and procedures from any device, whether you are in the office, at home, or on the go. Additionally, for those who prefer a hard copy, the handbook is available for download in PDF format. This allows you to print a personal copy. If you have any difficulties accessing the handbook, please reach out to your Line Manager or the Human Resources department for assistance. We encourage everyone to familiarize themselves with the contents of the handbook, as it is a vital resource for understanding our workplace.

Importance of Handbook Compliance

Adherence to the employee handbook is essential for maintaining a professional and compliant workplace. It ensures that all employees understand their responsibilities and the standards expected. Compliance fosters a fair and consistent environment for everyone;

Employee Responsibilities and Acknowledgement

Employees are responsible for thoroughly reading and understanding the medical employee handbook upon commencement of employment. This includes familiarizing themselves with all policies, procedures, and guidelines contained within. It is crucial that each team member acknowledges their understanding and agreement to adhere to these stipulations throughout their tenure. Employees must actively participate in maintaining a safe, respectful, and compliant work environment as outlined in the handbook. This includes following protocols for patient care, data protection, and professional conduct. Any questions or clarifications regarding the handbook should be promptly addressed with the appropriate supervisor or human resources department. Furthermore, employees have an ongoing obligation to stay updated on any revisions or amendments to the handbook. By signing an acknowledgment form, employees confirm their commitment to uphold the standards set forth by the organization in the employee handbook. This collective effort ensures a smooth and ethical operation of the medical practice.

Posted in PDF

bladehq steel guide

Blade HQ’s steel guide serves as a helpful resource for individuals eager to understand different types of knife steel and their attributes. It offers a digestible overview, simplifying complex information for a wider audience.

Overview of the Guide’s Purpose

The primary aim of Blade HQ’s steel guide is to demystify the world of knife steels for both novice and seasoned knife enthusiasts. It seeks to provide a clear, concise, and accessible explanation of the various steel types, their unique properties, and how these properties influence a knife’s performance. Rather than overwhelming users with overly technical jargon, the guide strives to present the information in an easily digestible format, making it a valuable learning tool for anyone looking to understand the intricacies of knife steel. While not claiming to be a definitive or all-encompassing resource, the guide serves as an excellent starting point for understanding key factors like edge retention, corrosion resistance, and toughness, empowering users to make more informed choices when purchasing knives. It aims to bridge the gap between highly technical data and practical knowledge, helping users appreciate the importance of steel selection in knife performance and suitability.

Key Factors in Steel Quality

Several key factors determine steel quality, impacting knife performance. These include edge retention, corrosion resistance, and toughness, all crucial for a blade’s overall functionality and longevity.

Edge Retention

Edge retention is a crucial aspect of steel quality, referring to a blade’s ability to maintain its sharpness during use. Steels with high edge retention require less frequent sharpening, which is beneficial for everyday carry and demanding tasks. Various factors influence edge retention, including the steel’s composition, hardness, and the presence of carbides; The guide highlights that some steels, like ZDP-189, excel in edge retention because of their high carbon content and hardness. Blade HQ’s guide ranks steels based on their edge retention, though some users have noted discrepancies compared to other sources. This emphasizes the importance of understanding the nuanced factors that determine a steel’s ability to hold an edge, rather than relying solely on rankings. For example, CPM-M4’s ranking in the guide is debated, with some sources placing it lower than how Blade HQ rates it.

Corrosion Resistance

Corrosion resistance is another vital factor in steel quality, indicating a steel’s ability to resist rust and degradation. This is particularly important for knives exposed to moisture or humid environments. The guide emphasizes that steels with high chromium content, such as CPM-154 and CPM-20CV, exhibit excellent corrosion resistance. Blade HQ’s steel guide provides a helpful overview, allowing users to easily compare the corrosion resistance of different steels. However, it is important to note that a steel’s resistance to corrosion is not the sole determiner of quality. Factors such as edge retention and toughness also play significant roles. The guide highlights that while some steels excel in corrosion resistance, they may not be the top performers in other areas. Therefore, choosing the right steel depends on the intended use of the knife and the environment it will be used in, rather than just focusing on one factor.

Toughness and Durability

Toughness and durability are critical factors discussed in Blade HQ’s steel guide, highlighting a steel’s capacity to withstand impact and resist chipping or breaking. The guide emphasizes that a steel’s durability is closely linked to its overall performance, influenced by composition, processing, and finish. A durable blade is essential for demanding tasks. The guide points out that some steels, like CPM-M4, are known for their high toughness, making them suitable for hard-use applications, while others may prioritize other traits. Understanding a steel’s durability is paramount for choosing the correct blade for its intended purpose. It is not always the case that the steel with the highest hardness or edge retention is also the most durable. The guide serves as a valuable starting point for understanding how different factors contribute to the toughness and durability of a blade, assisting users in making informed decisions.

Steel Classification

Blade HQ’s guide categorizes steels into groups like premium, high-end, and mid-range. This classification helps users understand the relative quality and performance characteristics of different steels for knife blades.

Premium Steels

Blade HQ’s steel guide identifies certain steels as “premium,” indicating they possess superior qualities in terms of edge retention, toughness, and corrosion resistance. These steels often utilize advanced manufacturing processes, such as powder metallurgy, which enhances their performance. Examples like CPM-M4 and CPM-S90V, known for exceptional edge retention, are frequently placed in this category. The guide highlights that while these steels may be more expensive, their enhanced capabilities make them a worthwhile investment for users seeking top-tier performance. The classification helps consumers choose the right steel for their needs, especially for high-demand applications where performance is paramount. The guide also suggests that premium steels are chosen for their durability and their ability to withstand hard use.

High-End Steels

Blade HQ’s steel guide also features a category of “high-end steels,” which represents a step below their premium offerings. These steels still offer very good performance characteristics, often striking a balance between edge retention, toughness, and corrosion resistance. The guide suggests that these steels are ideal for users who want good performance without the premium price tag, and that these steels are generally more readily available than the premium steels. Steels within this grouping might include those that do not have quite the same level of edge retention as premium steels, but still offer an excellent overall experience. High-end steels are a great choice for users looking for enhanced capabilities compared to mid-range options, and are often found on knives designed for everyday carry.

Mid-Range Steels

The Blade HQ steel guide includes a section dedicated to “mid-range steels,” which are often seen as offering a good balance between performance and affordability. These steels typically provide decent edge retention, adequate corrosion resistance, and a reasonable level of toughness, making them suitable for general use and everyday tasks. While they might not excel in any one area as much as premium or high-end steels, mid-range steels are often chosen for their reliability and cost-effectiveness. They are commonly found in many production knives and offer a good entry point for those new to knife collecting or those looking for a practical, dependable tool without breaking the bank. This group is often a good starting point when choosing a knife, and the guide provides additional information about them.

Specific Steels Mentioned

Blade HQ’s guide highlights several specific steels, including CPM-M4, known for its edge retention, CPM-S90V, recognized for its high wear resistance, and CPM-154, valued as an excellent all-around EDC steel.

CPM-M4

CPM-M4 is often cited within the Blade HQ guide as a premium steel, celebrated for its exceptional edge retention capabilities. It’s a high-speed tool steel produced using Crucible’s particle metallurgy process, which results in a very fine grain structure. This fine grain structure contributes significantly to its impressive ability to hold a sharp edge for extended periods, making it a favorite among users who prioritize cutting performance. The guide often positions CPM-M4 as a top contender when comparing edge retention, although some sources indicate that its ranking in comparison to other steels may be debatable. While it’s recognized for its superior performance, it’s worth noting that CPM-M4 requires a bit more care compared to more corrosion-resistant steels due to its lower chromium content. It is also noted that it is very tough steel, but the BladeHQ guide differs with some other expert data on the subject.

CPM-S90V

CPM-S90V, frequently highlighted in Blade HQ’s steel guide, is a premium stainless steel renowned for its outstanding edge retention. This steel is manufactured using the Crucible Particle Metallurgy process, ensuring a uniform distribution of carbides, which helps to maintain a keen edge for an extended period. The guide often positions CPM-S90V as a top-tier option for users demanding the highest cutting performance, but some sources show that its ranking is debatable. It is known for its high wear resistance, a key factor in its exceptional edge-holding ability, making it a popular choice for high-end knives. Although it excels in edge retention, CPM-S90V can be more challenging to sharpen compared to some other steels due to its high vanadium content. The Blade HQ guide is not the only source of information for this particular steel.

CPM-154

CPM-154, as presented in Blade HQ’s steel guide, stands out as an excellent all-around choice for everyday carry (EDC) knives. This steel is a powder metallurgy version of 154CM, offering improved consistency and performance. Blade HQ often emphasizes its above-average edge retention, striking a balance between holding a sharp edge and being relatively easy to sharpen. The guide also notes its commendable corrosion resistance, making it suitable for various environments. CPM-154 is a popular choice for those who need a reliable steel that performs well in daily use without requiring excessive maintenance. While not at the absolute top in any single category, its well-rounded attributes make it a preferred option. The guide positions CPM-154 as a good all-around performer for daily use. It’s a steel that’s both practical and capable, according to Blade HQ.

Accuracy and Criticisms

While valuable, Blade HQ’s steel guide faces criticisms regarding accuracy, with some users noting discrepancies when compared to data from sources like Larrin Thomas’s research on knife steels.

Comparison with Larrin Thomas’s Data

Blade HQ’s steel guide, while aiming to simplify complex information, has been noted by some users to differ from the data presented by Larrin Thomas, a metallurgist known for his detailed work on knife steels. Specifically, the guide’s rankings of certain steels, such as CPM-M4, have been questioned. Blade HQ positions CPM-M4 with higher edge retention than steels like S90V, while Larrin Thomas’s data suggests a closer performance to S30V. Such discrepancies raise concerns about the guide’s accuracy and reliance on scientific data. It appears that while Blade HQ acknowledges Larrin’s work and even consulted with him, the final published guide differs from his findings, causing some confusion and debate among knife enthusiasts who rely on the guide for information. This highlights the importance of consulting multiple sources when researching knife steel properties.

vaillant ecotec plus 624 user manual

The Vaillant Ecotec Plus 624 user manual provides essential information for installation, maintenance, and servicing of the boiler, available for download on the official Vaillant website, in pdf format, with detailed instructions.

Overview of the Boiler Model

The Vaillant Ecotec Plus 624 is a wall-hung, room-sealed, fan-assisted condensing boiler, designed for high efficiency and reliability. It is part of the Ecotec Plus series, which includes various models with different specifications. The Ecotec Plus 624 model is suitable for a wide range of applications, including residential and commercial buildings. According to the manufacturer’s instructions, the boiler requires proper installation and maintenance to ensure optimal performance and safety. The user manual provides detailed information on the boiler’s technical specifications, installation requirements, and maintenance procedures. The Ecotec Plus series is known for its advanced technology and environmentally friendly design, making it a popular choice among homeowners and installers. The Vaillant Ecotec Plus 624 boiler model is designed to provide efficient and reliable heating, with a focus on reducing energy consumption and minimizing environmental impact. The boiler’s compact design and quiet operation make it an ideal choice for installations where space is limited.

Installation and Maintenance Instructions

Instructions for installation and servicing are provided in the manual, including guidelines for wall-hung room sealed fan assisted condensing boiler models, such as the Vaillant Ecotec Plus 624 boiler.

Importance of Following the Manual

The Vaillant Ecotec Plus 624 user manual is a crucial document that provides detailed instructions for the installation and maintenance of the boiler. Following the manual is essential to ensure the safe and efficient operation of the boiler. The manual contains important information on the installation process, including the connection of pipes and electrical components. It also provides guidance on the maintenance and servicing of the boiler, including the replacement of parts and the troubleshooting of common issues. By following the manual, users can help to prevent accidents and ensure that the boiler operates at its optimal level. The manual is protected by copyright and can be reproduced or distributed only with the manufacturer’s written consent. It is essential to read and follow the manual carefully to ensure the safe and efficient operation of the Vaillant Ecotec Plus 624 boiler. The manual is available for download on the official Vaillant website.

Technical Specifications of Vaillant Ecotec Plus 624

Vaillant Ecotec Plus 624 has detailed technical specifications outlined in the user manual, including dimensions and performance data, for optimal installation and operation, in a wall-hung design, with fan-assisted condensing.

Key Features and Benefits

The Vaillant Ecotec Plus 624 user manual outlines the key features and benefits of the boiler, including its high efficiency and reliability, with a wall-hung design and fan-assisted condensing technology. The boiler is designed to provide optimal performance and energy savings, with a range of features such as automatic ignition and flame failure detection. The user manual also highlights the benefits of the boiler’s compact design, which makes it ideal for installation in small spaces. Additionally, the boiler’s low noise level and minimal vibration ensure a quiet and comfortable operation. The Vaillant Ecotec Plus 624 is also designed to be environmentally friendly, with low emissions and a durable construction that minimizes waste and reduces the need for frequent repairs. Overall, the Vaillant Ecotec Plus 624 offers a reliable and efficient heating solution for homes and businesses. The boiler’s features and benefits are fully explained in the user manual.

Download and Viewing Options for the User Manual

The Vaillant Ecotec Plus 624 user manual is available for download as a pdf file from the official Vaillant website for easy viewing and printing purposes online always.

Availability of the Manual on Vaillant Website

The Vaillant Ecotec Plus 624 user manual is readily available on the official Vaillant website, allowing users to easily access and download the manual in pdf format for their convenience. The website provides a user-friendly interface, enabling users to quickly locate the manual and download it for viewing and printing purposes. The manual is also available in various languages, catering to a diverse range of users. Additionally, the website offers a search function, allowing users to quickly find specific information or topics within the manual. The availability of the manual on the Vaillant website ensures that users have access to the information they need to install, maintain, and service their Vaillant Ecotec Plus 624 boiler. The website is regularly updated, ensuring that users have access to the most up-to-date information and manual revisions. Overall, the Vaillant website provides a convenient and accessible platform for users to obtain the Vaillant Ecotec Plus 624 user manual.

Installation and Servicing Guidelines

Vaillant Ecotec Plus 624 installation and servicing guidelines are provided in the manual, including instructions for wall-hung room sealed fan-assisted condensing boiler models, with detailed diagrams and illustrations.

Step-by-Step Instructions for Installers

The Vaillant Ecotec Plus 624 user manual provides step-by-step instructions for installers, covering the installation process of the boiler, including the preparation of the site, unpacking and inspection of the boiler,!
and the connection of the gas and water supplies. The manual also includes detailed diagrams and illustrations to help installers understand the process.
The instructions are clear and concise, making it easy for installers to follow and complete the installation correctly.
The manual also covers the servicing and maintenance of the boiler, including the replacement of parts and the troubleshooting of common issues.
Overall, the step-by-step instructions for installers provide a comprehensive guide to the installation, servicing, and maintenance of the Vaillant Ecotec Plus 624 boiler.
The instructions are an essential resource for installers, helping them to ensure that the boiler is installed and maintained correctly, and that it operates safely and efficiently.
The manual is available for download on the official Vaillant website, making it easily accessible to installers.

The instructions are also available in pdf format, making it easy to print and refer to during the installation process.
The Vaillant Ecotec Plus 624 user manual is a valuable resource for installers, providing them with the information they need to install and maintain the boiler correctly.
The manual is well-organized and easy to follow, making it a useful tool for installers.
The instructions are detailed and comprehensive, covering all aspects of the installation and maintenance process.
The manual is an essential resource for anyone installing or maintaining a Vaillant Ecotec Plus 624 boiler.

Troubleshooting and Common Issues

Troubleshooting guides are available online, helping users resolve common issues with the Vaillant Ecotec Plus 624 boiler, including error codes and maintenance requirements, quickly and easily resolved.

Resolving Problems with the Vaillant Ecotec Plus 624 Boiler

To resolve problems with the Vaillant Ecotec Plus 624 boiler, users can refer to the troubleshooting guide available online, which provides step-by-step instructions for identifying and fixing common issues. The guide covers a range of topics, including error codes, maintenance requirements, and repair procedures. Additionally, users can consult the user manual, which provides detailed information on the boiler’s operation, installation, and servicing. By following the troubleshooting guide and referring to the user manual, users can quickly and easily resolve problems with their Vaillant Ecotec Plus 624 boiler, minimizing downtime and ensuring optimal performance. The guide is available in pdf format and can be downloaded from the official Vaillant website, providing users with a convenient and accessible resource for resolving problems with their boiler. Regular maintenance is also essential.

and Final Thoughts

The Vaillant Ecotec Plus 624 user manual is a valuable resource, providing essential information and guidance for optimal boiler performance and maintenance, available online in pdf format easily.

Importance of Referencing the User Manual

Referencing the Vaillant Ecotec Plus 624 user manual is crucial for ensuring the boiler operates efficiently and safely; The manual provides detailed instructions on installation, maintenance, and troubleshooting, which helps to prevent errors and potential hazards. By following the guidelines outlined in the manual, users can optimize the performance of their boiler, reduce energy consumption, and extend its lifespan. Additionally, the manual includes important safety information and warnings, which should be carefully read and understood to avoid accidents. The user manual is a valuable resource that should be consulted regularly, especially when performing maintenance or repairs, to ensure that the boiler continues to function correctly and safely. Regular referencing of the manual can also help to identify and resolve any issues promptly, reducing downtime and minimizing the need for costly repairs. Proper use of the manual is essential for getting the most out of the Vaillant Ecotec Plus 624 boiler.

manual key won’t unlock car door dead battery

Manual key wont unlock car door due to dead battery, causing problems with door locks, a common issue reported by many car owners on various online forums and websites every day normally․

Causes of Car Lock Problems

The causes of car lock problems are varied, but a dead battery is a common culprit․ When a car battery dies, it can cause a range of issues with the door locks, including the manual key not working․ This is because the locking system in many cars relies on the battery to function, and when the battery is dead, the locks can become unresponsive․ According to online forums and websites, a dead battery can also cause the key fob to stop working, leaving car owners stranded and unable to unlock their vehicles․ In some cases, the manual key may turn but the door won’t unlock, or the hood may be locked, making it difficult to access the battery or other essential components․ Understanding the causes of car lock problems is essential to finding a solution and getting back on the road․ The locking system is complex and can be affected by a range of factors, including the type of battery and the age of the vehicle․

Understanding the Role of Car Battery in Locking System

Car battery plays crucial role in locking system, powering door locks and key fob, essential for vehicle security and access, always requiring maintenance normally․

Symptoms of a Dead Car Battery

The symptoms of a dead car battery can be frustrating and debilitating, especially when it affects the locking system of the vehicle․ One common symptom is the inability to unlock the car door using the manual key or the key fob․ The key may turn, but the door will not unlock, leaving the owner stranded and locked out․ Another symptom is the failure of the remote key to function, even with new batteries․ The car’s hood may also be locked, making it difficult to access the battery or other essential components․ In some cases, the dead battery can cause the car’s locking system to malfunction, making it impossible to unlock the doors manually or with the key fob․ These symptoms can be caused by a variety of factors, including a dead car battery, a faulty key fob, or a malfunctioning locking system․ Understanding these symptoms is essential to diagnosing and resolving the issue․

Types of Batteries Affecting Power Locks

Car battery and FOB battery affect power locks normally every day․

Difference Between Car Battery and FOB Battery

The car battery and FOB battery are two distinct types of batteries that serve different purposes in a vehicle․ The car battery is responsible for powering the vehicle’s electrical systems, including the engine, lights, and accessories․ On the other hand, the FOB battery is a small battery found in the remote key fob that powers the remote locking and unlocking system․ According to online forums, the FOB battery is usually a small coin cell battery that can be easily replaced when it runs out of power․ In contrast, the car battery is a larger and more complex battery that requires more maintenance and care․ Understanding the difference between these two batteries is crucial in diagnosing and resolving issues related to power locks and remote keyless entry systems․ Many car owners have reported issues with their power locks due to dead batteries, highlighting the importance of proper battery maintenance․

Instances Where Manual Key Fails to Unlock

Manual key fails to unlock car door due to dead battery, causing lockout situations, reported by many car owners online every day normally with frustration and concern always present somehow․

Locked Car with No Entry Possible

A dead car battery can cause a range of problems, including a locked car with no entry possible, leaving the owner stranded and frustrated․
In such situations, the manual key may not work, and the remote key fob may also be unresponsive due to the dead battery․
The car’s locking system may be affected, making it impossible to unlock the doors, even with the mechanical key․
This can be a stressful and inconvenient experience, especially if the owner is in a hurry or has important appointments to attend to․
The locked car can also be a safety concern, especially if the owner is locked out in a remote or isolated area․
In some cases, the owner may need to call a locksmith or a tow truck to gain access to the vehicle, which can be time-consuming and costly․
It is essential to address the issue promptly to avoid any further complications or damage to the vehicle․
The owner should try to find a safe and secure location to wait for assistance, and consider keeping a spare key or a backup power source, such as a portable battery pack, to avoid similar situations in the future․

Methods to Unlock Car with Dead Battery

Using a slim jim tool or manual key to unlock the car door is possible with a dead battery normally every day․

Using Manual Key or Slim Jim Tool

When a car battery is dead, it can be challenging to unlock the car door, even with a manual key․ However, there are methods to unlock the car door in such situations․ Using a slim jim tool or a manual key can be an effective way to unlock the car door․ The slim jim tool is a long, flexible rod that can be inserted into the car’s door to manipulate the lock mechanism․ On the other hand, the manual key can be used to unlock the car door manually․ To use the manual key, locate the keyhole on the driver’s side door and insert the key․ Turn the key to the right to unlock the door․ If the manual key does not work, try using the slim jim tool to unlock the car door․ It is essential to use these tools carefully to avoid damaging the car’s lock mechanism․ By using a slim jim tool or a manual key, you can unlock your car door even when the battery is dead․

Seeking Professional Help

Calling a professional locksmith for assistance is recommended when manual key wont unlock car door due to dead battery, they can help resolve the issue quickly and safely every time․

Calling a Locksmith for Assistance

When a manual key wont unlock a car door due to a dead battery, calling a locksmith for assistance is often the best course of action․ A professional locksmith can help resolve the issue quickly and safely, without causing any damage to the car․ They will have the necessary tools and expertise to unlock the car door and get the owner back on the road․ It is recommended to call a reputable and licensed locksmith who has experience in dealing with car lock issues․ They will be able to assess the situation and provide the best solution, whether it is unlocking the car door or providing a replacement key․ In addition, a locksmith can also provide advice on how to prevent similar issues from happening in the future, such as regular maintenance of the car battery and lock system․ Overall, calling a locksmith is a convenient and reliable way to resolve car lock issues caused by a dead battery․

Specific Car Models and Their Locking Issues

Certain car models are more prone to locking issues when the battery is dead, such as the Mazda3, where the manual key may not unlock the door due to a dead battery․ The 2015 Mazda3 is a specific example, where owners have reported being unable to unlock the car with the fob or even the key in the driver’s side door․ Similarly, the R56 model has also been known to have issues with the manual key not working when the battery is dead․ Other car models may also have unique locking issues when the battery is dead, and it’s essential to research the specific model to understand the potential problems that may arise․ By understanding the locking issues associated with a particular car model, owners can take steps to prevent or resolve the issue when the battery is dead, and get back on the road quickly and safely․ This information can be found on various online forums and websites, where owners share their experiences and solutions to common problems․

deye 8kw hybrid inverter manual pdf

The Deye 8kw hybrid inverter manual provides specifications and instructions for installation and operation of the inverter system with safety precautions included always online.

Overview of the Document

The document provides a comprehensive guide to the Deye 8kw hybrid inverter, including its features, specifications, and operating instructions. The manual is designed to help users understand the system’s capabilities and limitations, as well as how to properly install, operate, and maintain it. The document is divided into sections, each covering a specific aspect of the inverter, such as safety precautions, installation procedures, and troubleshooting guides. By reading the manual, users can ensure that they are using the inverter safely and efficiently, and that they are getting the most out of their investment. The manual is available for free download as a PDF file, making it easily accessible to users.

Importance of Reading the Manual

Reading the manual is crucial for safe and efficient use of the Deye 8kw hybrid inverter system always online every time.

Safety Precautions and Warnings

The Deye 8kw hybrid inverter manual outlines essential safety precautions and warnings to ensure the user’s safety during installation and operation of the system.
The manual advises against disassembling the inverter and provides guidelines for proper handling and maintenance to prevent accidents and injuries.
It also emphasizes the importance of reading and following the instructions carefully to avoid any potential hazards.
Additionally, the manual includes warning signs and cautions to alert users of potential risks associated with the battery and other components of the system.
By following these safety precautions and warnings, users can minimize the risk of accidents and ensure safe and efficient use of the Deye 8kw hybrid inverter system.
The manual is an essential resource for users to understand and implement these safety measures.

Contents of the Manual

The manual includes product description, installation, and operation instructions always available online for users.

Product Description and Specifications

The Deye 8kw hybrid inverter manual provides detailed product description and specifications, including battery input/output capabilities and PV input power ranges. The manual outlines the key features and technical specifications of the inverter, allowing users to understand its capabilities and limitations. The product description section provides an overview of the inverter’s design and functionality, while the specifications section provides detailed information on its electrical and mechanical characteristics. This information is essential for users to ensure safe and effective installation and operation of the inverter; The manual is available online for users to access and download, making it easily accessible.

Installation and Operation Instructions

Manual provides instructions for mounting and connecting the inverter system with safety precautions always included online for easy access and download purposes.

Mounting and Connection Procedures

The manual outlines the steps for mounting and connecting the Deye 8kw hybrid inverter, including the installation of the battery and PV input connections.
The procedures are designed to ensure safe and efficient installation, with clear instructions and diagrams to guide the user through the process.
The manual also provides information on the required tools and materials, as well as troubleshooting tips for common issues that may arise during installation.
By following the mounting and connection procedures outlined in the manual, users can ensure a successful and safe installation of the Deye 8kw hybrid inverter, and begin enjoying the benefits of renewable energy.
The procedures are straightforward and easy to follow, making it possible for users to install the inverter themselves.

Troubleshooting and Maintenance

Troubleshooting tips and maintenance schedules are provided online always for Deye inverter systems and users.

Common Issues and Solutions

The Deye 8kw hybrid inverter manual pdf provides a list of common issues and solutions to help users troubleshoot problems with their inverter system;
The manual includes information on how to resolve issues with the inverter’s display, battery charging, and grid connection.
It also provides guidance on how to perform routine maintenance tasks to prevent problems from occurring.
By following the troubleshooting guide and performing regular maintenance, users can help ensure their inverter system operates efficiently and effectively.
The manual is available for download online, making it easy for users to access the information they need to resolve common issues and keep their system running smoothly.
This helps to minimize downtime and ensure a reliable source of power.

Downloads and Resources

Manuals and guides are available for download online in pdf format always easily.

Availability of the Manual in PDF Format

The manual is available for download in PDF format, which can be easily accessed online. This allows users to view and print the manual as needed. The PDF format is convenient for users who prefer to have a digital copy of the manual. It can be downloaded from various online sources, including the official website of the manufacturer. The manual in PDF format is also searchable, making it easy to find specific information. Additionally, the PDF format is compatible with most devices, including computers, tablets, and smartphones. This makes it easy to access the manual from anywhere, at any time, using a variety of devices. The manual is also free to download, making it accessible to everyone;

Related Documents and Updates

Related documents include user manuals and datasheets for Deye inverters always available online for reference purposes only.

Periodic Updates and Revisions

The Deye 8kw hybrid inverter manual is subject to periodic updates and revisions due to product development and improvements.
The information in the manual may change without notice, and it is essential to check for the latest version online.
The manufacturer may release new versions of the manual, and users should ensure they have the most up-to-date information.
This will help users to operate and maintain their inverters safely and efficiently.
The updates may include new features, safety precautions, and troubleshooting guides.
Users can find the latest version of the manual on the manufacturer’s website or by contacting their customer support.
It is crucial to follow the updates and revisions to ensure the optimal performance of the inverter.
The manual’s contents may be revised to reflect changes in the product’s design or functionality.

and Final Thoughts

The Deye 8kw hybrid inverter manual is a valuable resource for safe and efficient operation always available online for users easily.

Importance of Following the Manual

The Deye 8kw hybrid inverter manual is a crucial guide for users to ensure safe and efficient operation of the system. By following the manual, users can avoid potential hazards and errors, and optimize the performance of the inverter. The manual provides detailed instructions and guidelines for installation, operation, and maintenance, which are essential for troubleshooting and resolving issues. It is essential to read and understand the manual carefully before using the inverter, as it contains important safety precautions and warnings. Additionally, the manual is subject to periodic updates and revisions, so users should always refer to the latest version available online.