
Welcome to the Lorex User Manual, your comprehensive guide to setting up and optimizing Lorex security systems. This manual covers installation, configuration, and troubleshooting.
1.1 Overview of Lorex Products
Lorex offers a wide range of security solutions, including DVRs, NVRs, and IP cameras, designed for home and business use. Their products feature advanced technology like 4K Ultra HD resolution, motion detection, and smart deterrence. The Lorex Home app enables remote monitoring, while software like Lorex Player and Cirrus provides playback and management tools. With models like the N843 and L400, Lorex caters to diverse security needs, ensuring compatibility and ease of use for all users.
- Advanced security cameras with smart features.
- Reliable DVR and NVR systems for recording.
- User-friendly software for seamless monitoring.
1.2 Importance of Reading the Manual
Reading the Lorex user manual is essential for understanding your security system’s features, troubleshooting, and optimizing performance. It provides step-by-step guides for installation, configuration, and advanced settings. The manual ensures you avoid setup mistakes and fully utilize capabilities like motion detection and remote access. By following the instructions, you can enhance security, resolve common issues, and maintain your system effectively. This guide is your key to unlocking the full potential of your Lorex devices.
- Avoid common installation errors.
- Maximize system performance.
- Understand advanced features.
1.3 System Requirements for Lorex Devices
To ensure optimal performance, Lorex devices require specific system specifications. Ensure your mobile device runs on iOS 10.0+ or Android 5.0+ for the Lorex Home App. For PC users, Windows 7+ or macOS 10.12+ is recommended. Internet connectivity is essential for remote access and firmware updates. Additionally, ensure your browser is compatible with Lorex software, such as Chrome or Safari. For video playback, install Lorex Player 10 software. Always verify compatibility with your specific Lorex model for seamless operation.
- iOS 10.0+ or Android 5.0+ for mobile apps.
- Windows 7+ or macOS 10.12+ for desktop use.
- Stable internet connection for remote access.
- Compatible browsers like Chrome or Safari.
- Lorex Player 10 for video playback on PC/Mac.

Downloading and Installing Lorex Software
Lorex software is available for download on mobile and desktop platforms. Install the Lorex Home App from the App Store or Google Play Store. For PC and Mac, download Lorex Player software from the official website. Ensure compatibility with your device and follow installation instructions carefully for seamless setup.
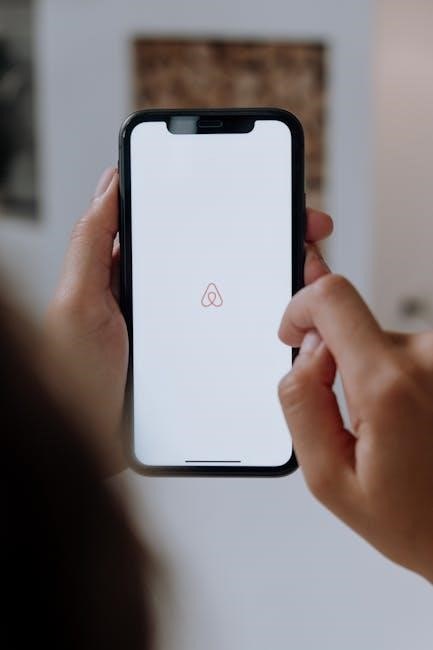
2.1 Lorex Home App Installation
Lorex Home,。Google PlayLorex Home。,。Lorex Home,,。Lorex Home。PCMac,Lorex Player。,。
2.2 Lorex Player Software for PC and Mac
Install Lorex Player software to view recorded videos on your PC or Mac. Download the software from the official Lorex website or insert the provided installation disc. Follow on-screen instructions to complete the setup. Ensure compatibility with your device by selecting the correct version for your operating system. Once installed, import recorded videos and use playback tools for enhanced viewing. Refer to the manual for troubleshooting tips and optimal performance. This software is essential for accessing and managing your Lorex system’s recordings efficiently.
2.3 Lorex Cirrus App Setup
Download and install the free Lorex Cirrus app from the App Store or Google Play Store. Launch the app and create an account or log in if you already have one. Follow the in-app instructions to add your Lorex devices. Ensure your devices are powered on and connected to the same network. Once paired, you can monitor live feeds, review recordings, and receive notifications. The Lorex Cirrus app offers remote access and control, enhancing your security system’s functionality. Refer to the app’s guide for troubleshooting and optimal setup tips.

Physical Installation of Lorex Devices
Use the included mounting template to mark holes, drill, and secure your device. Ensure proper installation for optimal performance and reliability of your Lorex system.
3.1 Mounting and Positioning Cameras
Use the provided mounting template to mark holes for screws. Drill holes carefully, ensuring they align with the template. Secure the camera firmly to the surface. Position cameras to cover key areas like entry points or high-traffic zones. Ensure clear line of sight and minimal obstructions. Check power supply and network connectivity before finalizing placement. Adjust camera angles for optimal coverage and test video quality to confirm proper installation. Proper positioning ensures reliable performance and enhances security monitoring. Follow the manufacturer’s guidelines for precise installation.
3.2 Connecting Cables and Power Supply
Connect the video and power cables to the DVR/NVR and cameras. Ensure all connections are secure to avoid signal loss. Use the provided adapters for power supply and insert them into a nearby outlet. Avoid damaging cables during installation. Once connected, power on the system and verify functionality. Check for any loose connections or faulty cables. Test the system to ensure proper video and power delivery. Refer to the manual for specific cable requirements and troubleshooting tips to ensure reliable performance and clear video feed. Proper connections are vital for optimal system operation.
3.2 Drilling Holes for Mounting Screws
Use the included mounting template to mark hole locations for screws. Ensure the surface is level and sturdy before drilling. Mark the spots with a pencil. Drill pilot holes using a drill bit compatible with your wall type. Insert screws into the holes, ensuring they are aligned properly for camera mounting. Tighten screws firmly to secure the camera base. Avoid over-tightening, which may damage the screws or surface. Double-check alignment before finalizing the installation. Properly drilled holes ensure stable camera placement and optimal performance. Follow safety precautions while drilling to prevent accidents. Securely fasten all screws to avoid loose mounts.

Setting Up Your Lorex System
Configure your DVR/NVR for initial setup, pair cameras with the recorder for synchronized operation, and set up network settings for remote access functionality.
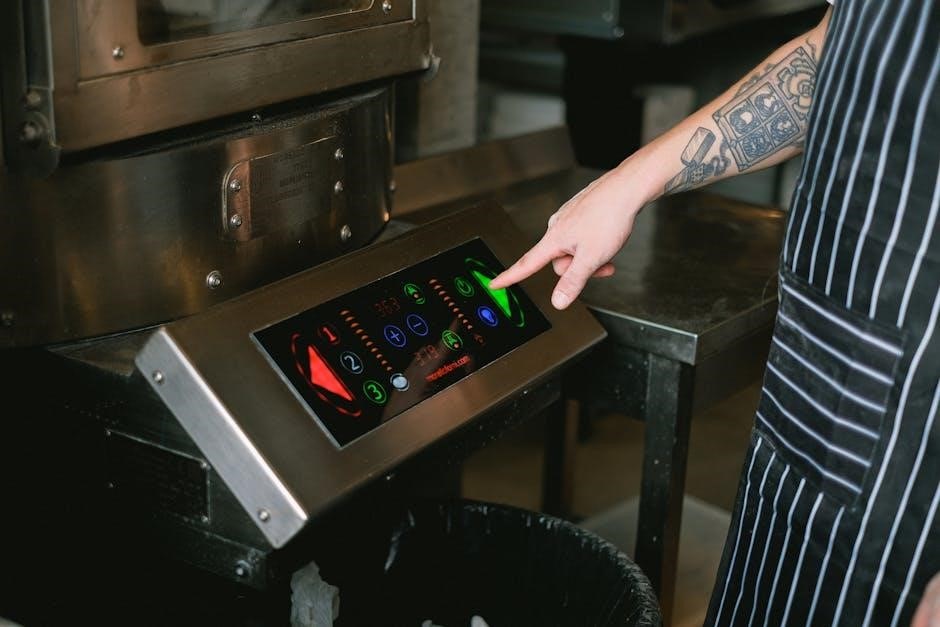
4.1 Initial Configuration of DVR/NVR
Start by connecting your DVR/NVR to a monitor using an HDMI cable and power it on. Access the menu using the remote or mouse. Set an administrator password for security. Configure basic settings like date, time, and timezone. Enable network settings for remote access. Update firmware if available for optimal performance. Refer to the Lorex Home app for additional guidance. Ensure all cameras are recognized and connected properly for a seamless setup experience.
4.2 Pairing Cameras with the Recorder
Power on your DVR/NVR and cameras. Access the menu and navigate to the “Add Device” option. Enter the camera’s password or scan the QR code. Ensure cameras are connected to the same network. Physically install cameras using the mounting template and drill holes for screws. Connect cables securely to avoid signal loss. Use the Lorex Home app to verify camera pairing and adjust settings. Test live video feed to confirm proper pairing and functionality. Refer to the app for additional guidance on optimizing camera placement and performance.
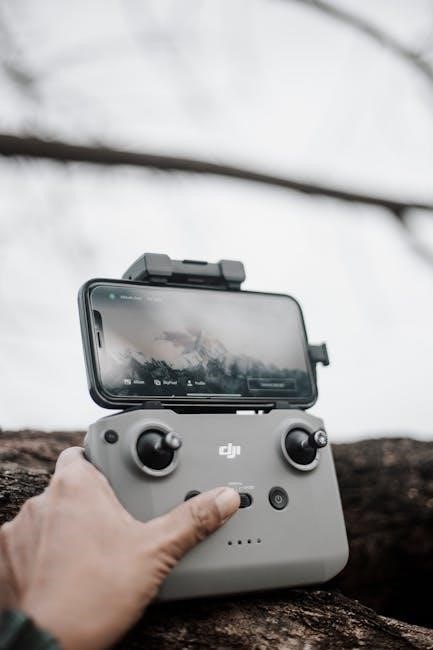
4.3 Network Configuration for Remote Access
To enable remote access, ensure your DVR/NVR is connected to a stable internet connection. Access the device’s network settings via the menu. Enable port forwarding on your router, using the specified ports for Lorex devices. Configure DDNS settings if necessary. Use the Lorex Home app to link your system to your account. Ensure all cameras are synced with the recorder and connected to the same network. Test remote access by viewing live feeds through the app. Refer to the Lorex Cirrus setup guide for detailed instructions on optimizing network performance and security.

Using Lorex Home App
The Lorex Home app allows you to monitor live feeds, control cameras, and receive alerts. Launch the app, log in, and access your security system remotely.
5.1 Navigating the App Interface
Navigating the Lorex Home app is intuitive. Upon launching, you’ll see a dashboard with live camera feeds. Tap a camera to view full-screen video. Use the bottom menu to switch between live view, recordings, and settings. The app also allows access to motion events and notifications. Customize settings like alert preferences and camera names for a personalized experience. Ensure your device is connected to the same network for seamless navigation and control.
5.2 Viewing Live and Recorded Video
To view live video, open the Lorex Home app and select the camera feed you wish to monitor. For recorded video, navigate to the “Recordings” section, where clips are organized by date and time. Use the timeline to scrub through footage or select specific events. Pinch-to-zoom enhances details, and playback controls allow you to pause or adjust speed. Download or delete clips directly from the app for easy management. This feature ensures you can review and manage your security footage efficiently.
5.3 Receiving Notifications and Alerts
Enable notifications in the Lorex Home app to stay informed about motion detection, camera activity, and system updates. Customize alert settings to receive push notifications for specific events, such as motion-triggered recordings or camera disconnections. Notifications appear on your device, ensuring you’re always aware of your system’s status. Adjust sensitivity levels to minimize false alerts and focus on critical events. Use the app’s settings menu to tailor notifications to your preferences, ensuring you’re only alerted when necessary. This feature enhances security monitoring and provides peace of mind.
Advanced Features of Lorex Systems
Lorex systems offer advanced features like motion detection, smart deterrence, and scheduled recordings. These features enhance security and provide personalized monitoring options for optimal performance and peace of mind.
6.1 Motion Detection Settings
Motion detection is a key feature of Lorex systems, allowing you to customize alerts and notifications. Adjust sensitivity levels to minimize false alarms and focus on critical events. Use the Lorex Home app to enable motion-activated recording and notifications. Define specific detection zones to monitor particular areas, ensuring alerts are relevant and timely. Customize settings to suit your security needs, enhancing overall system efficiency and reducing unnecessary notifications. Properly configuring motion detection ensures your system is both responsive and reliable, providing peace of mind and effective surveillance.
6.2 Scheduling Recordings
Scheduling recordings on your Lorex system allows you to customize when and how your cameras capture footage. Use the Lorex Home app or DVR/NVR interface to set specific recording times, ensuring you only record during relevant periods. Choose from continuous recording, motion-triggered, or scheduled intervals. Define daily or weekly schedules to align with your security needs. This feature helps optimize storage and ensures you capture essential events without unnecessary recording. Adjust settings to prioritize motion events or continuous coverage, tailoring your system for enhanced efficiency and reliability.
6.3 Smart Deterrence Features
Lorex systems offer advanced smart deterrence features to enhance security. These include motion-activated alerts, LED lights, and two-way audio. Motion detection triggers alerts and recording, while LED lights deter intruders by indicating camera activity. Two-way audio allows real-time communication, enabling you to confront trespassers remotely. These features can be customized via the Lorex Home app, ensuring tailored security responses. By combining visual and auditory deterrents, Lorex systems help prevent incidents before they escalate, providing an added layer of protection for your property.

Troubleshooting Common Issues
This section helps resolve common problems like connectivity issues, video playback errors, and software update failures. Identify symptoms, check connections, restart devices, and consult the manual or support.
7.1 Resolving Connectivity Problems
Connectivity issues can often be resolved by restarting your router and Lorex devices. Ensure all cables are securely connected and check for loose wires. Verify your internet connection and network settings. If using Wi-Fi, confirm the device is connected to the correct network. Power cycle the DVR/NVR and cameras, then wait for them to reconnect. If problems persist, reset the device to factory settings or consult the Lorex manual for advanced troubleshooting steps. Contact Lorex support for further assistance if needed.
7.2 Fixing Video Playback Issues
To resolve video playback issues, ensure your Lorex Player software is up-to-date. Download the latest version from the Lorex website or app store. Check if your device meets system requirements for playback. Verify that the video file is compatible with the Lorex Player. Restart your device and reload the video. If issues persist, reinstall the Lorex Player software or consult the user manual for troubleshooting guides. Contact Lorex support for further assistance if the problem remains unresolved.
7.3 Solving Software Update Failures
If a software update fails, restart your Lorex device and ensure a stable internet connection. Clear the app cache or reinstall the Lorex Home app. Verify that your device is compatible with the latest software version. Check for any ongoing server maintenance by visiting the Lorex website. If issues persist, refer to the user manual or contact Lorex support for assistance. Regular updates are crucial for optimal performance and security.
Maintenance and Updates
Regular maintenance ensures optimal performance and security. Update firmware and software promptly, and back up recordings to prevent data loss. Follow guidelines for smooth updates.
8.1 Regular System Maintenance Tips
Regular system maintenance is crucial for optimal performance. Ensure firmware and software are updated to the latest versions. Periodically check storage devices for sufficient space and organize recordings. Inspect cables and connections for damage or wear. Restart devices monthly to clear cache and resolve minor glitches. Use the Lorex Home app to monitor system health and receive update notifications. Clean cameras and sensors to maintain video clarity. Follow these tips to ensure reliability, security, and continuous functionality of your Lorex system.
8.2 Updating Firmware and Software
Regularly updating your Lorex system’s firmware and software ensures optimal performance and security. To update, access the device settings via the Lorex Home app or visit the official Lorex website. Select the latest firmware version and follow on-screen instructions. Ensure devices are connected to power during updates to avoid interruptions. Updated software often includes new features, bug fixes, and enhanced security measures. Always verify the source of updates to prevent unauthorized access. Schedule updates during low-usage periods to minimize disruption. This ensures your system remains up-to-date and secure. Regular updates are essential for maintaining peak functionality.
8.3 Backing Up Video Recordings
Backing up video recordings is crucial for preserving important footage. Use an external hard drive or NAS device to create local backups. Alternatively, enable cloud storage through the Lorex Home app for off-site backups. To initiate a backup, access the DVR/NVR settings, select the backup option, and choose the desired video clips. Schedule automatic backups for convenience. Regular backups ensure data safety and prevent loss. Always verify storage capacity and internet speed for cloud backups. This feature enhances security and provides peace of mind for your recorded content.
Lorex Product Models and Compatibility
Lorex offers a wide range of security devices, including DVRs, NVRs, and cameras; Compatibility between models ensures optimal performance and integration within your security system setup for all users.
9.1 Popular Lorex DVR and NVR Models
Lorex offers a variety of DVR and NVR models, each designed for different security needs. The N843 and N910 series are popular choices, known for their 4K Ultra HD resolution and advanced features. These models support multiple cameras and offer robust storage solutions; For smaller setups, the L400 series provides an affordable yet reliable option. All models are compatible with Lorex cameras, ensuring seamless integration and optimal performance for home or business security systems.
9.2 Compatibility with Various Cameras
Lorex DVR and NVR systems are designed to work seamlessly with a wide range of cameras, including Lorex-branded models and select third-party IP cameras. The N843 and N910 series, for example, support up to 16 cameras, ensuring flexibility for both home and business setups. Compatibility varies by model, so users should consult the product manual or Lorex’s official website to confirm compatibility before purchasing. Regular firmware updates also enhance compatibility, ensuring optimal performance across connected devices.
9.3 Model-Specific Features
Lorex devices offer model-specific features tailored to enhance security and user experience. The N910 series, for instance, supports 4K Ultra HD resolution and smart deterrence, while the N843 model includes advanced motion detection. Certain models, like the L400 series, feature night vision and weather-resistant designs. Each model is designed to meet specific needs, ensuring users can choose the right device for their security requirements. Refer to the product manual for detailed feature lists and model-specific capabilities to maximize functionality.

FAQs and Common Queries
Common questions include sales inquiries, warranty details, and device model identification. Users often ask about discounts, support information, and troubleshooting tips for optimal device performance.
10.1 Sales and Discounts on Lorex Products
Lorex offers frequent discounts and sales throughout the year, with special deals changing regularly. Seasonal promotions and bundle offers are common, providing cost-effective solutions for security needs. Users can check the official Lorex website or authorized retailers for current deals. Additionally, the Lorex Home app often features exclusive discounts. Sales may vary by region, so it’s advisable to verify availability in your area for the best savings on Lorex products.
10.2 Warranty and Support Information
Lorex products typically come with a 2-year warranty covering parts and labor. For warranty details, visit the official Lorex website or contact customer support. Support is available via phone, email, or live chat. Extended support plans may be purchased for additional coverage. Online resources, including FAQs and troubleshooting guides, are accessible through the Lorex website. Ensure to register your product for warranty validation and timely assistance. For urgent issues, refer to the user manual or contact Lorex support directly for professional guidance and solutions.
10.3 Device Model Identification
To identify your Lorex device model, locate the model number on the product label or in the user manual. This number is essential for accessing specific support, software downloads, and troubleshooting guides. Model numbers are unique to each product and ensure compatibility with accessories and updates. For assistance, contact Lorex support with your model number for tailored help. Registering your device on the Lorex website can also provide easier access to model-specific resources and warranty information.
This manual provides comprehensive guidance for Lorex system setup, use, and maintenance. Follow the instructions to ensure optimal performance and security for your Lorex devices.
11.1 Summary of Key Points
This manual guides users through Lorex system setup, configuration, and maintenance. It covers physical installation, software downloads, and advanced features like motion detection and scheduling. Troubleshooting tips address common issues, while maintenance sections emphasize updates and backups. Compatibility details ensure seamless integration with various Lorex models. By following this guide, users can optimize their security systems for enhanced performance and reliability. Regular updates and proper care will extend the lifespan of your Lorex devices, ensuring continuous protection and peace of mind.
11.2 Final Tips for Optimal Use
For optimal performance, regularly update firmware and software, and ensure compatibility with your devices. Organize cables neatly to avoid damage and interference. Use motion detection and scheduling features to customize your security setup. Back up recordings frequently to prevent data loss. Refer to the Lorex Home app for remote monitoring and alerts. Explore advanced settings like smart deterrence to enhance security. Always follow the manual’s guidelines for installation and maintenance to ensure your system runs smoothly and provides reliable protection.
Additional Resources
For more support, visit the official Lorex website for user manuals and guides; Join community forums to connect with other users and gain insights.
12.1 Official Lorex Website and Support
The official Lorex website offers comprehensive support, including downloadable user manuals, software updates, and troubleshooting guides. Visit www.lorextechnology.com for detailed product information and assistance.
12.2 Lorex User Manuals and Guides
Lorex provides detailed user manuals and guides for all their products, available for download in PDF format from their official website. These resources cover installation, configuration, and troubleshooting, ensuring seamless setup and optimal use of your security systems. Manuals are model-specific, offering tailored instructions for DVRs, NVRs, cameras, and software. Visit the Lorex support page to access these guides, ensuring you maximize your product’s features and performance. Essential for both new and experienced users.
12.3 Community Forums and Groups
Lorex users can engage with community forums and groups for shared knowledge and support. These platforms offer troubleshooting tips, installation guidance, and feature discussions. Active groups like the G-Watch App Users group provide access to manuals, guides, and updates. Members share experiences, solving common issues and optimizing system performance. Participating in these forums fosters a collaborative environment, helping users maximize their Lorex devices. Visit Lorex’s official website or platforms like Facebook Groups to join and benefit from community-driven insights and resources.