can a manual car have remote start

Can a Manual Car Have Remote Start? A Comprehensive Guide (Updated 11/28/2025)

Historically, installing remote starters in manual transmission vehicles was considered impossible by many manufacturers and installers, but advancements now offer viable solutions․

Modern systems, like Compustar and Viper, demonstrate compatibility, though safety precautions and proper installation are absolutely crucial for functionality and peace of mind․

For years, a significant debate has surrounded the possibility of equipping manual transmission vehicles with remote start systems․ Traditionally, manufacturers avoided offering this combination, and many installers refused to undertake such installations, citing inherent safety concerns․ The core issue revolved around the potential for the car to unexpectedly lurch forward if started while in gear, creating a dangerous situation․

However, the narrative is evolving․ Recent technological advancements and the development of sophisticated bypass modules are challenging this long-held belief․ Systems from brands like Compustar, Viper, Avital, and Python are now demonstrating compatibility with manual cars, albeit with specific requirements and safety protocols․ This shift sparks ongoing discussion about feasibility, risk mitigation, and the future of remote start technology in the realm of stick-shift vehicles․

The Core Challenge: Safety and Manual Transmissions

The primary safety concern with remote starting a manual transmission vehicle stems from the possibility of the car being left in gear․ If the ignition is activated while the shifter isn’t in neutral or park, the vehicle could unexpectedly move, potentially causing damage or injury․ This is why original equipment manufacturers (OEMs) generally avoid offering remote start on manual cars․

Furthermore, the clutch safety switch, designed to prevent starting in gear, presents a hurdle․ Bypassing this switch, while possible, introduces risk․ A reliable remote start system must verify the parking brake is engaged before initiating the start sequence, mitigating the risk of unintended movement․ Addressing these challenges requires careful system design and meticulous installation․

Technical Feasibility & System Requirements

Successfully implementing remote start on a manual car hinges on bypassing the clutch safety switch and ensuring the parking brake is firmly engaged before ignition․

Understanding the Clutch Safety Switch

The clutch safety switch is a critical component in manual transmission vehicles, designed to prevent the engine from starting unless the clutch pedal is fully depressed․ This safety feature inherently blocks remote start functionality, as the system cannot electronically replicate pedal engagement․

Essentially, if the shifter is in gear, the switch prevents the starter from engaging, safeguarding against unintended vehicle movement․ Manufacturers generally avoid offering remote start options on manual cars due to this inherent safety concern․ However, aftermarket solutions exist that address this limitation, often involving bypassing or tricking the switch․

Understanding its function is paramount before attempting any modifications, as improper handling can compromise vehicle safety and potentially lead to hazardous situations․

Bypassing the Clutch Safety Switch: Risks and Methods

Bypassing the clutch safety switch, while enabling remote start, introduces significant risks․ The primary concern is the potential for unintended vehicle movement if the car is left in gear․ This could result in property damage, injury, or even a serious accident․

Methods typically involve grounding the switch’s signal wire, effectively tricking the system into believing the clutch is depressed․ However, this practice demands extreme caution and a thorough understanding of automotive electrical systems․

Professional installation is strongly recommended to mitigate these risks, ensuring the system is correctly configured and incorporates additional safety measures, such as parking brake verification․

The Role of the Parking Brake in Remote Start Systems

The parking brake is a critical safety component in manual transmission remote start systems․ It acts as a primary safeguard against unintended vehicle movement, ensuring the car remains stationary during the remote start process․ Most systems require the parking brake to be engaged before remote start activation is permitted․

Modern remote start modules often integrate parking brake verification into their programming․ This means the system actively checks if the brake is applied before allowing the engine to start, adding an extra layer of security․

Failure to properly engage the parking brake could lead to dangerous situations, highlighting its indispensable role in safe operation․

Necessary Components for Manual Transmission Remote Start

Successfully equipping a manual car with remote start demands specific components beyond a standard kit․ A crucial element is a bypass module, designed to interface with the vehicle’s security system and enable remote activation․ Additionally, a clutch safety switch override or bypass is often required, carefully managing engine starting permissions․

High-quality wiring harnesses are essential for secure connections, ensuring reliable system operation․ A compatible remote start module, like those from Compustar or Viper, specifically programmed for manual transmissions, is paramount․

Finally, professional installation or a detailed understanding of automotive electrical systems is vital for correct component integration and safe functionality․

Compatible Remote Start Systems

Several brands offer solutions for manual cars, including Compustar, Viper, Avital, and Python, with specific models designed to overcome transmission-related challenges․

Choosing the right system requires careful consideration of vehicle compatibility and desired features․

Compustar Systems for Manual Cars

Compustar consistently emerges as a leading choice for manual transmission vehicles seeking remote start capabilities, offering a range of systems specifically engineered for these applications․ Their Pro and Prime series, when paired with a compatible bypass module, demonstrate excellent functionality across numerous standard transmission cars․

The key lies in Compustar’s ability to effectively bypass the clutch safety switch, a critical component preventing ignition without the clutch depressed․ This bypass, when implemented correctly, allows remote starting while ensuring the vehicle remains safely immobilized unless the driver actively engages the clutch and shifter․

Furthermore, Compustar systems often include advanced features like smartphone control and extended range, enhancing convenience and security․ Professional installation is highly recommended to guarantee proper functionality and adherence to safety protocols․

Viper Remote Start Compatibility

Viper offers several remote start systems demonstrably compatible with manual transmission vehicles, though careful system selection and professional installation are paramount․ The Viper 5706V and DS4 models are frequently cited as viable options, providing reliable remote starting functionality when properly configured․

Like Compustar, Viper systems necessitate a bypass of the clutch safety switch, a crucial safety feature in manual cars․ This bypass must be executed correctly to prevent unintended vehicle movement and ensure operational safety․ Grounding the bypass switch is a common method;

Viper’s compatibility extends to a broad range of vehicles, and their systems often incorporate features like two-way communication and security alarms, enhancing both convenience and protection․ Always verify specific model compatibility with your vehicle before purchasing․

Avital and Python Systems: Manual Transmission Options

Avital and Python, both brands under the Directed Electronics umbrella, present viable remote start solutions for manual transmission vehicles, mirroring the approach of Compustar and Viper․ The Avital 4105L and Python 5706P are frequently mentioned as compatible options, offering a balance of features and affordability․

Similar to other systems, successful installation hinges on safely bypassing the clutch safety switch, a critical component preventing starting in gear․ This requires meticulous wiring and a thorough understanding of the vehicle’s electrical system․

These systems often include features like remote keyless entry and security system integration, providing added convenience and protection․ Confirming specific vehicle compatibility is essential before proceeding with installation, ensuring a seamless and safe integration․

Other Compatible Brands and Models

Beyond Compustar, Viper, Avital, and Python, several other brands offer remote start systems adaptable to manual transmission vehicles, though compatibility varies significantly by make and model․ Directed Electronics continues to dominate the aftermarket, but options exist․

Fortin, for example, provides bypass modules designed to integrate with factory security systems, often necessary for a clean installation․ iDatalink also offers similar solutions, expanding compatibility across a wider range of vehicles․

Ultimately, determining compatibility requires careful research, utilizing online databases and consulting with professional installers․ The key remains safely bypassing the clutch safety switch and ensuring the parking brake is engaged during remote start operation․

Installation Considerations

Professional installation is highly recommended due to the complexity of bypassing safety features, while DIY attempts require advanced electrical knowledge and meticulous wiring practices․

Proper module placement and careful programming are essential for reliable operation and to avoid potential system malfunctions or vehicle damage․

Professional Installation vs․ DIY Installation

Choosing between professional installation and a DIY approach for a manual transmission remote start system is critical․ Professionals possess the expertise to navigate the intricate wiring and safety system overrides required, ensuring a secure and functional installation․ They understand the nuances of clutch safety switches and parking brake integration․

DIY installation, while potentially cost-effective, demands significant electrical knowledge and carries inherent risks․ Incorrect wiring can lead to system malfunctions, vehicle damage, or even safety hazards․ Bypassing the clutch switch improperly could result in unintended vehicle movement․ A professional guarantees proper programming and testing, validating the system’s safe operation․ Ultimately, the complexity and safety implications often favor professional expertise․

Wiring and Module Placement

Successful remote start installation in a manual vehicle hinges on precise wiring and strategic module placement․ The system requires connection to several key circuits: ignition, starter, parking lights, and crucially, the clutch safety switch․ Careful attention must be paid to identifying and accessing these wires without causing damage․

Module placement should prioritize security and accessibility for future maintenance․ Common locations include under the dashboard, steering column, or within the vehicle’s computer system area․ Proper wire routing prevents interference and ensures reliable operation․ Securely fastening all connections and utilizing appropriate connectors are vital to avoid shorts or disconnections, guaranteeing a stable and long-lasting installation․

Programming the Remote Start System

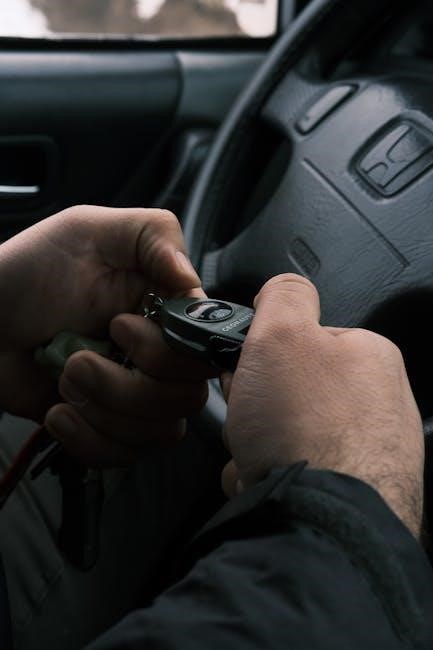
Post-installation, programming the remote start system is essential for correct functionality․ This process typically involves pairing the remote fob with the main control module, often requiring specific sequences of key turns and button presses․ Many systems offer customizable settings, such as run-time duration and temperature control preferences․

Advanced systems may necessitate a programming interface connected to the vehicle’s OBDII port or a dedicated programming tool․ Correctly configuring the system to recognize the bypassed clutch safety switch is paramount․ Thoroughly testing all functions – remote start, stop, and lock/unlock – confirms successful programming and ensures the system operates as intended, providing a seamless user experience․

Safety Concerns and Precautions

Critical safety measures include verifying emergency brake engagement and recognizing the potential for unintended vehicle movement, demanding cautious system operation․

Liability and insurance implications should be carefully considered before installing a remote start in a manual transmission vehicle․

Emergency Brake Engagement Verification

A paramount safety feature in manual transmission remote start systems is the absolute necessity of emergency brake engagement verification․ The system must confirm the parking brake is firmly applied before initiating the remote start sequence; This prevents the vehicle from unexpectedly rolling or shifting into gear, mitigating a potentially dangerous situation․

Modern remote start modules often incorporate sensors or rely on the vehicle’s existing parking brake switch to confirm engagement․ Bypassing or disabling this verification process is strongly discouraged and can create significant safety hazards․ Proper installation and testing of this feature are essential, ensuring reliable operation every time the remote start is activated․ Always double-check the brake before remote starting!

Potential for Unintended Vehicle Movement

Despite safety mechanisms, a potential risk with manual transmission remote start systems remains: unintended vehicle movement․ If the vehicle isn’t on a level surface, or the parking brake fails to fully engage, the car could roll․ Even with the brake engaged, a faulty clutch switch bypass could theoretically allow the vehicle to shift into gear․

Therefore, careful consideration of parking location is vital․ Avoid inclines whenever possible․ Regular inspection and maintenance of the parking brake are crucial․ Understanding the system’s limitations and adhering to all safety guidelines minimizes the risk․ Never rely solely on the remote start; always visually confirm the vehicle’s stability before entering․

Liability and Insurance Implications

Installing a remote start in a manual transmission vehicle introduces potential liability concerns․ If an accident occurs due to a system malfunction – such as unintended movement – responsibility could fall on the installer, the owner, or even the system manufacturer․

Insurance companies may view aftermarket remote start systems as a modification, potentially affecting coverage․ It’s crucial to inform your insurer about the installation․ Failure to do so could lead to claim denial in the event of an incident․ Thorough documentation of professional installation and adherence to safety standards are vital for mitigating risk and ensuring adequate coverage․

Legal Aspects and Vehicle Warranty

Local regulations regarding remote start systems vary, and modifications can potentially void your vehicle’s manufacturer warranty, especially concerning the electrical system․

Careful consideration of these factors is essential before proceeding with installation and modifications․

Local Regulations Regarding Remote Start Systems

Navigating the legal landscape surrounding remote start systems requires diligent research into your specific state and local ordinances․ While a federal law doesn’t explicitly prohibit these systems, individual municipalities may have restrictions․ Some areas might require professional installation certification to ensure safety standards are met, while others could have limitations on when and where remote starting is permissible – for example, prohibiting it in residential zones during certain hours․

It’s crucial to verify if your location mandates specific permits or inspections for aftermarket vehicle modifications like remote starters․ Ignoring these regulations could result in fines or the requirement to remove the system․ Always consult your local Department of Motor Vehicles or a qualified legal professional to confirm compliance before installation, ensuring a hassle-free experience․

Impact on Vehicle Manufacturer Warranty

Installing an aftermarket remote start system, particularly in a manual transmission vehicle, can potentially void portions of your vehicle’s original manufacturer warranty․ The Magnuson-Moss Warranty Act offers some protection, stating that modifications cannot void the entire warranty unless directly causing the failure of a covered component․

However, manufacturers can deny warranty claims for issues stemming from the remote start installation or related wiring․ This is especially true if the installation is deemed improper or causes damage to the vehicle’s electrical system․ Documenting professional installation and using high-quality components can mitigate this risk, but careful consideration is vital before proceeding․

Troubleshooting Common Issues

Frequent problems include the remote start failing to engage, system malfunctions displaying error codes, and issues arising from bypassing the clutch safety switch improperly․

Remote Start Fails to Engage

If your remote start system isn’t working, several factors could be at play․ First, verify the parking brake is firmly engaged, as this is a critical safety requirement for manual transmissions․

Next, confirm the vehicle is actually in neutral; the system won’t initiate if it detects the shifter in gear․ Check the clutch safety switch bypass – a faulty connection or incorrect wiring here is a common culprit․

Also, examine the remote itself, ensuring fresh batteries and proper programming․ Finally, consult the system’s error codes, if any, as these provide valuable diagnostic clues, potentially indicating a wiring issue or module malfunction requiring professional attention․

System Malfunctions and Error Codes

Remote start systems, especially those retrofitted to manual vehicles, can exhibit various malfunctions․ Error codes displayed on the system’s interface or via a smartphone app are invaluable for diagnosis․ Common issues include communication failures between the module and the vehicle’s computer, or problems with the clutch safety switch bypass․

Some systems may indicate low voltage, suggesting a battery issue․ Others might signal a problem with the antenna, hindering remote communication․ Consult the system’s manual for a comprehensive list of error codes and their meanings, as these will guide troubleshooting or necessitate professional assistance․

Addressing Clutch Switch Bypass Problems

Bypassing the clutch safety switch, essential for manual transmission remote starts, can introduce complications․ If the system fails to engage, verify the bypass wiring is secure and correctly connected, ensuring a solid ground․ Incorrect wiring is a frequent culprit․ Inspect the switch itself for damage or corrosion, potentially requiring replacement․

Remember, a faulty bypass can create a safety hazard, allowing the vehicle to start in gear․ Double-check all connections and consider professional re-evaluation if issues persist․ Ensure the parking brake is firmly engaged during testing, and prioritize safety above all else when troubleshooting this critical component․

Future Trends in Remote Start Technology

Expect enhanced safety features and tighter integration with smartphone applications, offering improved control and monitoring for manual transmission remote start systems․

Advancements in Safety Features

Remote start technology for manual vehicles is rapidly evolving, with a significant focus on bolstering safety protocols․ Modern systems increasingly incorporate multiple layers of verification to prevent unintended vehicle movement․ This includes enhanced emergency brake engagement checks, ensuring the parking brake is firmly applied before remote activation․

Sophisticated algorithms are being developed to monitor vehicle sensors, detecting any potential for gear slippage or accidental shifting․ Furthermore, integration with the vehicle’s existing security systems is becoming more prevalent, adding an extra layer of protection against unauthorized use․ Future iterations may even include GPS tracking and geofencing capabilities, allowing owners to remotely disable the vehicle if necessary․

These advancements aim to address the inherent risks associated with remotely starting a manual transmission car, providing owners with greater confidence and peace of mind․

Integration with Smartphone Applications

The future of manual transmission remote start systems is inextricably linked with smartphone technology․ Modern systems are increasingly offering dedicated mobile applications, providing users with unprecedented control and convenience․ These apps allow for remote activation, status monitoring (e․g․, running time, battery voltage), and customizable settings․

Beyond basic start/stop functionality, smartphone integration enables advanced features like pre-heating or pre-cooling the vehicle cabin, locating the vehicle via GPS, and receiving real-time alerts regarding system status or potential issues․ Some apps even allow for scheduling remote starts based on time or location․

This connectivity enhances the user experience and provides a level of control previously unavailable, solidifying the role of smartphones as central hubs for vehicle management․

2006 honda pilot owner’s manual

The 2006 HondaPilot Owners Manual is your comprehensive guide to operating and maintaining your vehicle. Available online, it includes detailed information on features, safety, and upkeep. Visit official Honda sources or trusted forums like PilotErs for reliable access. This manual ensures you understand everything about your Pilot, from daily use to routine maintenance.

Overview of the Manual

The 2006 Honda Pilot Owners Manual provides a comprehensive overview of the vehicle’s features, operations, and maintenance requirements. It serves as a key reference for owners to understand the car’s functions, safety systems, and routine upkeep. The manual is structured to guide users through setup, usage, and troubleshooting, ensuring they maximize the vehicle’s performance and longevity. Key sections include detailed specifications, safety guidelines, and a maintenance schedule. The manual also highlights the Pilot’s advanced features, such as its durable construction and innovative technology. For those seeking repairs or updates, the manual offers clear instructions and diagrams. This resource is essential for anyone looking to operate and maintain their 2006 Honda Pilot effectively and confidently.

Key Features of the 2006 Honda Pilot

The 2006 Honda Pilot boasts an array of innovative features designed to enhance performance, comfort, and versatility. Equipped with a powerful 3.5L V6 engine, it delivers exceptional power and efficiency. The Pilot’s all-wheel-drive system ensures optimal traction in various conditions, while its spacious interior accommodates up to eight passengers comfortably. Advanced safety features, including anti-lock brakes and airbags, prioritize driver and passenger protection. Additionally, the Pilot’s interior includes modern tech features like a premium Infiniti Bose sound system and climate control. Outside, the vehicle showcases rugged styling and durable construction. These features make the 2006 Honda Pilot a standout choice for families and adventurers alike, offering both functionality and reliability.

Official Sources for the Manual

Official sources for the 2006 HondaPilot manual include Honda’s website and authorized repair forums like PilotErs. These platforms provide reliable copies and guidance for accessing or downloading the manual. Always verify sources to ensure you receive accurate and up-to-date information for your vehicle.

Where to Find the Manual Online

To locate the 2006 HondaPilot owner’s manual online, start with Honda’s official website, which offers comprehensive resources for vehicle owners. Third-party forums like PilotErs also host versions of the manual, though they may not always be complete. Archive websites, such as archive.org, contain downloadable PDFs, including the 06-08 HondaPilot service manual, available at this link. Additionally, Google Drive provides incomplete service manual documents, offering partial access to repair and maintenance information. For mobile users, specialized apps are recommended for easy access. Be cautious of outdated or removed links, as some resources may no longer be available. Always verify the source to ensure you receive accurate and reliable information for your vehicle.

Recommended Platforms for Downloading

For downloading the 2006 Honda Pilot Owners Manual, reliable platforms include PilotErs.org, which hosts a wide range of Honda service manuals, including the 2006 model. Visit their website for access to verified documents. Additionally, the manual is available on Google Drive and Archive.org, offering free and easy downloads. Ensure the links are safe and comply with terms of use when accessing these platforms. For mobile users, consider downloading a dedicated app that allows offline access, making the manual conveniently available anytime, anywhere. Always verify the source to avoid downloading incomplete or outdated versions and check for antivirus protection when accessing files online. These platforms provide a seamless and secure experience for obtaining the manual.

Downloading the Manual

Download the 2006 Honda Pilot Owners Manual from Honda’s official website or piloteers.org. Access PDF formats or mobile apps for convenience. Use verified sources to ensure safe and reliable downloads.

Options for PDF Download

To access the 2006 Honda Pilot Owners Manual in PDF format, you canvisit Archive.org, where the manual is available for direct download. Additionally, some forums like PilotErs.org host incomplete versions or links to Google Drive for storage. Be aware that large files may require desktop downloads rather than mobile. Always ensure you are using reliable sources and adhering to any restrictions or donation requests mentioned by shared platforms.

Mobile and Desktop Accessibility

The 2006 Honda Pilot Owners Manual is accessible on both mobile and desktop platforms, ensuring convenience for users. For mobile devices, dedicated apps allow easy access to the manual on-the-go, while desktop users can conveniently download or view the manual through browser interfaces. Online platforms provide responsive design, adapting to various screen sizes for optimal readability. Whether accessing the manual digitally or via traditional PDFs, the format ensures clarity and usability across devices. Users can navigate between sections, search for specific topics, and explore technical details seamlessly. This accessibility enhances the overall user experience, making the manual a practical resource for owners in any setting.

Understanding the Manual’s Structure

The 2006 Honda Pilot Owners Manual is organized to provide clear guidance for owners. It begins with an introduction, followed by sections on vehicle specifications, maintenance schedules, and safety features. The manual also includes a comprehensive table of contents for easy navigation. This structure ensures users can quickly find the information they need, whether it’s troubleshooting tips or routine care instructions.

Table of Contents

🛤️ The Table of Contents in the 2006 Honda Pilot Owner’s Manual serves as a roadmap for navigating its comprehensive guide. It begins with an introduction, followed by vehicle specifications, safety features, and maintenance tips. Key sections include binding information, system descriptions, and troubleshooting steps. This organized structure ensures owners can quickly locate the information they need, whether it’s about engine operation or emergency procedures. The Table of Contents is designed to enhance the user experience by providing easy access to all essential details about the 2006 Honda Pilot.

Index and Glossary

The Index and Glossary in the 2006 Honda Pilot Owner’s Manual are designed to enhance your understanding and navigation of the document. The Index provides a comprehensive list of topics, making it easy to locate specific sections or terms quickly. The Glossary explains technical terms and abbreviations used throughout the manual, ensuring clarity for all users. These sections are particularly useful for resolving questions about vehicle components, systems, and procedures. Together, they serve as essential tools for maximizing your ownership experience, offering clear definitions and organized information that aligns with the manual’s content while maintaining a user-friendly approach.

Key Sections of the Manual

The manual includes essential sections like vehicle specifications, maintenance schedules, and safety features. These sections provide critical details for operating and maintaining your 2006 Honda Pilot effectively. They ensure owners understand the vehicle’s systems and performance capabilities, enabling informed decision-making and proper care.

Vehicle Specifications and Technical Details

The 2006 Honda Pilot Owners Manual provides detailed vehicle specifications, including engine specifications, performance metrics, and technical details. Owners can find information on the 3.0L V-6 engine, 5-speed automatic transmission, and impressive towing capacity. The manual also outlines key dimensions, seating configurations, and advanced safety features, ensuring owners understand the vehicle’s capabilities and limitations.

Maintenance Schedule

The 2006 Honda Pilot Owners Manual provides a comprehensive maintenance schedule to ensure your vehicle operates at peak performance. It outlines recommended service intervals, such as oil changes, tire rotations, and filter replacements, based on mileage and time. Following these guidelines helps maintain the vehicle’s reliability and longevity. The manual also includes factory-recommended maintenance tasks for various systems, including the engine, transmission, and braking system.

Owners are encouraged to refer to the maintenance schedule regularly to stay aligned with Honda’s factory guidelines. This ensures optimal performance and helps prevent potential issues before they arise. By adhering to the outlined schedule, owners can also extend the life of their vehicle and maintain its value. The manual emphasizes the importance of following these recommendations for safe and efficient driving experiences.

Maintenance and Repairs

Routine maintenance ensures your 2006 Honda Pilot runs smoothly and avoids costly repairs. Regular inspections and timely repairs help prevent wear and tear. Refer to the owner’s manual for detailed guidelines on keeping your vehicle in optimal condition.

General Maintenance Tips

Keeping your 2006 Honda Pilot in optimal condition requires regular maintenance. Check oil level, coolant, and brake fluid frequently. Inspect tires for proper inflation and wear, and rotate them as needed. Clean the exterior regularly to protect paint and wax it to maintain shine. Inspect brakes and replace pads if needed. Replace air filters and spark plugs at intervals specified in the manual. Keep the interior clean by vacuuming carpets and using protective covers. Regularly inspect belts and hoses for signs of wear. Ensure all lights and indicators are functioning properly. Replace windshield wipers and check the battery for corrosion. Follow the maintenance schedule in the manual to avoid costly repairs and ensure smooth operation; Proper care extends the vehicle’s lifespan and maintains its performance.

Common Repairs and Troubleshooting

The 2006 Honda Pilot may encounter common repairs such as engine misfires, transmission issues, or ABS problems. Troubleshooting often involves checking error codes or inspecting components like spark plugs or sensors. For engine misfires, inspect the ignition system and replace faulty parts. Transmission problems may require fluid checks or clutch inspections. ABS issues can be resolved by cleaning or replacing sensors. Always consult the manual for specific diagnostics and repair procedures. Refer to online forums like Piloteers.org for additional troubleshooting tips from owners. Regular inspections and prompt repairs help avoid further damage and ensure optimal performance of your vehicle.

Driving and Safety Tips

Safe driving with the 2006 Honda Pilot involves adhering to traffic laws, maintaining proper speed, and staying attentive. Always use turn signals, check blind spots, and maintain safe distances. Monitor tire pressure and brakes for optimal handling. Avoid sudden maneuvers and respect the vehicle’s limits. Additional tips include regular inspections and understanding the Pilot’s advanced safety features.

Best Practices for Safe Driving

For safe driving with your 2006 Honda Pilot, always follow traffic laws, maintain a safe speed, and stay focused on the road. Adjust mirrors and seats for optimal visibility. Wear seat belts at all times and ensure passengers do the same. Avoid distractions like texting or eating while driving. Maintain a proper following distance, especially in poor weather conditions. Use turn signals to indicate lane changes and be vigilant about blind spots. Drive defensively and anticipate other drivers’ actions. Avoid sudden accelerations or stops, and control your speed on curves or hills. Regularly inspect tires and brakes for safe handling. Always prioritize safety for yourself, passengers, and others on the road.

Understanding the Vehicle’s Safety Features

The 2006 Honda Pilot is equipped with advanced safety features designed to protect you and your passengers. The dual-stage front airbags are engineered to deploy at varying rates depending on the severity of the collision, reducing the risk of injury. Anti-lock braking system (ABS) helps maintain control during emergency stops, preventing wheels from locking up. Traction control enhances stability on slippery roads by reducing wheel spin. The vehicle’s reinforced body structure absorbs impact energy during collisions, providing enhanced occupant protection. The Hill Start Assist feature prevents rollback on inclines, and the vehicle’s center high-mounted brake light improves visibility for other drivers. Additionally, the Pilot’s anti-theft system activates alarm and horn signals when unauthorized access is detected. Understanding and utilizing these safety features ensures a safer driving experience in various conditions.

Owner Feedback and Reviews

Owners often praise the 2006 Honda Pilot for its reliability and spacious design. Many appreciate the manual’s detailed maintenance schedule and clear diagrams. However, some users find certain sections incomplete or challenging tofollow. Overall, the manual is a valuable resource, though community forums remain a popular.

User Experiences with the Manual

Owners of the 2006 Honda Pilot generally find the manual to be a reliable and informative resource. Many appreciate its clear organization and valuable insights into vehicle maintenance, safety features, and trouble-shooting. Detailed diagrams and step-by-step instructions are often praised for making complex tasks easier to understand. However, some users have noted that certain sections, such as those covering advanced repairs, lack sufficient detail or may feel incomplete. Additionally, formatting issues in some PDF versions have been reported, though these are less common. Overall, the manual remains a trusted companion for Pilot owners, providing essential guidance for both everyday use and more specialized maintenance tasks.

Common Complaints and Suggestions

Some users have reported difficulties accessing the 2006 Honda Pilot Owners Manual due to its large file size, which can be slow to download. Additionally, incomplete sections or missing pages in certain PDF versions have caused confusion. Formatting issues, such as unclear diagrams or hard-to-read text, have also been noted. A common suggestion is for Honda to provide a more user-friendly online platform for accessing the manual. Users recommend regular updates to ensure the manual remains accurate and complete. Others suggest better organization of technical information and clearer instructions for complex procedures. Overall, improving accessibility and clarity would enhance the user experience for owners of the 2006 Honda Pilot.

yth22v46 manual

Welcome to the Husqvarna YTH22V46 manual, your comprehensive guide to understanding and operating your lawn tractor. This 28-page manual covers operation, maintenance, and safety tips for optimal use.

1.1 Overview of the Husqvarna YTH22V46 Lawn Tractor

The Husqvarna YTH22V46 is a powerful and versatile lawn tractor designed for medium to large-sized lawns. Equipped with a 22 HP engine and a 46-inch cutting deck, it offers efficient mowing performance. The tractor features hydrostatic transmission for smooth operation and a comfortable seating design. It is ideal for homeowners seeking reliability and durability. This manual provides detailed guidance on operation, maintenance, and safety, ensuring you get the most out of your tractor while maintaining its longevity.

1.2 Purpose of the Manual

This manual is designed to provide comprehensive guidance for the Husqvarna YTH22V46 lawn tractor, ensuring safe and effective operation. It covers essential information on assembly, maintenance, troubleshooting, and proper usage. The manual also includes safety precautions, warranty details, and technical specifications to help users maximize their tractor’s performance. By following the instructions, users can maintain their tractor’s longevity and ensure optimal mowing results. This guide is a valuable resource for both new and experienced users, offering clear instructions and helpful tips for every aspect of tractor ownership.

1.3 Importance of Reading the Manual

Reading the Husqvarna YTH22V46 manual is crucial for safe and effective operation. It provides essential safety guidelines, operating instructions, and maintenance tips to ensure optimal performance. Understanding the manual helps users avoid accidents, prolong the tractor’s lifespan, and troubleshoot common issues. It also outlines warranty details and technical specifications, ensuring compliance with manufacturer recommendations. By following the manual, users can maximize efficiency, maintain their tractor properly, and enjoy a seamless mowing experience. This guide is indispensable for both new and experienced users to get the most out of their investment.

Safety Precautions and Guidelines

Always wear protective gear and follow safety guidelines to ensure safe operation. Be aware of your surroundings and keep bystanders away while operating the tractor.

2.1 General Safety Guidelines

Always read and understand the manual before operating the tractor. Wear protective gear, including gloves and eyewear. Ensure the area is clear of obstacles and bystanders. Never allow children to operate the tractor. Use the seatbelt when operating and avoid loose clothing. Keep the tractor in good working condition and follow all safety symbols. Be cautious on slopes and uneven terrain. Never leave the tractor unattended while it is running. Regularly inspect and maintain the tractor to ensure safe operation. Follow all local regulations and environmental guidelines.

2.2 Safety Symbols and Their Meanings

The manual uses specific safety symbols to alert users of potential hazards. These symbols include warnings, cautions, and notices. A warning indicates a potentially dangerous situation that could result in serious injury or death. A caution alerts users to situations that may cause minor injury or damage. A notice provides important information for safe and effective operation. Understanding these symbols is crucial for safe tractor operation. Refer to the manual for detailed explanations of each symbol and its meaning to ensure proper usage and adherence to safety guidelines.

2.3 Pre-Operation Safety Checks

Before operating the Husqvarna YTH22V46, perform essential safety checks. Ensure the parking brake is engaged and the PTO is disengaged. Check the seat switch and all control functions for proper operation. Verify that all safety shields and guards are in place. Inspect the mower deck for damage or obstructions. Ensure the area is clear of debris and obstacles. Always wear protective gear, including gloves and eyewear. Familiarize yourself with the tractor’s controls and ensure all systems function correctly before starting the engine. These checks are vital for safe and efficient operation.

Product Specifications

  • Engine power: 22 HP Briggs & Stratton engine.
  • Mower deck size: 46-inch cutting deck.
  • Transmission: Hydrostatic for smooth operation.
  • Fuel capacity: 2.5 gallons.
  • Designed for medium-sized lawns with durability.
  • Ergonomic design for comfort and efficiency.

3.1 Key Features of the YTH22V46

The Husqvarna YTH22V46 is a robust lawn tractor designed for efficient mowing. It features a powerful 22 HP Briggs & Stratton engine, a 46-inch cutting deck, and hydrostatic transmission for smooth operation. The tractor includes an ergonomic design with an adjustable seat and steering wheel, ensuring comfort during long mowing sessions. It also offers a convenient cruise control feature and a washout port for easy deck maintenance. With a fuel capacity of 2.5 gallons, it provides ample runtime for medium-sized lawns. These features make it a reliable choice for homeowners seeking durability and performance.

3.2 Technical Specifications

The Husqvarna YTH22V46 features a 22 HP Briggs & Stratton engine, providing reliable power for mowing. It has a hydrostatic transmission for smooth speed control and a 46-inch cutting deck with adjustable height settings. The tractor is equipped with a 2.5-gallon fuel tank, ensuring extended runtime. Additional specs include a robust steel frame, 20-inch rear tires, and a 15-inch steering wheel for precise control. The deck washout port simplifies maintenance, while the ergonomic design enhances comfort during operation. These specifications ensure optimal performance for medium-sized lawns.

3.4 Warranty Information

The Husqvarna YTH22V46 is backed by a comprehensive warranty program. The tractor is covered under a 5-year limited warranty, while the cutting deck is protected by a 3-year limited warranty. Proper maintenance, as outlined in this manual, is required to maintain warranty validity. For full warranty terms, including coverage details and exclusions, refer to the warranty section in this manual. Registration of your product is recommended to ensure seamless warranty service. This warranty reflects Husqvarna’s commitment to quality and customer satisfaction.

Assembly and Installation

Assembly involves unboxing, inventorying parts, and following step-by-step instructions. Ensure all components are correctly installed and adjusted. Purge the transmission before first use for smooth operation.

4.1 Unboxing and Inventory of Parts

Welcome to the assembly section! Start by carefully unboxing your Husqvarna YTH22V46 and inspecting for damage. Inventory all parts against the manual’s list to ensure completeness. Locate the tractor, keys, attachments, and hardware. Organize components to avoid misplacement. If any item is missing or damaged, contact Husqvarna support immediately. Proper inventory ensures a smooth assembly process. Take your time to verify each part before proceeding.

4.2 Step-by-Step Assembly Instructions

Begin by attaching the steering wheel using the provided hardware. Next, secure the seat to the tractor frame, ensuring all bolts are tightened properly. Attach the mower deck by aligning the mounting brackets and fastening with the included screws. Refer to the manual for specific torque values. Connect the deck lift lever and ensure it operates smoothly. Finally, install any additional accessories like the bagger or mulch kit. Double-check all connections and bolts for tightness before proceeding to the initial setup.

4.3 Initial Setup and Adjustments

After assembly, purge the transmission by slowly moving the tractor forward and backward. Adjust the mower deck height using the lift lever, ensuring it is level for even cutting. Check and inflate tires to the recommended pressure. Verify the oil and fluid levels, topping them off as needed. Test all controls, such as the throttle and brake, to ensure proper function. Finally, review the manual for any model-specific adjustments and ensure all safety features are operational before first use.

Operating the Tractor

Operating the Husqvarna YTH22V46 involves understanding controls, ensuring safety, and preparing the tractor for use. Start the engine, engage the mower, and adjust settings for optimal performance.

5.1 Starting the Engine

To start the engine of your Husqvarna YTH22V46, ensure the tractor is on a level surface and the parking brake is engaged. Move the mower deck to the “disengaged” position and set the throttle to the “choke” position. Insert the key into the ignition and turn it clockwise to start the engine. Allow the engine to warm up for a few seconds before adjusting the throttle to your desired speed. Always refer to the manual for specific starting procedures and safety precautions to ensure smooth operation.

5.2 Basic Operating Controls

The Husqvarna YTH22V46 features intuitive controls designed for ease of use. The steering wheel provides smooth directional control, while the foot pedals manage acceleration and braking. The control levers on the right side handle the mower deck lift and PTO (Power Take-Off) engagement. Always ensure the PTO switch is off when not mowing. Familiarize yourself with these controls to operate the tractor safely and efficiently. Refer to the manual for detailed instructions on adjusting and using these controls effectively during operation.

5.3 Mowing Techniques and Tips

For optimal mowing results with your Husqvarna YTH22V46, maintain a consistent mowing pattern and keep the mower deck at the recommended height. Always purge the transmission before first use. Mow in slightly overlapping passes to ensure even cutting. Avoid cutting more than one-third of the grass blade to promote healthy growth. Leave grass clippings on the lawn to act as a natural fertilizer. Adjust your speed according to grass thickness and use the PTO engage/disengage feature as needed. Proper techniques will enhance efficiency and lawn health.

Maintenance and Servicing

Regular maintenance ensures optimal performance. Check oil, fluids, and blades frequently. Refer to the manual for detailed schedules and procedures. Download the full manual for additional guidance.

6.1 Routine Maintenance Schedule

Regular maintenance is crucial for optimal performance and longevity. Check oil and fluid levels before each use, sharpen blades monthly, and purge the transmission annually. Every 50 hours, change the engine oil and inspect the air filter. Refer to the manual for a detailed schedule. Proper upkeep ensures safety and efficiency. Download the full manual for comprehensive guidance on maintaining your Husqvarna YTH22V46.

6.2 Oil and Fluid Checks

Regular oil and fluid checks are essential for maintaining your Husqvarna YTH22V46. Check the engine oil level before each use, ensuring it reaches the recommended level. Use SAE 30 or 10W-40 oil for optimal performance. Inspect the hydraulic fluid level using the dipstick and top it off if necessary. Refer to the manual for specific guidelines on fluid types and capacities. Proper fluid maintenance ensures smooth operation and extends the tractor’s lifespan. Download the full manual for detailed instructions on oil and fluid checks.

6.3 Blade Maintenance and Sharpening

Regular blade maintenance is crucial for optimal mowing performance. Inspect the blades for damage or wear and sharpen them as needed. Dull blades can tear grass, leaving it vulnerable to disease. Sharpen blades carefully, ensuring balance to maintain even cutting. Always disconnect the spark plug before performing blade maintenance. Refer to the manual for specific sharpening techniques and safety guidelines. Proper blade care extends the life of your tractor and ensures a clean, precise cut every time. Download the full manual for detailed blade maintenance instructions.

Troubleshooting Common Issues

This section helps you identify and resolve common issues with your Husqvarna YTH22V46 tractor, ensuring optimal performance and addressing problems like transmission issues or blade malfunctions effectively.

7.1 Common Problems and Solutions

Common issues with the Husqvarna YTH22V46 include transmission problems and blade malfunctions. For transmission issues, ensure proper purging before first use. Dull or damaged blades can cause poor cutting performance; sharpen or replace them as needed. Regular maintenance, such as oil checks and filter cleaning, prevents engine issues. If the tractor doesn’t start, check the ignition switch, fuel level, and air filter. Refer to the manual for diagnostic steps and solutions to ensure optimal performance and extend the tractor’s lifespan.

7.2 Diagnostic Techniques

Diagnosing issues with your Husqvarna YTH22V46 involves checking key components. Start by ensuring the ignition switch is functioning properly and the parking brake is engaged. Inspect the air filter for cleanliness and the fuel level for adequacy. If the tractor fails to start, check the spark plug and battery connections. For transmission problems, ensure proper purging and fluid levels. Refer to the manual for detailed diagnostic steps and troubleshooting guides to identify and resolve issues efficiently. Regular checks can help prevent malfunctions and ensure smooth operation.

7.3 Resetting the Tractor

Resetting your Husqvarna YTH22V46 tractor involves a few key steps. Start by turning the ignition switch to the “off” position and engaging the parking brake. Next, purge the transmission to ensure proper fluid flow. Check the air filter and fuel level to confirm they are adequate. If issues persist, refer to the manual for specific reset procedures. Regular checks and maintenance can help prevent the need for frequent resets. Always follow the manual’s guidelines for troubleshooting and resetting to ensure optimal performance and safety.

Accessories and Attachments

Explore compatible accessories for your Husqvarna YTH22V46, including bags, mulch kits, and tow-behind attachments. Proper installation ensures safety and optimal performance, enhancing your mowing experience.

8.1 Compatible Accessories

The Husqvarna YTH22V46 supports a variety of accessories to enhance its functionality. These include grass catchers, mulch kits, and tow-behind attachments like trailers or spreaders. Each accessory is designed to fit seamlessly with your tractor, ensuring optimal performance and safety. Before purchasing, always verify compatibility with your model to avoid installation issues. Accessories can be found on Husqvarna’s official website or through authorized dealers. Properly installed accessories not only improve efficiency but also extend the versatility of your lawn tractor for different yard-care tasks.

8.2 Installing Attachments

Installing attachments on your Husqvarna YTH22V46 is straightforward when done correctly. Always ensure the attachment is compatible with your tractor model. Begin by preparing the tractor and attachment according to the manual. Align the attachment with the tractor’s mounting points and secure it using the provided hardware. Tighten all bolts firmly to prevent loose connections. After installation, test the attachment at a low speed to ensure proper function. Refer to the manual for specific instructions, as improper installation can lead to safety hazards or damage to the tractor.

8.3 Using Attachments Safely

Using attachments on your Husqvarna YTH22V46 requires careful attention to safety. Always follow the manual’s guidelines for specific attachments. Ensure the attachment is securely fastened to prevent detachment during operation. Wear protective gear, such as gloves and safety glasses, when operating with attachments. Keep bystanders, especially children and pets, at a safe distance. Before starting, clear the area of debris or obstacles. Operate at moderate speeds and avoid sudden turns. Turn off the tractor and engage the brake when leaving it unattended, even briefly. Proper usage ensures safety and optimal performance.

Storage and Winterization

Proper storage protects your tractor from damage. Winterization ensures the engine remains functional. Clean and cover the tractor for long-term storage. Follow guidelines for optimal protection.

9.1 Proper Storage Techniques

Proper storage techniques ensure your Husqvarna YTH22V46 remains in excellent condition. Clean the tractor thoroughly, removing dirt and debris. Store in a dry, level location, away from direct sunlight. Use a breathable cover to protect from dust and moisture. Ensure the engine is cool before storage. Avoid leaving fuel in the tank for extended periods. Follow winterization steps if storing for several months. Regularly inspect the tractor during storage to prevent damage. Proper storage extends the lifespan and maintains performance.

9.2 Winterizing the Tractor

Winterizing your Husqvarna YTH22V46 is essential to protect it from cold weather damage. Drain the fuel tank or add a fuel stabilizer to prevent corrosion. Purge the transmission and lubricate moving parts. Disconnect and store the battery in a cool, dry place. Cover the tractor to shield it from moisture and debris. Follow the manual’s specific winterization steps to ensure optimal condition. Proper winter care extends the tractor’s lifespan and ensures it’s ready for spring use.

9.3 Preparing for Long-Term Storage

Before storing your Husqvarna YTH22V46 for an extended period, clean the tractor thoroughly to remove dirt and debris. Check for any damage and repair it to prevent further issues. Secure all loose parts and protect the tires from moisture. Store the tractor in a dry, well-ventilated area, away from direct sunlight. Cover it with a durable cover to shield it from dust and pests. Ensure the battery is fully charged or stored separately. Proper long-term storage helps maintain your tractor’s condition and ensures it’s ready for future use.

Conclusion

Thank you for reading the Husqvarna YTH22V46 manual. This guide has provided essential information to help you operate, maintain, and troubleshoot your tractor effectively. Refer back for optimal performance.

10.1 Summary of Key Points

This manual provides a comprehensive guide for the Husqvarna YTH22V46 lawn tractor, covering safety, operation, maintenance, and troubleshooting. It emphasizes the importance of following safety precautions and performing routine checks. Key features and technical specifications are detailed to ensure optimal performance. Regular maintenance, such as oil changes and blade sharpening, is essential for longevity. Troubleshooting tips and storage guidelines are also included. Refer to the manual for specific instructions and warranty information to maximize your tractor’s efficiency and safety.

10.2 Final Tips for Optimal Use

For optimal performance, always refer to the manual before operating your Husqvarna YTH22V46. Regularly purge the transmission and check fluid levels to ensure smooth operation. Maintain sharp blades for even cutting and adjust settings according to terrain. Store the tractor properly during off-seasons and follow winterization steps. Explore compatible accessories to enhance functionality. By adhering to these guidelines, you’ll extend the tractor’s lifespan and enjoy efficient mowing sessions. Safe operation and consistent upkeep are key to maximizing your investment.

10.3 Encouragement to Refer Back to the Manual

Referencing this manual regularly ensures safe and effective operation of your Husqvarna YTH22V46. It provides detailed troubleshooting guides, maintenance schedules, and operational tips to maximize performance. The manual is your go-to resource for resolving issues and optimizing tractor functionality. Download or print it for easy access, and keep it handy for future reference. By revisiting the manual, you’ll maintain your tractor’s efficiency and extend its lifespan, ensuring years of reliable service.

Additional Resources

Explore online support, forums, and downloadable guides for the YTH22V46. Visit Husqvarna’s official website for the full manual, troubleshooting tips, and additional resources to enhance your experience.

11.1 Online Support and Forums

Access comprehensive online support and forums for the YTH22V46. Husqvarna’s official website offers downloadable manuals, troubleshooting guides, and FAQs. Engage with communities to share experiences and solutions. Visit Husqvarna’s website for dedicated resources, ensuring optimal use and maintenance of your tractor. These platforms provide valuable insights and expert advice, helping you resolve issues and enhance your mowing experience.

11.2 Contacting Husqvarna Support

For direct assistance, contact Husqvarna support via phone, email, or live chat. Visit their official website for contact details and regional support options. The support team is available to address questions, troubleshooting, and repair needs. Additionally, you can schedule service appointments or order genuine parts through authorized dealers. Husqvarna’s customer support ensures prompt and professional help, providing peace of mind for any issues related to your YTH22V46 tractor. Reach out to their experts for reliable guidance and maintenance advice.

11.3 Downloading the Full Manual

The full Husqvarna YTH22V46 manual is available for download as a PDF from the official Husqvarna website or authorized platforms. This 28-page document includes detailed instructions, safety guidelines, and technical specifications. To download, visit the support section, enter your model number, and follow the prompts. The manual is free and can be printed for convenience. Ensure you download from trusted sources to avoid unauthorized versions. This resource is essential for troubleshooting, maintenance, and understanding your tractor’s features thoroughly.

aircraft bulkhead structural integrity pdf

Aircraft bulkheads are critical structural components ensuring safety and performance by withstanding various loads and stresses․ Their integrity is vital for preventing fatigue and corrosion-related failures, as highlighted in recent studies․ This article explores the design, materials, and testing methods to maintain bulkhead reliability, addressing real-world challenges and future innovations․

1․1 Definition and Importance of Bulkheads in Aircraft

Bulkheads are critical structural components in aircraft, serving as transverse frames that maintain the fuselage’s shape and provide structural integrity․ They are essential for distributing loads, such as tension, compression, and shear forces, across the aircraft’s frame․ Bulkheads also act as compartmentalization barriers, separating sections like the cockpit, cabin, and cargo areas․ Their structural role is vital for ensuring safety and performance, as they prevent collapse under extreme conditions․ Failures in bulkheads can lead to catastrophic consequences, emphasizing their importance in aircraft design․ Recent studies highlight the impact of corrosion and fatigue on bulkhead reliability, underscoring the need for advanced materials and testing methods to mitigate these risks․ Thus, bulkheads are indispensable for maintaining aircraft safety and operational efficiency․

1․2 Overview of Structural Integrity in Aviation

Structural integrity in aviation ensures aircraft components withstand operational stresses, including fatigue, corrosion, and mechanical loads․ It is critical for maintaining safety and performance, as failures can lead to catastrophic events․ Factors such as material degradation, manufacturing defects, and environmental conditions like humidity and temperature fluctuations can compromise integrity․ Advanced analysis techniques, including load distribution assessments and non-destructive testing (NDT), are employed to identify potential weaknesses․ Fatigue cracking from corrosion pits, as documented in recent studies, highlights the need for robust inspection methods․ Ensuring structural integrity involves a combination of design optimization, high-performance materials, and rigorous testing protocols․ These practices are essential for extending the service life of aircraft components, including bulkheads, and preventing premature failures․ The aviation industry relies heavily on these measures to maintain fleet reliability and passenger safety․

1․3 Purpose of the Article

This article aims to provide a comprehensive analysis of aircraft bulkhead structural integrity, focusing on design principles, material selection, and testing methodologies․ It seeks to bridge the gap between theoretical concepts and practical applications, offering insights into maintaining the reliability and safety of aircraft structures․ By exploring real-world challenges and advancements, the article highlights the importance of fatigue and damage tolerance analysis, corrosion prevention, and topology optimization․ It also examines case studies and future trends, such as the use of advanced materials and additive manufacturing․ The purpose is to equip engineers, researchers, and industry professionals with a detailed understanding of bulkhead integrity, enabling them to develop innovative solutions and ensure the longevity of aircraft components․ This resource serves as a reference for enhancing structural performance and safety in aviation․

Design and Analysis of Aircraft Bulkheads

Aircraft bulkheads are designed to ensure structural integrity, with topology optimization enhancing load distribution and stress resistance․ Load analysis is critical for maintaining safety and performance under various conditions․

2;1 Role of Bulkheads in Aircraft Structure

Bulkheads are critical structural components in aircraft, serving as load-bearing walls that ensure the integrity of the fuselage and wing structures․ They play a vital role in distributing external loads, such as aerodynamic forces and landing impacts, across the aircraft frame․ By maintaining the shape of the fuselage and preventing deformation, bulkheads contribute to the overall structural rigidity and stability of the aircraft․ Additionally, they act as compartments, separating sections of the aircraft for fuel, cargo, or passenger areas․ Their design must account for various stress factors, including tension, compression, and shear, to ensure safe operation under all flight conditions․ The lower cap of the bulkhead, for instance, is axially loaded by shear flow, highlighting their complex role in load transfer․ Effective bulkhead design is essential for maintaining aircraft performance and safety․

2․2 Key Components of Bulkhead Design

The key components of bulkhead design include the caps, webs, stiffeners, and bearings, each playing a specific role in load distribution and structural stability․ The caps, located at the edges, are designed to resist axial and bending loads, while the webs provide shear resistance and maintain shape integrity․ Stiffeners are added to enhance rigidity and prevent buckling under compressive forces․ Bearings, such as thrust bearings, are strategically placed to distribute propeller or engine thrust into the structure․ These components work together to ensure the bulkhead can withstand operational stresses, including aerodynamic loads and landing impacts․ Advanced design techniques, such as topology optimization, are increasingly used to enhance structural efficiency while reducing weight․ Proper integration of these elements is crucial for maintaining aircraft safety and performance under various flight conditions․

2․3 Load Analysis and Stress Distribution

Load analysis is critical to understanding how forces interact with aircraft bulkheads․ These components are subjected to axial, shear, and bending loads, which must be carefully analyzed to ensure structural integrity․ The lower cap of the bulkhead, for instance, experiences axial loading due to shear flow in the lower shear web, particularly during tail-down landings․ Stress distribution is influenced by the geometry and material properties of the bulkhead, with areas like cutouts or joints being prone to stress concentrations․ Advanced techniques, such as finite element analysis (FEA), are employed to model and optimize stress distribution, ensuring that the bulkhead can withstand operational loads without failure․ Accurate load analysis is essential for preventing structural degradation and ensuring the safety of the aircraft under various flight conditions․

2․4 Topology Optimization for Enhanced Structural Integrity

Topology optimization plays a pivotal role in enhancing the structural integrity of aircraft bulkheads by optimizing material distribution to withstand operational loads․ This method ensures that the bulkhead’s structure is both lightweight and robust, minimizing stress concentrations․ Recent studies highlight the successful implementation of topology optimization, which improved structural integrity, reduced mass, and eliminated resonance issues․ By leveraging computational tools, engineers can design bulkheads with complex geometries that efficiently distribute loads, enhancing overall performance․ This approach not only addresses fatigue and corrosion challenges but also paves the way for innovative designs that meet stringent safety and efficiency requirements in modern aviation․ The integration of topology optimization is a cornerstone in advancing bulkhead design for future aircraft․

Materials and Manufacturing Techniques

Advanced materials like composites and alloys are used for aircraft bulkheads to enhance strength-to-weight ratios․ Modern manufacturing techniques, including additive methods, improve precision and reduce material waste․

3․1 Types of Materials Used for Bulkheads

Aircraft bulkheads are typically fabricated from high-strength, lightweight materials to ensure optimal performance․ Aluminum alloys, such as 2024-T3 and 7075-T6, are commonly used due to their excellent strength-to-weight ratio and corrosion resistance․ Titanium alloys, like Ti-6Al-4V, are also employed in critical areas due to their superior strength and resistance to fatigue; Composite materials, including carbon fiber-reinforced polymers (CFRP), are increasingly adopted for their exceptional durability and weight reduction capabilities․ Steel is occasionally used in specific applications where high strength and stiffness are required․ The selection of materials depends on the bulkhead’s location, load requirements, and environmental conditions․ Advanced materials are continuously being developed to enhance structural integrity while minimizing weight, ensuring safer and more efficient aircraft operation․

3․2 Advanced Manufacturing Techniques for Bulkheads

Modern aircraft bulkhead production leverages advanced manufacturing techniques to enhance precision and efficiency․ Additive manufacturing, such as 3D printing, enables the creation of complex geometries and optimized structures, reducing material waste and weight․ Computer numerical control (CNC) machining ensures high accuracy in cutting and shaping materials like aluminum and titanium․ Automation and robotics are increasingly used to streamline assembly processes, improving consistency and reducing human error․ Additionally, advanced welding techniques, such as friction stir welding, are employed to join materials without compromising their structural integrity․ These methods not only improve the quality of bulkheads but also reduce production time and costs․ The integration of topology optimization in design further enhances the manufacturability of complex components, ensuring optimal performance and durability in aircraft structures․

3․3 Challenges in Material Selection and Fabrication

Selecting and fabricating materials for aircraft bulkheads presents significant challenges․ Balancing strength, durability, and weight is critical, as bulkheads must withstand extreme loads and environmental conditions․ Corrosion resistance is a key concern, as moisture and fatigue can lead to material degradation․ Additionally, the fabrication process must ensure minimal defects, as even small imperfections can compromise structural integrity․ Advanced materials like composites offer improved performance but are difficult to manufacture due to complex curing processes․ Welding and joining techniques also pose challenges, requiring precise control to maintain material properties․ Furthermore, the high cost of specialized materials and the need for rigorous quality control add to the complexity․ Addressing these challenges is essential to ensure the reliability and safety of aircraft bulkheads in service․

Testing and Inspection Methods

Testing and inspection methods are crucial for ensuring aircraft bulkhead structural integrity․ Techniques like Non-Destructive Testing (NDT), static, and fatigue testing detect flaws and corrosion, ensuring safety and performance․

4․1 Non-Destructive Testing (NDT) Techniques

Non-Destructive Testing (NDT) techniques are critical for evaluating aircraft bulkhead structural integrity without causing damage․ Common methods include ultrasonic testing, radiography, and eddy-current testing, which detect defects like cracks, corrosion, and voids․ These techniques ensure early detection of fatigue and corrosion-related issues, preventing catastrophic failures․ NDT is essential for maintaining aircraft safety and compliance with regulatory standards․ Advanced NDT methods, such as phased array ultrasonics, provide high-resolution imaging for complex geometries․ Regular inspections using NDT ensure bulkheads withstand operational stresses and environmental factors․ Trained personnel and specialized equipment are vital for accurate results․ NDT plays a key role in extending service life and ensuring the reliability of aircraft structures․

4․2 Static and Fatigue Testing of Bulkheads

Static and fatigue testing are essential for ensuring aircraft bulkheads can withstand operational loads and repetitive stresses․ Static tests validate structural strength under maximum loads, while fatigue tests simulate long-term operational conditions to identify potential failure points․ These tests are critical for detecting issues like cracks, corrosion pits, and material degradation․ Advanced testing methods, such as cyclic loading, replicate real-world stress patterns, helping to assess bulkhead durability․ Results from these tests inform design improvements and maintenance schedules․ Fatigue testing also reveals the effects of corrosion on bulkhead integrity, as highlighted in recent studies․ By identifying weak points, these tests ensure safer and more reliable aircraft structures, preventing in-service failures and extending service life․ Regular testing is vital for maintaining airworthiness and passenger safety․

4․3 Corrosion Detection and Prevention Strategies

Corrosion detection and prevention are critical for maintaining aircraft bulkhead integrity․ Non-destructive testing (NDT) methods, such as ultrasonic inspection and eddy-current testing, are widely used to identify corrosion pits and cracks․ Regular inspections ensure early detection of corrosion damage, preventing catastrophic failures․ Prevention strategies include applying protective coatings, using corrosion-resistant materials, and controlling environmental factors․ Cathodic protection systems are also employed to mitigate corrosion risks․ Effective corrosion management extends bulkhead service life and reduces maintenance costs․ Advanced monitoring techniques, such as real-time sensors, are being integrated to enhance detection accuracy․ Addressing corrosion proactively is essential for ensuring the structural reliability and safety of aircraft bulkheads throughout their operational lifecycle․ These strategies are vital for minimizing the adverse effects of corrosion on fatigue life and overall structural integrity․

Fatigue and Damage Tolerance Analysis

Fatigue and damage tolerance analysis are crucial for assessing aircraft bulkhead durability․ It focuses on crack initiation, propagation, and corrosion effects, ensuring structural integrity under repeated stress․

5․1 Fatigue Crack Initiation and Propagation

Fatigue crack initiation and propagation in aircraft bulkheads are critical factors in maintaining structural integrity․ Cracks often originate from corrosion pits or material defects, which act as stress concentrators under cyclic loading․ The interaction of corrosion damage with operational loads accelerates fatigue crack growth, as documented in failure analyses of airframe components․

Research highlights the influence of pit topology on the transition from corrosion damage to crack initiation․ Advanced NDT techniques are essential for detecting such defects early, ensuring timely repairs․

Understanding the mechanisms of crack propagation is vital for designing durable bulkheads and predicting fatigue life․ This analysis informs maintenance schedules and enhances safety by addressing potential failures before they occur․

5․2 Damage Tolerance Philosophy in Aircraft Structures

The damage tolerance philosophy ensures aircraft structures, including bulkheads, can sustain damage without compromising safety․ This approach allows for controlled levels of damage, provided they do not lead to catastrophic failure before detection․ It integrates defect detection, fatigue analysis, and maintenance schedules to ensure structural integrity throughout the aircraft’s lifecycle․

By evaluating the effects of defects on structural performance, engineers can set inspection intervals and repair thresholds․ This philosophy is critical for bulkheads, as they are prone to fatigue and corrosion․ Advanced NDT techniques and fatigue spectrum analyses are used to identify critical stress locations and predict crack propagation․

This systematic evaluation ensures that even if damage occurs, it will not escalate to a dangerous level before being addressed, thereby maintaining the overall safety and reliability of the aircraft structure․

5․3 Effects of Corrosion on Fatigue Life

Corrosion significantly impacts the fatigue life of aircraft bulkheads by initiating cracks and accelerating their propagation․ Corrosion pits act as stress concentrators, reducing the material’s resistance to fatigue․

When corrosion occurs, it interacts with operational loading, leading to a faster accumulation of fatigue damage․ This interaction has been extensively documented in failure analyses of airframe components;

The presence of corrosion reduces the threshold for crack initiation and increases the rate of crack growth, ultimately shortening the fatigue life of the structure․

This highlights the importance of corrosion detection and prevention strategies to maintain the structural integrity and safety of aircraft bulkheads throughout their service life․

Maintenance and Repair of Bulkheads

Regular inspections and timely repairs are crucial for maintaining bulkhead structural integrity․ Advanced NDT techniques detect early signs of damage, while repair methods like patching restore strength and safety․

6․1 Inspection Intervals and Procedures

Regular inspection of aircraft bulkheads is essential to ensure structural integrity and safety․ Inspection intervals are typically determined by flight hours, cycles, or calendar time, depending on the aircraft’s operational conditions․ Procedures involve visual checks for signs of damage, corrosion, or wear, followed by advanced non-destructive testing (NDT) methods like ultrasonic testing or radiography to detect internal flaws․ Maintenance manuals provide detailed guidelines for these inspections, ensuring consistency and thoroughness․ Environmental factors, such as exposure to moisture or salt, may necessitate more frequent inspections․ Documentation of findings is critical for tracking the bulkhead’s condition over time and planning repairs․ Timely inspections help prevent minor issues from escalating into major structural failures, ensuring the aircraft remains airworthy and safe for operation․

6․2 Common Repair Techniques for Damaged Bulkheads

Repairing damaged aircraft bulkheads involves specialized techniques to restore structural integrity․ Common methods include patching with reinforced materials, riveting to reinforce weak areas, and welding to repair cracks or corrosion damage․ In cases of extensive damage, partial or full replacement of the bulkhead may be necessary․ Advanced techniques, such as bonded repairs using composite materials, are increasingly used for their strength and weight efficiency․ Each repair must adhere to strict aviation standards and be validated through non-destructive testing to ensure safety․ The goal is to restore the bulkhead to its original strength and durability, preventing further degradation and ensuring the aircraft’s continued airworthiness․ Proper documentation and inspection of repairs are critical to maintaining reliability and safety․

6․3 Importance of Timely Maintenance for Structural Integrity

Timely maintenance is crucial for ensuring the structural integrity of aircraft bulkheads․ Delays in addressing damage or wear can lead to severe consequences, including fatigue cracking and corrosion, which compromise safety and performance․ Regular inspections and non-destructive testing (NDT) techniques are essential for early detection of potential issues․ By identifying and repairing damage promptly, operators can prevent minor problems from escalating into critical failures․ This proactive approach not only enhances safety but also reduces long-term maintenance costs․ Additionally, adherence to scheduled maintenance protocols ensures compliance with aviation standards and extends the service life of the aircraft․ Ultimately, timely maintenance is vital for safeguarding passengers, crew, and the aircraft itself, making it a cornerstone of aviation safety practices․

Case Studies and Real-World Examples

Historical failures highlight the consequences of neglecting bulkhead integrity, while successful implementations of topology optimization demonstrate advancements in enhancing structural reliability and reducing maintenance challenges effectively․

7․1 Historical Failures and Lessons Learned

Historical failures in aircraft bulkheads underscore the critical importance of structural integrity․ One notable incident involved a corroded bulkhead that led to in-flight decompression, highlighting the dangers of unchecked corrosion․ Fatigue cracking from corrosion pits has been extensively documented, with studies showing how such defects propagate under operational stresses․ These failures have prompted rigorous inspection protocols and the adoption of advanced non-destructive testing (NDT) methods․ Lessons learned emphasize the need for early detection of corrosion and fatigue, as well as the importance of maintaining strict maintenance schedules․ Such incidents have also driven innovations in material selection and design practices, ensuring safer and more durable aircraft structures․ These historical cases serve as a foundation for modern approaches to bulkhead design and maintenance․

7․2 Successful Implementation of Topology Optimization

Topology optimization has revolutionized aircraft bulkhead design by enhancing structural integrity while reducing weight․ A landmark study demonstrated its successful application, yielding two optimal designs that improved load distribution and eliminated resonance․ These designs not only strengthened the bulkhead but also reduced mass, contributing to overall aircraft efficiency․ The implementation highlighted the potential of topology optimization to address complex structural challenges․ By leveraging advanced computational tools, engineers achieved a balance between performance and material usage․ This breakthrough has set a precedent for future bulkhead designs, showcasing the benefits of integrating topology optimization in aerospace engineering․ Such innovations are pivotal in advancing the safety and efficiency of modern aircraft structures․

Future Trends in Bulkhead Design and Analysis

Future trends emphasize advanced materials and additive manufacturing, enabling lighter, stronger bulkheads․ These innovations enhance structural efficiency and durability, driving next-generation aircraft performance and safety․

8․1 Use of Advanced Materials and Composites

The integration of advanced materials and composites, such as carbon fiber reinforced polymers (CFRP) and titanium alloys, is revolutionizing bulkhead design․ These materials offer exceptional strength-to-weight ratios, enhancing structural efficiency while reducing overall aircraft mass․ CFRP, in particular, provides superior resistance to fatigue and corrosion, critical for maintaining bulkhead integrity under cyclic loading conditions․ Additionally, titanium alloys are being utilized for their high strength and durability in extreme environments․ The use of these materials, combined with topology optimization, enables the creation of lightweight yet robust bulkheads․ However, challenges remain, including high production costs and complex manufacturing processes․ Despite these hurdles, the adoption of advanced composites is expected to become widespread, driving innovation in aircraft structural design and performance․

8․2 Integration of Additive Manufacturing Techniques

Additive manufacturing (AM) is transforming the production of aircraft bulkheads by enabling complex geometries and reducing material waste․ Techniques like Selective Laser Sintering (SLS) and Electron Beam Melting (EBM) allow for the creation of lightweight, high-performance components․ AM facilitates topology optimization, enabling the design of bulkheads with enhanced strength-to-weight ratios․ This technology also reduces production lead times and enables rapid prototyping․ However, challenges such as material porosity and surface finish requirements must be addressed․ Regulatory bodies are working to establish certification standards for AM-produced aircraft components․ Despite these hurdles, the integration of additive manufacturing promises to revolutionize bulkhead production, offering significant advantages in terms of performance, efficiency, and cost-effectiveness․ As the technology matures, it is expected to play a pivotal role in future aircraft design and manufacturing․

Aircraft bulkhead structural integrity is a cornerstone of aviation safety and performance․ This article has explored the critical aspects of bulkhead design, materials, testing, and maintenance, highlighting their role in ensuring aircraft durability․ Advances in topology optimization, additive manufacturing, and non-destructive testing have significantly enhanced bulkhead reliability․ However, challenges such as fatigue, corrosion, and material degradation remain critical concerns․ Future trends, including the use of advanced composites and 3D printing, promise to further improve bulkhead performance․ Continued research and collaboration among engineers, manufacturers, and regulatory bodies are essential to address emerging challenges and maintain the highest standards of structural integrity․ By prioritizing innovation and rigorous testing, the aviation industry can ensure the safety and efficiency of aircraft for years to come․

References and Further Reading

For deeper insights, refer to studies on fatigue cracking and corrosion effects on bulkheads, as detailed in ScienceDirect and NASA reports․ Key topics include topology optimization, non-destructive testing, and material advancements․

Further reading materials:
– “Structural Integrity Evaluation of Wing Structures” (2016)․
– “Topology Optimization of Pre-Stiffened Bulkheads” (2019)․
– “Fatigue and Damage Tolerance Analysis” by DOTIFAA․
– NASA-CR reports on fuselage structural analysis․
These resources provide comprehensive understanding of bulkhead design, testing, and maintenance, ensuring a robust approach to aircraft structural integrity․

Posted in PDF